| Name | Function | |
|---|---|---|
|
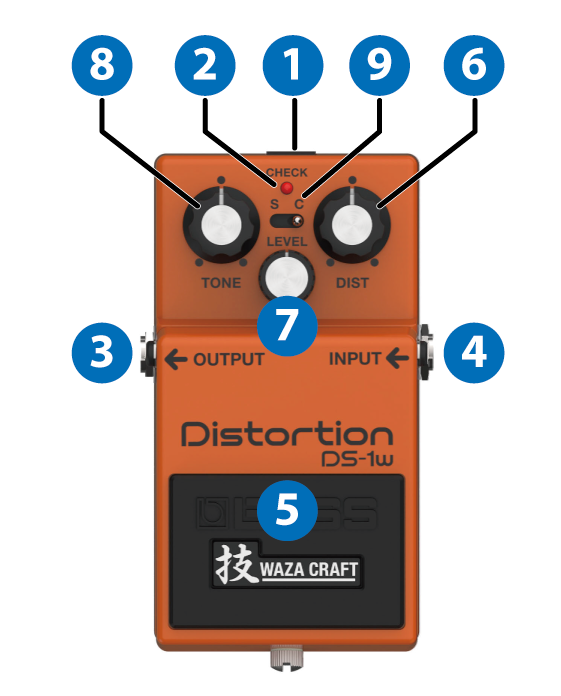
1 |
DC IN jack | Use this jack to connect an AC adaptor (PSA series; sold separately). If you use the AC adapter, you can play for a long time without worrying about running out of battery.
|
| 2 | CHECK indicator | This indicator shows whether an effect is ON/OFF, and doubles as the Battery Check indicator. The indicator lights when an effect is ON.
|
|
3 |
OUTPUT jack | Connect this jack to your amplifier or effect unit. |
|
4 |
INPUT jack |
Connect the output of your electric guitar, other musical instruments or effect units to this jack.
|
|
5 |
Pedal switch | This switch turns the effects ON/OFF. |
|
6 |
[DIST] knob | Adjusts the distortion depth and the sustain length at the same time. The further this is turned clockwise, the heavier the distortion effect becomes, and the longer the sound sustains. |
| 7 | [LEVEL] knob | Adjusts the volume when the effect is used.
|
|
8 |
[TONE] knob | Adjusts the tonal character of the distortion. Turning this clockwise cuts the low end and boosts the high end, for a more cutting tone. Turning this all the way counterclockwise cuts the high end and boosts the low end, for a more mellow tone. |
|
9 |
[MODE] knob | Switches between sound variations.
|
To prevent malfunction and equipment failure, always turn down the volume, and turn off all the units before making any connections.
- Do not use connection cables that contain a built-in resistor.
Turning the power on/off
- Once everything is properly connected, be sure to follow the procedure below to turn on their power. If you turn on equipment in the wrong order, you risk causing malfunction or equipment failure.
- Before turning the unit on/off, always be sure to turn the volume down. Even with the volume turned down, you might hear some sound when switching the unit on/off. However, this is normal and does not indicate a malfunction.
Turning the power on
Turn on the power to your amp last.
Turning the power off
Turn off the power to your amp first.