When connected to a hi-hat (Hi-Hat Calibration)
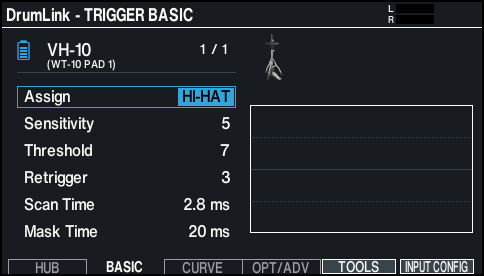
When connecting a hi-hat to the PAD1 jack of the WT-10, configure the calibration settings after making the “Selecting the type of pad connected to the WT-10 (INPUT CONFIGURATION)” settings.
- Calibration is necessary to correctly detect open/close hi-hat operations.
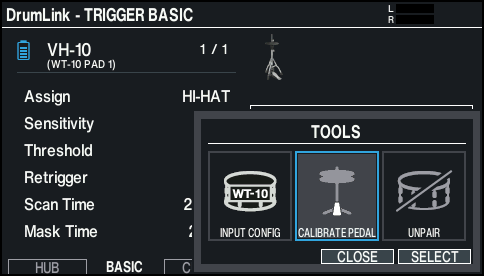
- On the TRIGGER - ADVANCED screen, press the [F4] (DrumLink) button.
- Open the [F2] (BASIC) tab.
- Press the [F5] (TOOLS) button.
- Select “CALIBRATE PEDAL” with the cursor buttons.
- Loosen the hi-hat’s clutch screw and let the hi-hat rest naturally on the motion sensor unit.
- Look for the indicator in the lower right part of the screen.
- When the indicator is within the CALIBRATION area
- The adjustment is complete.
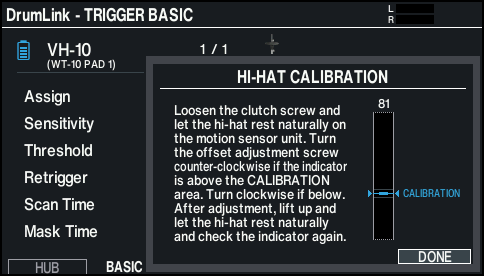
- When the indicator is above the CALIBRATION area
- Turn the offset adjustment screw counterclockwise.
- Lift and lower the hi-hat naturally, and double-check that the indicator stays within the CALIBRATION area.
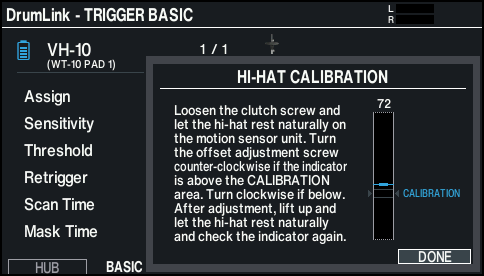
- When the indicator is below the CALIBRATION area
- Turn the offset adjustment screw clockwise.
- Lift and lower the hi-hat naturally, and double-check that the indicator stays within the CALIBRATION area.
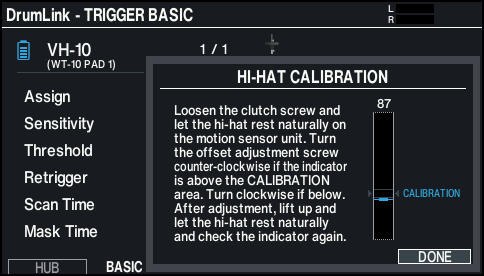
- Click the [F6] (DONE) button to finish the calibration.
- Fasten the clutch screw at a position where the hi-hat sways naturally when struck.