You can split a sample up into multiple smaller samples. To split a sample, you must first mark the locations where the sample is to be split using chop points (markers).
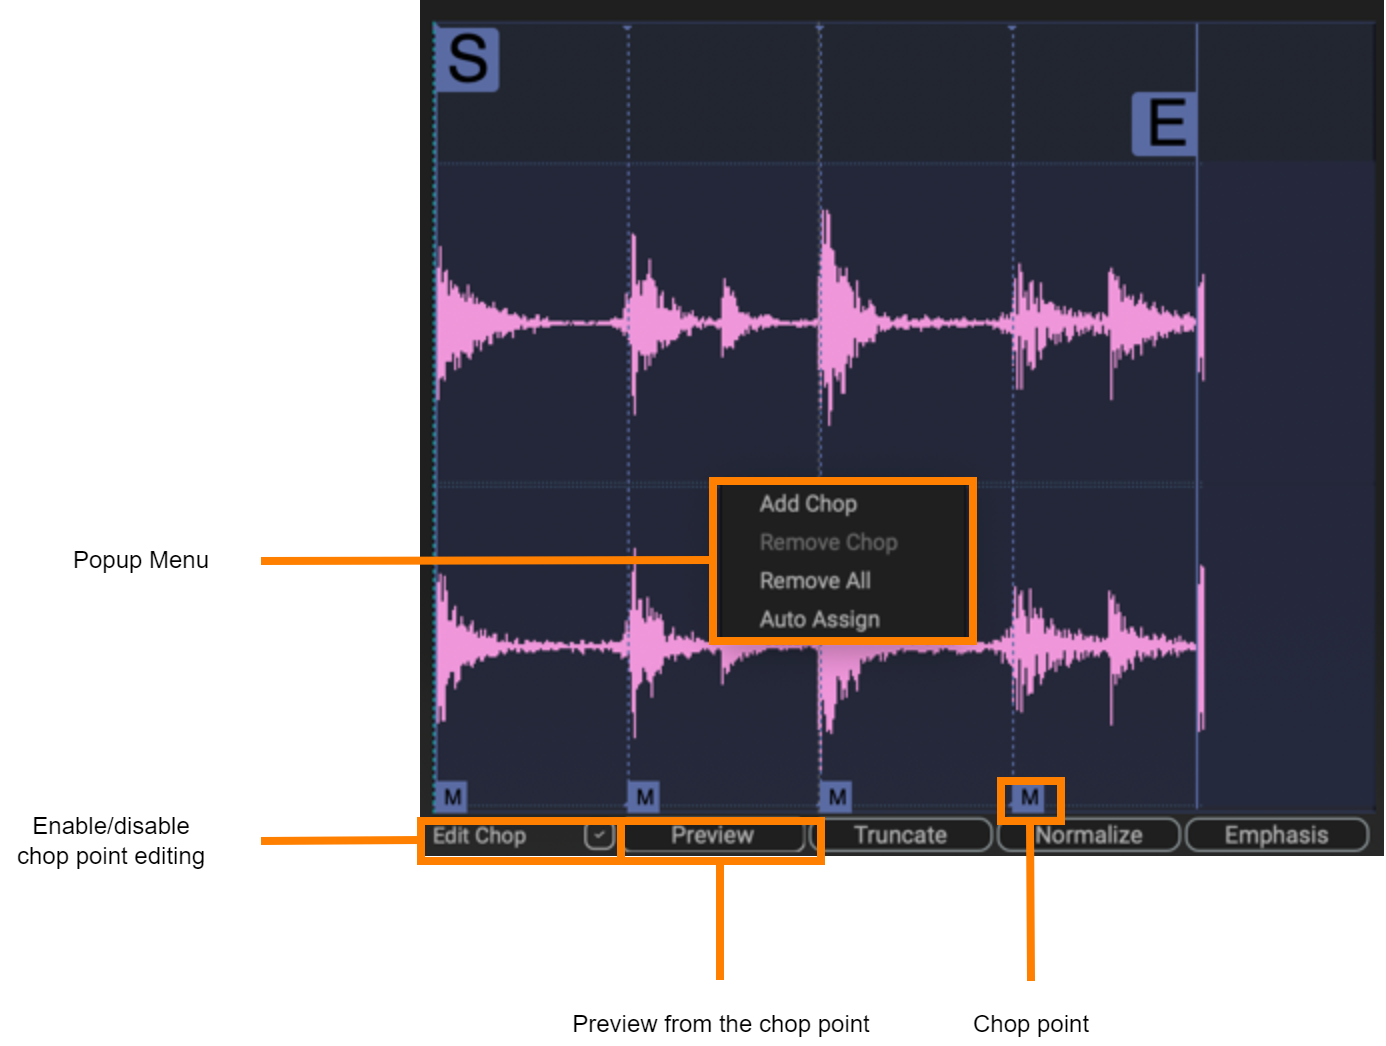
- Select the Edit Chop checkbox (
 ).
). In the waveform viewer, right-click at the position you want to add a chop point.
You can use the followings items in the popup menu to add/delete chop points.Item Explanation Add Chop Adds a chop point at the cursor location. Remove Chop Deletes the chop point at the cursor location. Remove All Deletes all chop points. Auto Assign Adds chop points based on certain conditions you specify.
|
||||||||||||
|