Applying side chain compression (SIDE CHAIN)
This uses the bus set in “SOURCE” (the source bus) to apply side chain compression to the bus set in “TARGET” (the target bus).
When the source bus volume exceeds a certain threshold, the target bus volume is reduced in proportion to the amount by which the threshold is exceeded.
Depending on the SIDE CHAIN settings, the sound of the source bus comes to the forefront, while at the same time, the sound of the target bus moves to the background (for a ducking effect). For instance, you can use this to more clearly emphasize the bass drum, which tends to get overpowered by other low-frequency instruments, or you can make the bus volume change dynamically to express a unique kind of groove.
Parameter | Value | Explanation |
|---|---|---|
SOURCE | DRY, BUS 1, BUS 2, BUS 3, BUS 4 | Selects the bus (source bus) that activates the compression. |
TARGET | OFF, DRY, BUS 1, BUS 2, BUS 3, BUS 4 | Selects the bus (target bus) to which the compression is applied. |
THRESHOLD | 0–255 | Adjusts the volume threshold (threshold level) of the source bus, at which compression is applied to the target bus. The larger the value, the lower the threshold level is reduced, which applies compression at an even lower volume. |
RATIO | 0–255 | Adjusts the compression ratio applied to the excessive level of the source bus. Larger values apply deeper compression to the target bus, and extreme values reduce the volume to zero. |
RELEASE | 0–255 | Adjusts the time it takes for the compression effect to fade out (release time). The larger this value, the more gradually the target bus volume returns, and the effect continues for a while even after the source bus volume falls below the threshold level. |
GAIN | 0.0dB–6.0dB | Sets the amount that the final output is amplified (makeup gain). By adjusting this, you can raise the overall volume of the sound that has been lowered by compression. |
MEMO
- By setting the “SOURCE” and “TARGET” to the same bus, you can get an effect that’s equivalent to a standard compressor.
- You cannot select “DRY” as the source bus or target bus when “ DRY Routing” is set to “BUS 3”. At this time, the value is shown as “(DRY)”.
- Hold down the [SHIFT] button and press the pad [13].
- The UTILITY MENU screen appears.
- Use the [VALUE] knob to select “EFX SET” and press the [VALUE] knob.
- The effect setting screen appears.
MEMO
- From the top screen, you can also make this screen appear by pressing pad [16] while holding down the [SHIFT] button.
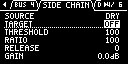
- Turn the [CTRL 3] knob to select “SIDE CHAIN”.
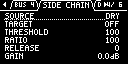
- Use the [VALUE] knob to move the cursor to the parameter you wish to edit, and press the [VALUE] knob.
- The value display is highlighted. You can now edit the value.
- Turn the [VALUE] knob to select the value, and press the [VALUE] knob.
- This sets the parameter’s value.
- If you set the “TARGET” parameter to a value besides “OFF” here, the side chain is enabled.
- To finish making settings, press the [EXIT] button.
Tips on using the side chain
To effectively use side chain compression, it’s necessary to assign the output destination of each sample to the three buses (BUS 1, BUS 2, DRY). When doing so, it's important to be aware of the division of roles between each bus, so that the positioning of the sounds becomes clear within the overall mix.
As an example, we explain here how to emphasize the bass drum if it gets lost in the mix.
First, configure the bus so that the bass drum you want to emphasize becomes the side chain source.
When setting “SOURCE” to “DRY”, the bass drum sample should also be set to “DRY”. Next, group together the samples for which you wish to lower the volume, which share similar frequency bands with the bass drum into “BUS 1” or “BUS 2”, and set that bus to “TARGET”.
MEMO
- You might want to change the bus routing as necessary. With the “TYPE A” routing, BUS 1 and BUS 2 are connected in serial (in that order). “TYPE B” is for a parallel connection.
For example, if you want to apply effects to a bass drum as well that’s the side chain source, you can set the routing to “TYPE B” and separate the bass drum from the other sounds using the BUS 1 and BUS 2 effect buses.
Next, adjust the threshold level to match the volume of the bass drum (source bus) while playing back the pattern, so that the side chain compression operates properly. At this time, if you change the “THRESHOLD’ value with the “RATIO” value at maximum and the “RELEASE” value at minimum, you can easily determine the value at which compression begins.
Once you’ve checked the compression effect, set the “RATIO” value to “100” and keep adjusting the parameters until the mix sounds natural. If the bass drum sounds short and sharp (the source bus sound is percussive and the volume changes drastically), the release time needs to be set to a longer value to prevent the target bus sound from getting chopped off. Also, the length of a natural-sounding release time is inversely proportional to the pattern’s tempo.
MEMO
- If you don’t necessarily need a more natural sound, you can try increasing the compression ratio to shorten the release time.
When using these kinds of extreme settings, the target bus sound may seem to swell up whenever the source bus sound stops playing, or the target bus sound may seem to get “sucked into” the source bus sound (creating a pumping effect). Although this isn’t desirable when mixing, you may be able to intentionally create musical effects by focusing on the unique grooves this creates.
The lower the threshold level (meaning the higher the “THRESHOLD” value) and the higher the ratio, the deeper the compression becomes, which lowers the overall volume of the mix. Makeup gain is used to compensate for this loss in volume. Set the “GAIN” value to maintain a sufficient target bus volume. Note that when the source bus sound stops, compression is no longer applied, and the target bus volume always increases.
While this is easy to forget when you are editing the compressor parameters, the balance between various sounds is what makes the overall mix sound complete. If you still aren’t getting the effect you want even though you’ve tried the side chain, try setting the volume of each sample and adjusting the volume balance between buses.
The settings described above are but one example of how to use the side chain. Use your imagination to freely try all sorts of settings.