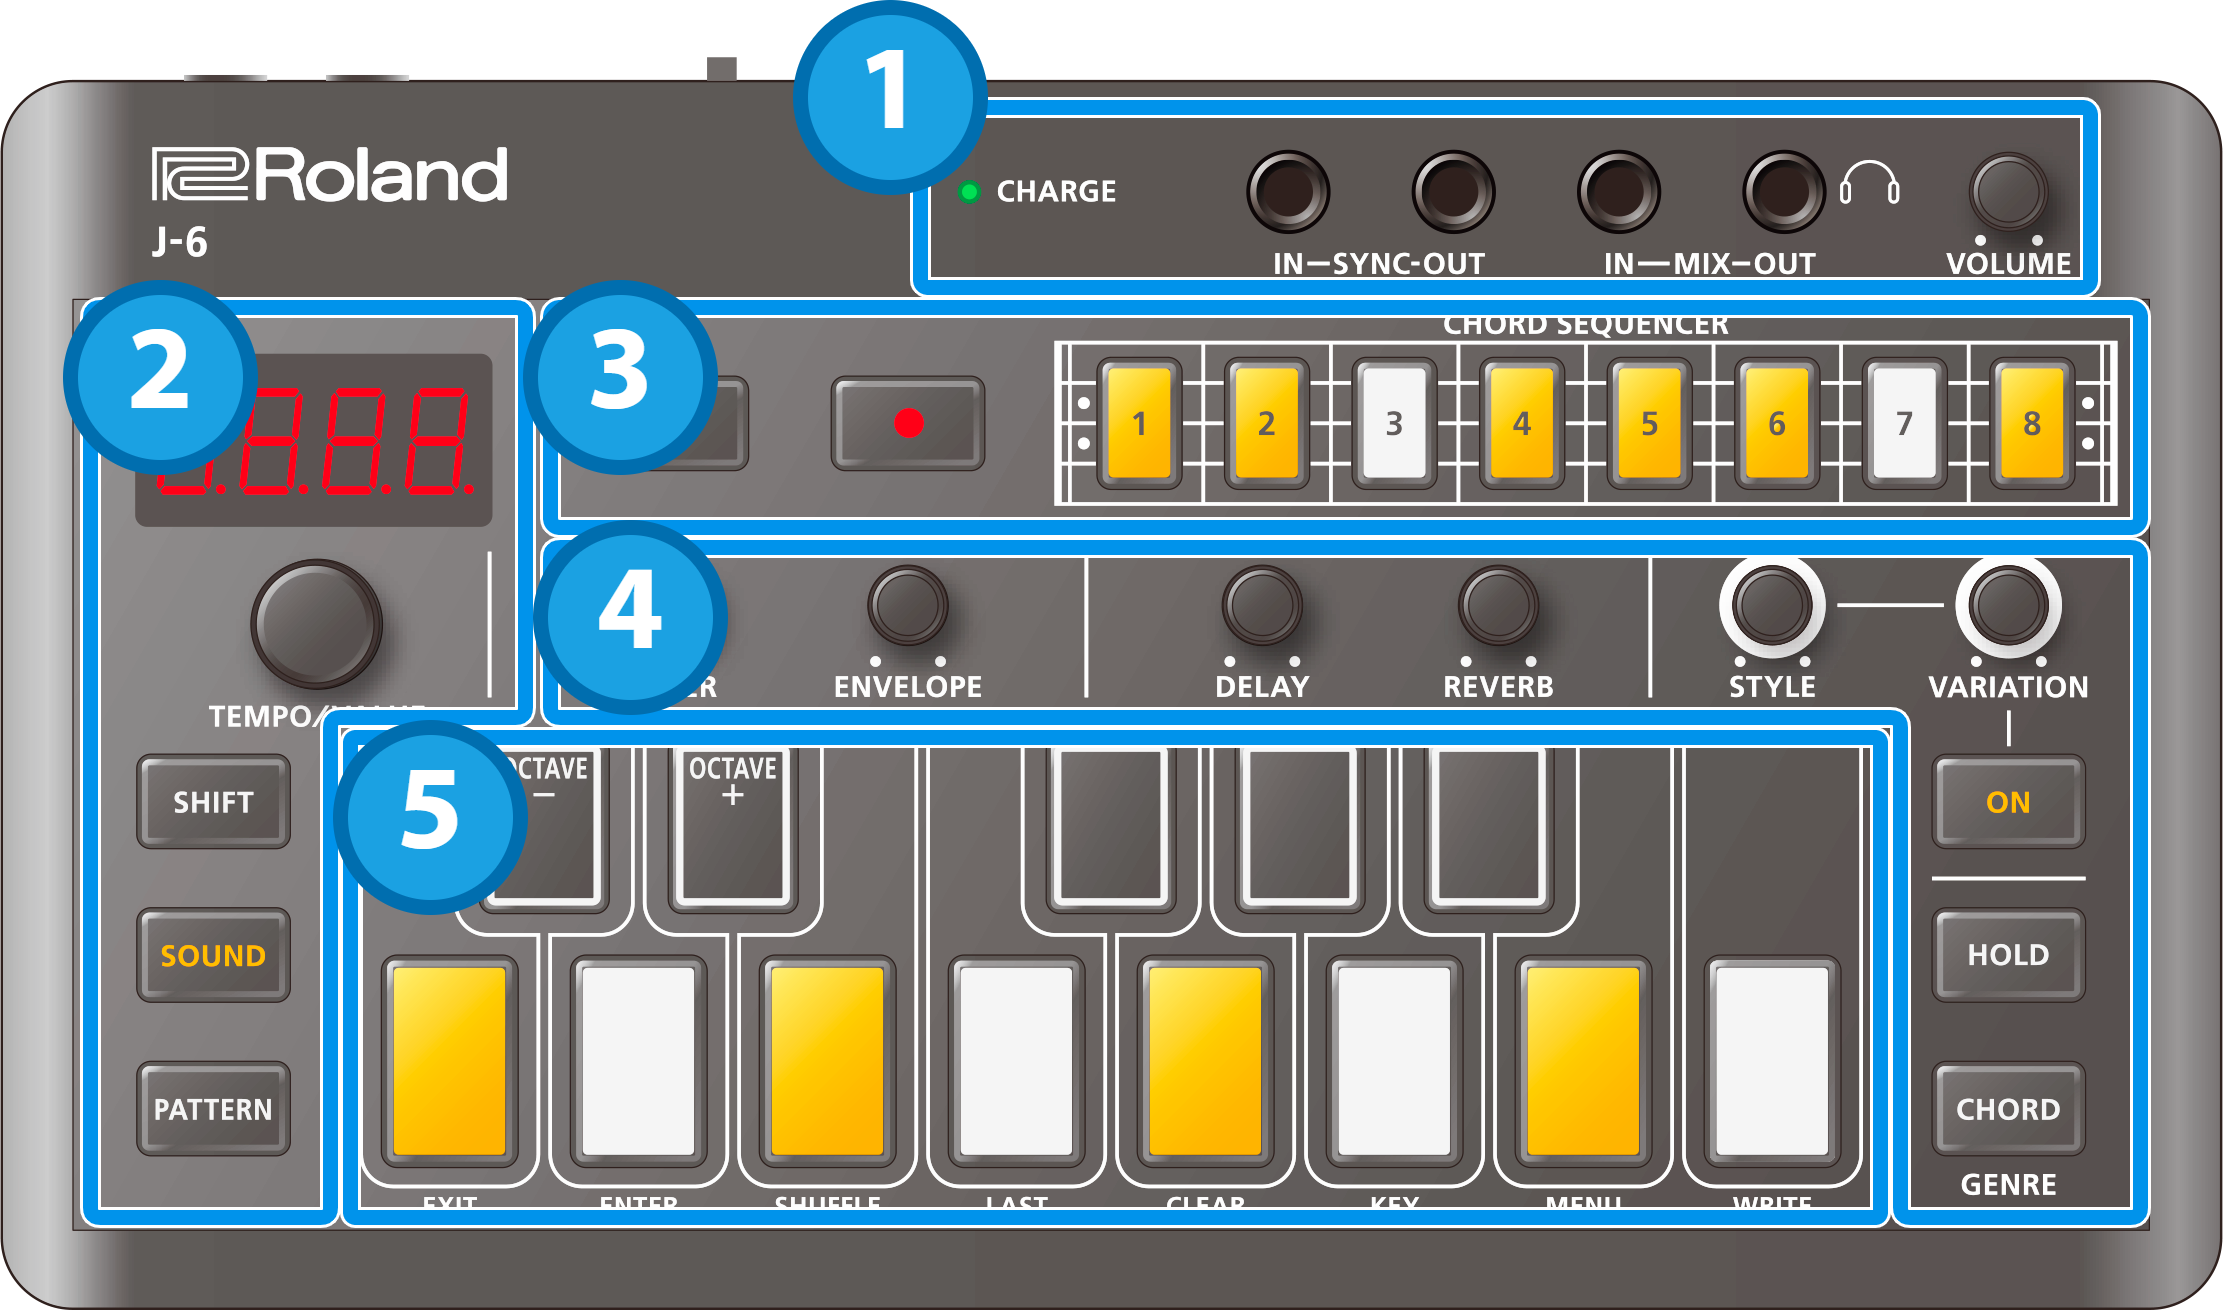
1. Jacks
Controller |
Explanation |
|---|---|
| CHARGE indicator |
When charging via USB port: |
When not charging via USB port:
|
|
| SYNC IN jack | Use this jack to input synchronization signals from an external device. |
| SYNC OUT jack | Use this jack to output synchronization signals to an external device. |
| MIX IN jack | This is the audio input jack. |
| MIX OUT jack | This is the audio output jack. |
| [VOLUME] knob | Adjusts the volume of audio coming from the MIX OUT jack. |
- Use cables with monaural mini phone type plugs to connect to/from the SYNC IN/OUT jacks. Do not use cables with stereo mini phone type plugs, as these cables do not work.
- Do not connect an audio device to the SYNC OUT jack. Doing so may cause a malfunction.
- If an external device is connected to the SYNC IN jack, the unit synchronizes with the clocks inputted to the SYNC IN jack, regardless of the MIDI Clock Sync setting.
- Use cables with stereo miniature phone type plugs to connect to/from the MIX IN/OUT jacks. Do not use cables with monaural mini phone type plugs, as these cables do not work.
2. Common
Controller |
Explanation |
|---|---|
| Display | This is a four-digit, seven-segment LED display. |
| [TEMPO/VALUE] knob | Changes the values shown in the display. |
| [SHIFT] button | Use this in combination with other controllers. |
| [SOUND] button | Switches the unit to sound selection mode. |
| [PATTERN] button | Switches the unit to pattern selection mode. |
3. Sequencer
Controller |
Explanation |
|---|---|
| [ø] (PLAY) button | Plays the pattern. |
| [ó] (REC) button | Switches the unit to recording standby. |
| Step [1]–[8] buttons | You can record chord data by holding down these buttons and pressing a keyboard button. |
4. Filter/effect/phrase functions
Controller |
Explanation |
|---|---|
| [FILTER] knob | Adjusts the filter’s cutoff frequency. |
| [ENVELOPE] knob | Adjusts the envelope release. |
| [DELAY] knob | Adjusts the delay volume. |
| [REVERB] knob | Adjusts the reverb volume. |
| [STYLE] knob | Selects the phrase style. The chords play differently depending on the style that you select. |
| [VARIATION] knob | Selects the phrase style variation. |
| STYLE [ON] button | Turns the phrase function on/off. |
| [HOLD] button | When this is turned on (lit), the last buttons you pressed stay pressed even after you take your finger off the keyboard. |
| [CHORD] button | Switches the keyboard to chord mode. When you press a keyboard button in this mode, the chord registered to that button plays. To switch between registered chord sets, hold down the [SHIFT] button and press the [CHORD] button. |
5. Keyboard
Controller |
Explanation |
|---|---|
| Keyboard buttons | Use these buttons to play or to input notes into the sequencer. |