Keyboard input
You can use your computer’s keyboard to perform the following operations on the SPD-SX PRO APP.
Before using the keyboard to operate this unit, click on the SPD-SX PRO APP screen anywhere outside of the wave list.
|
The following keyboard operations are unavailable while you’re using the wave list. |

Key |
Explanation |
|---|---|
Keyboard upper [1]–[9] |
Makes pads 1–9 play at a velocity level of 127. |
[Q] [W] [E] [R] [T] [Y] [U] [I] |
Makes TRIG IN 1–8 play at a velocity level of 127. |
[O] [P] |
Makes FOOT SW 1, 2 play at a velocity level of 127. |
[ESC] |
Stops all sounds that are playing (ALL SOUND OFF). |
[SPACE] |
Makes the selected pad play at a velocity level of 127. |
Pad list screen/parameter edit screen
Function |
Operation / Explanation |
||||||||
|---|---|---|---|---|---|---|---|---|---|
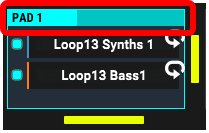
Click a pad to make it play |
When you click the area where the top part of the selected pad’s color changes, that pad plays.
|
||||||||
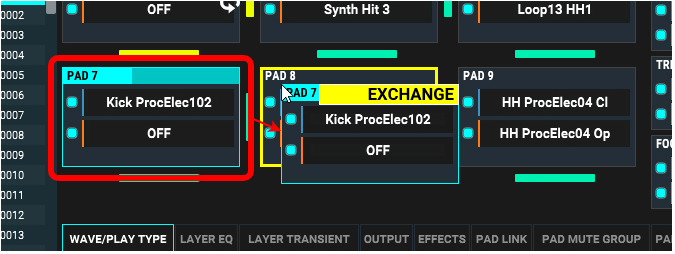
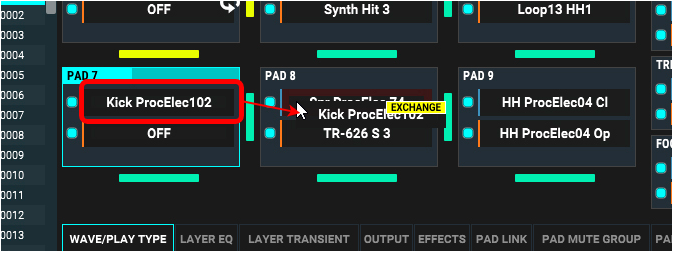
Exchanging pads (PAD EXCHANGE) |
Drag the pad whose pattern you want to exchange, and drop it onto the destination pad.
|
||||||||
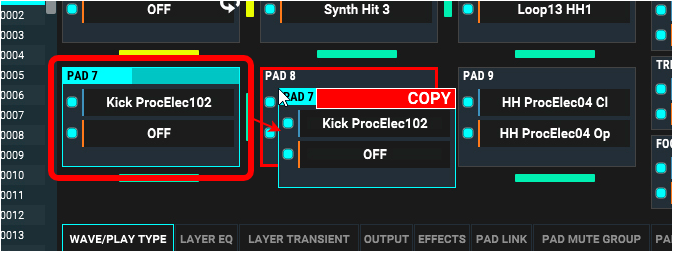
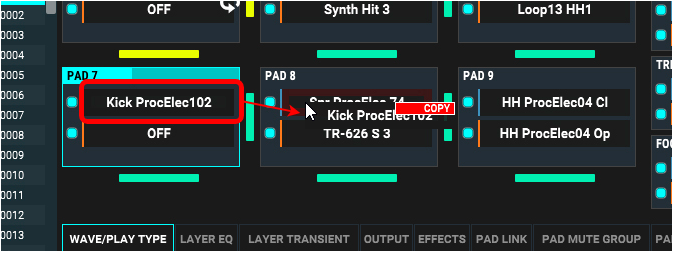
Copying a pad’s settings (PAD COPY) |
Drag the pad while holding down the [Ctrl] key (Windows) or [command] key (Mac), and drop it onto the copy destination pad.
A red border is shown around the drop destination pad. A confirmation message is shown when you drop the pad. To execute the copy operation, select “COPY”.
|
||||||||
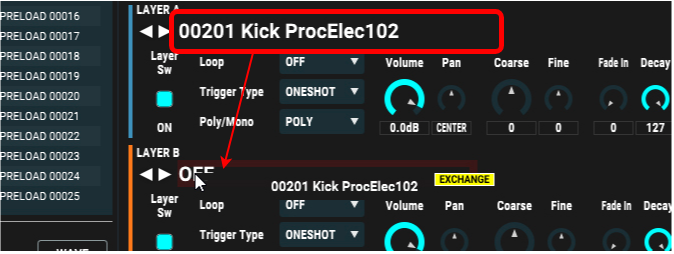
Exchanging layer settings (LAYER EXCHANGE) |
Drag the layer’s wave name and drop it onto the wave name of the layer you want to exchange.
This operation is the same for the WAVE/PLAY TYPE tab.
|
||||||||
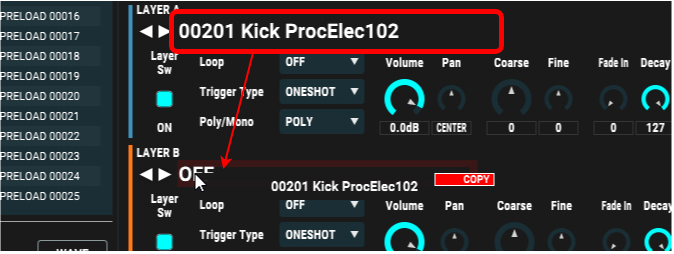
Copying the layer settings (LAYER COPY) |
Drag the layer’s wave name while holding down the [Ctrl] key (Windows) or [command] key (Mac), and drop it onto the copy destination layer’s wave name.
A confirmation message is shown when you drop the layer’s wave name. To execute the copy operation, select “COPY”.
This operation is the same for the WAVE/PLAY TYPE tab.
|
||||||||
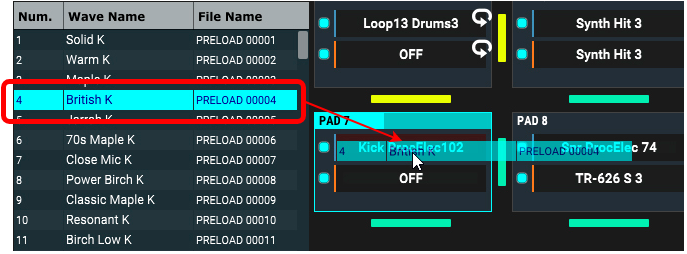
| Assigning a wave to a pad by dragging and dropping |
Drag and drop a wave from the WAVE LIST to the layer’s wave name in the pad where you want to assign the wave.
|
||||||||
Playing back the original waveform of a wave assigned to a pad |
Move the cursor to the wave assigned to a pad, and double-click while pressing the [Ctrl] key (Windows) or the [command] key (Mac). Take your finger off the [Ctrl] key (Windows) or the [command] key (Mac) to mute the sound.
|
||||||||
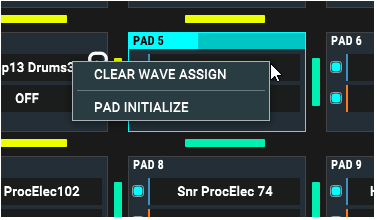
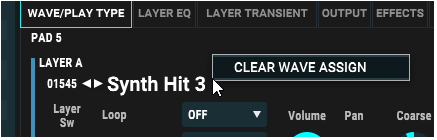
Clearing the wave assigned to a pad (CLEAR WAVE ASSIGN) |
CLEAR WAVE ASSIGN and PAD INITIALIZE are shown when you right-click on the wave name display area of a pad.
|
||||||||
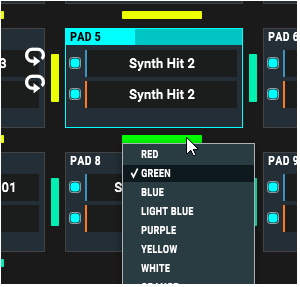
| Directly changing a PAD LED color |
You can directly select a color by clicking on PAD LED. You can also select “LED COLOR EDIT...” to change the color and name for the PAD LED.
|
||||||||
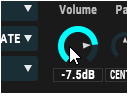
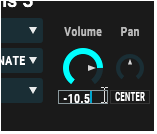
| Setting the default value |
Double-click on a knob to set it to its default (recommended) value.
|
||||||||
| Slowly changing a value |
Drag a knob while pressing the [Ctrl] key (Windows) or the [command] key (Mac) to make the value change at a speed corresponding to how fast you move the mouse.
|
||||||||
| Directly changing a value |
If you see an input box below a knob, you can click the input box to directly input a value.
|
||||||||
| Changing a value with the mouse wheel |
You can change the value of a knob with the mouse wheel while the cursor is hovering over the knob.
|


WAVE LIST
Function |
Operation / Explanation |
|
|---|---|---|
| Right-clicking on the WAVE LIST | RENAME | Edits the wave name of the currently selected wave.
|
| TAG ASSIGN | Assigns the wave tags 1–4. You can set tags for multiple waves at once. An asterisk appears at the end of the wave tag assigned to one of the waves. |
|
| WAVE EDIT > START END... | Opens a separate dedicated window for setting the WAVE START POINT/END POINT and other parameters.
|
|
WAVE EDIT > NORMALIZE |
Edits a wave. | |
| WAVE EDIT > TRUNCATE | ||
| WAVE EDIT > REVERSE | ||
| WAVE EDIT > COPY | ||
| DELETE | Deletes a wave. | |
| KIT USED | Performs a reverse lookup to show which kits use the selected wave.
|
|
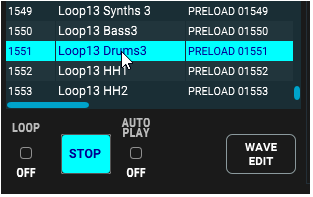
| WAVE PREVIEW |
Double-click on the list to play back a preview of a wave.
|
|
| RENAME WAVE TAG |
Right-click on a wave tag to edit the name of the selected wave tag.
|
|