Basic operations (basic steps for inputting notes)
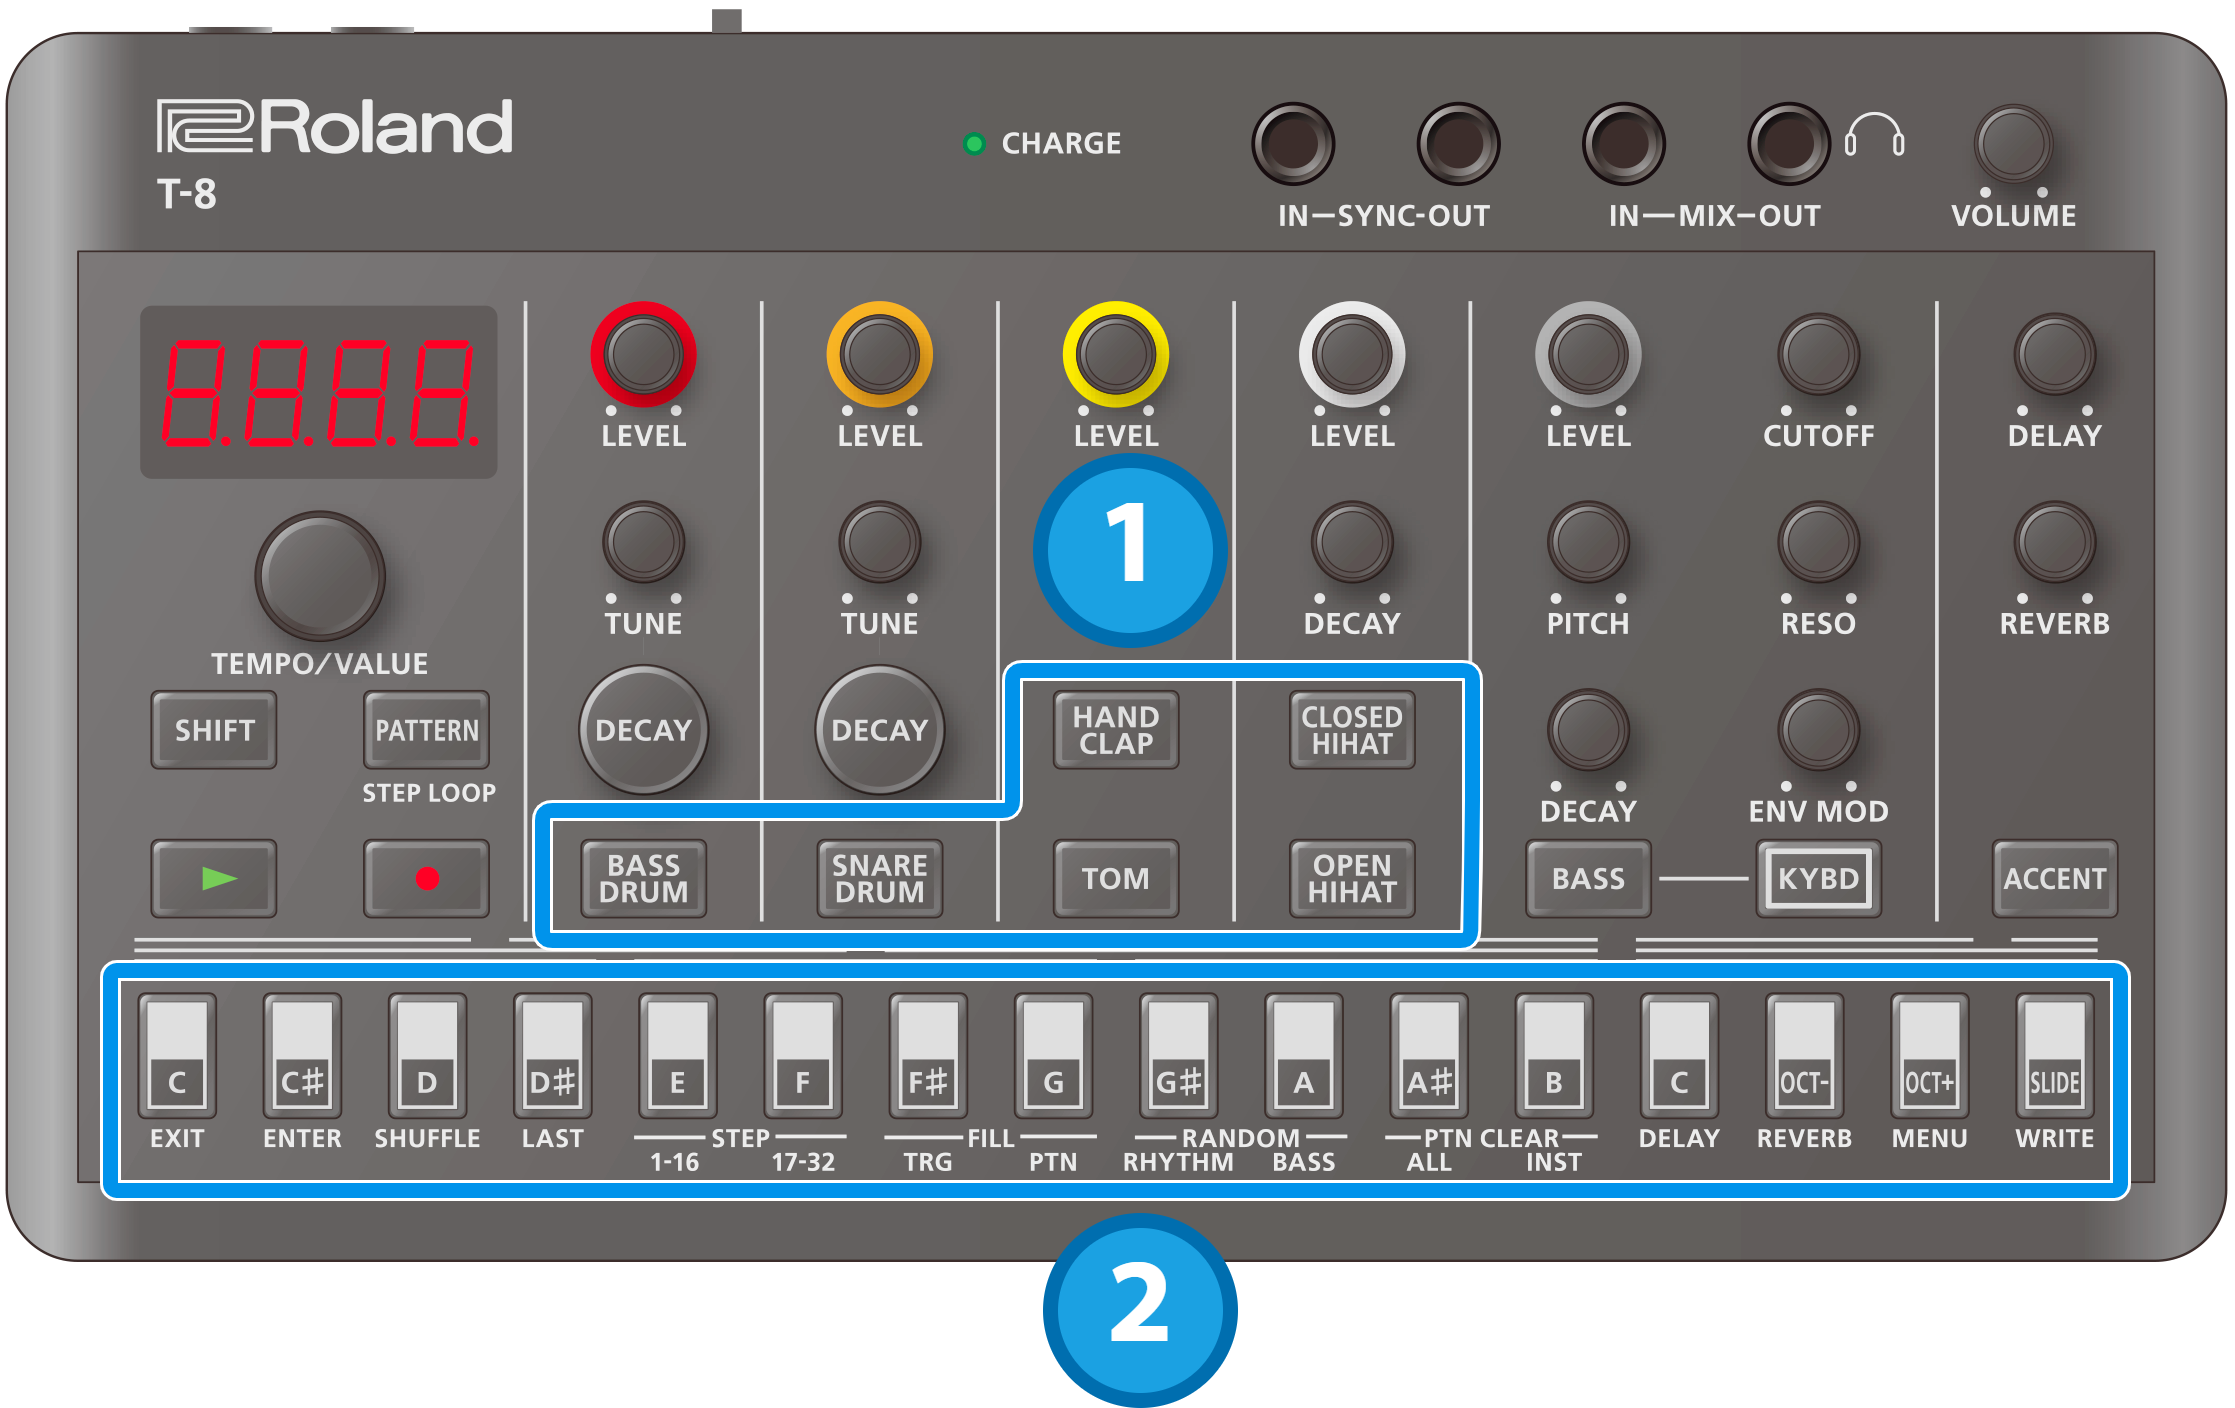
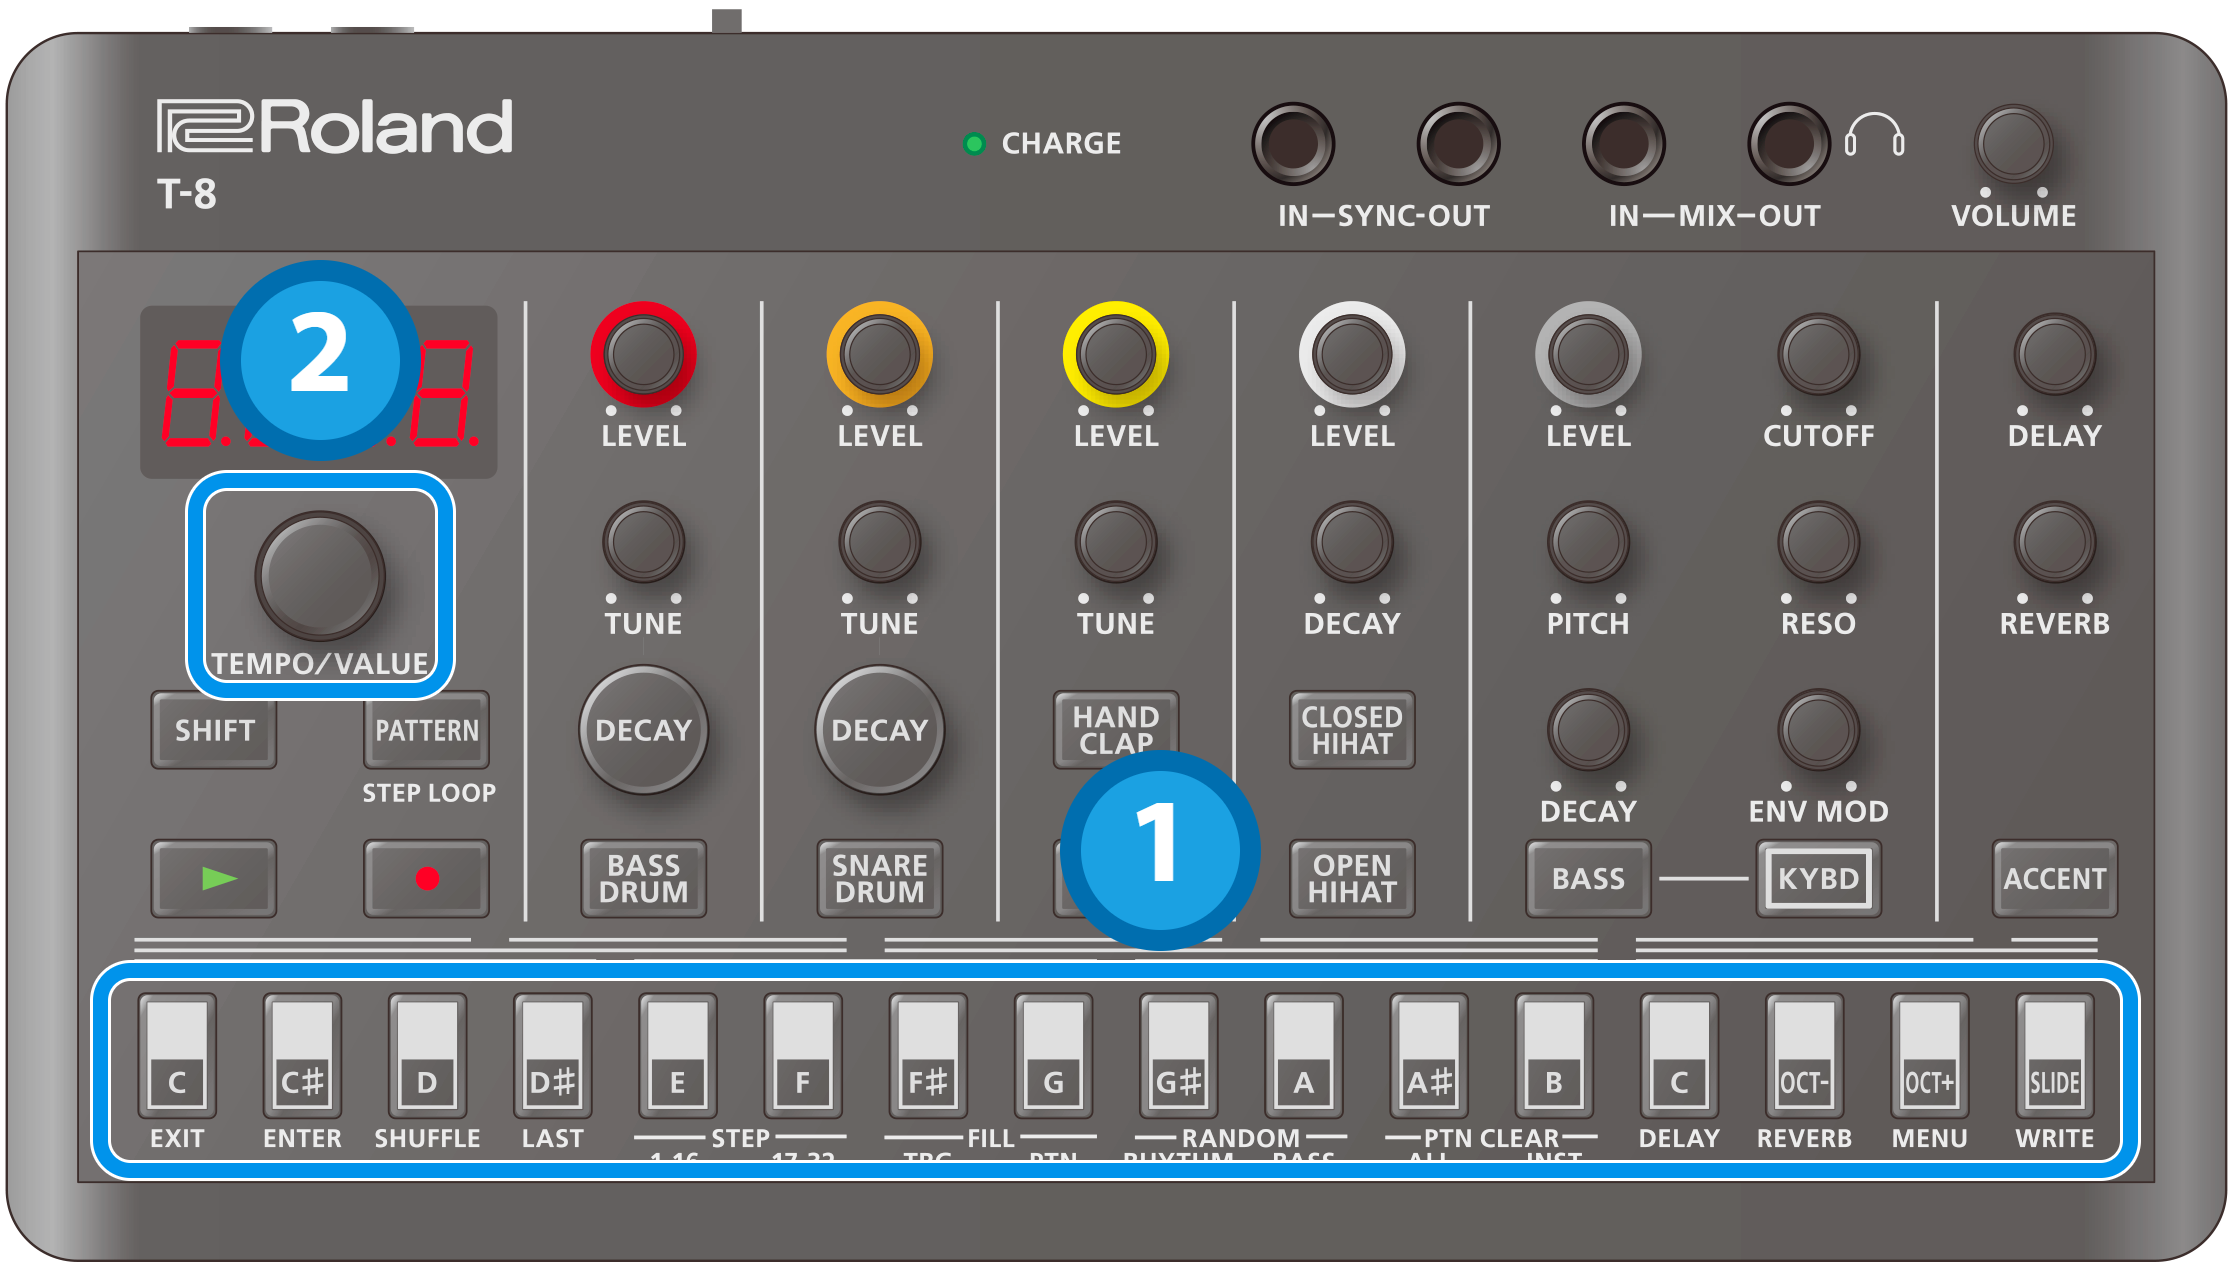
Press the button of the instrument you want to input.
The button lights up and the instrument is selected.
Press the step buttons of the steps you want to input.
The steps you select light up, and the notes are inputted.
Press a step button that’s lit up to delete that button’s note.
Switching between pages indicated on the panel
This unit can handle up to 32 steps (two “pages” of 16 steps each) per pattern. The steps are displayed separately in groups of 16 steps.
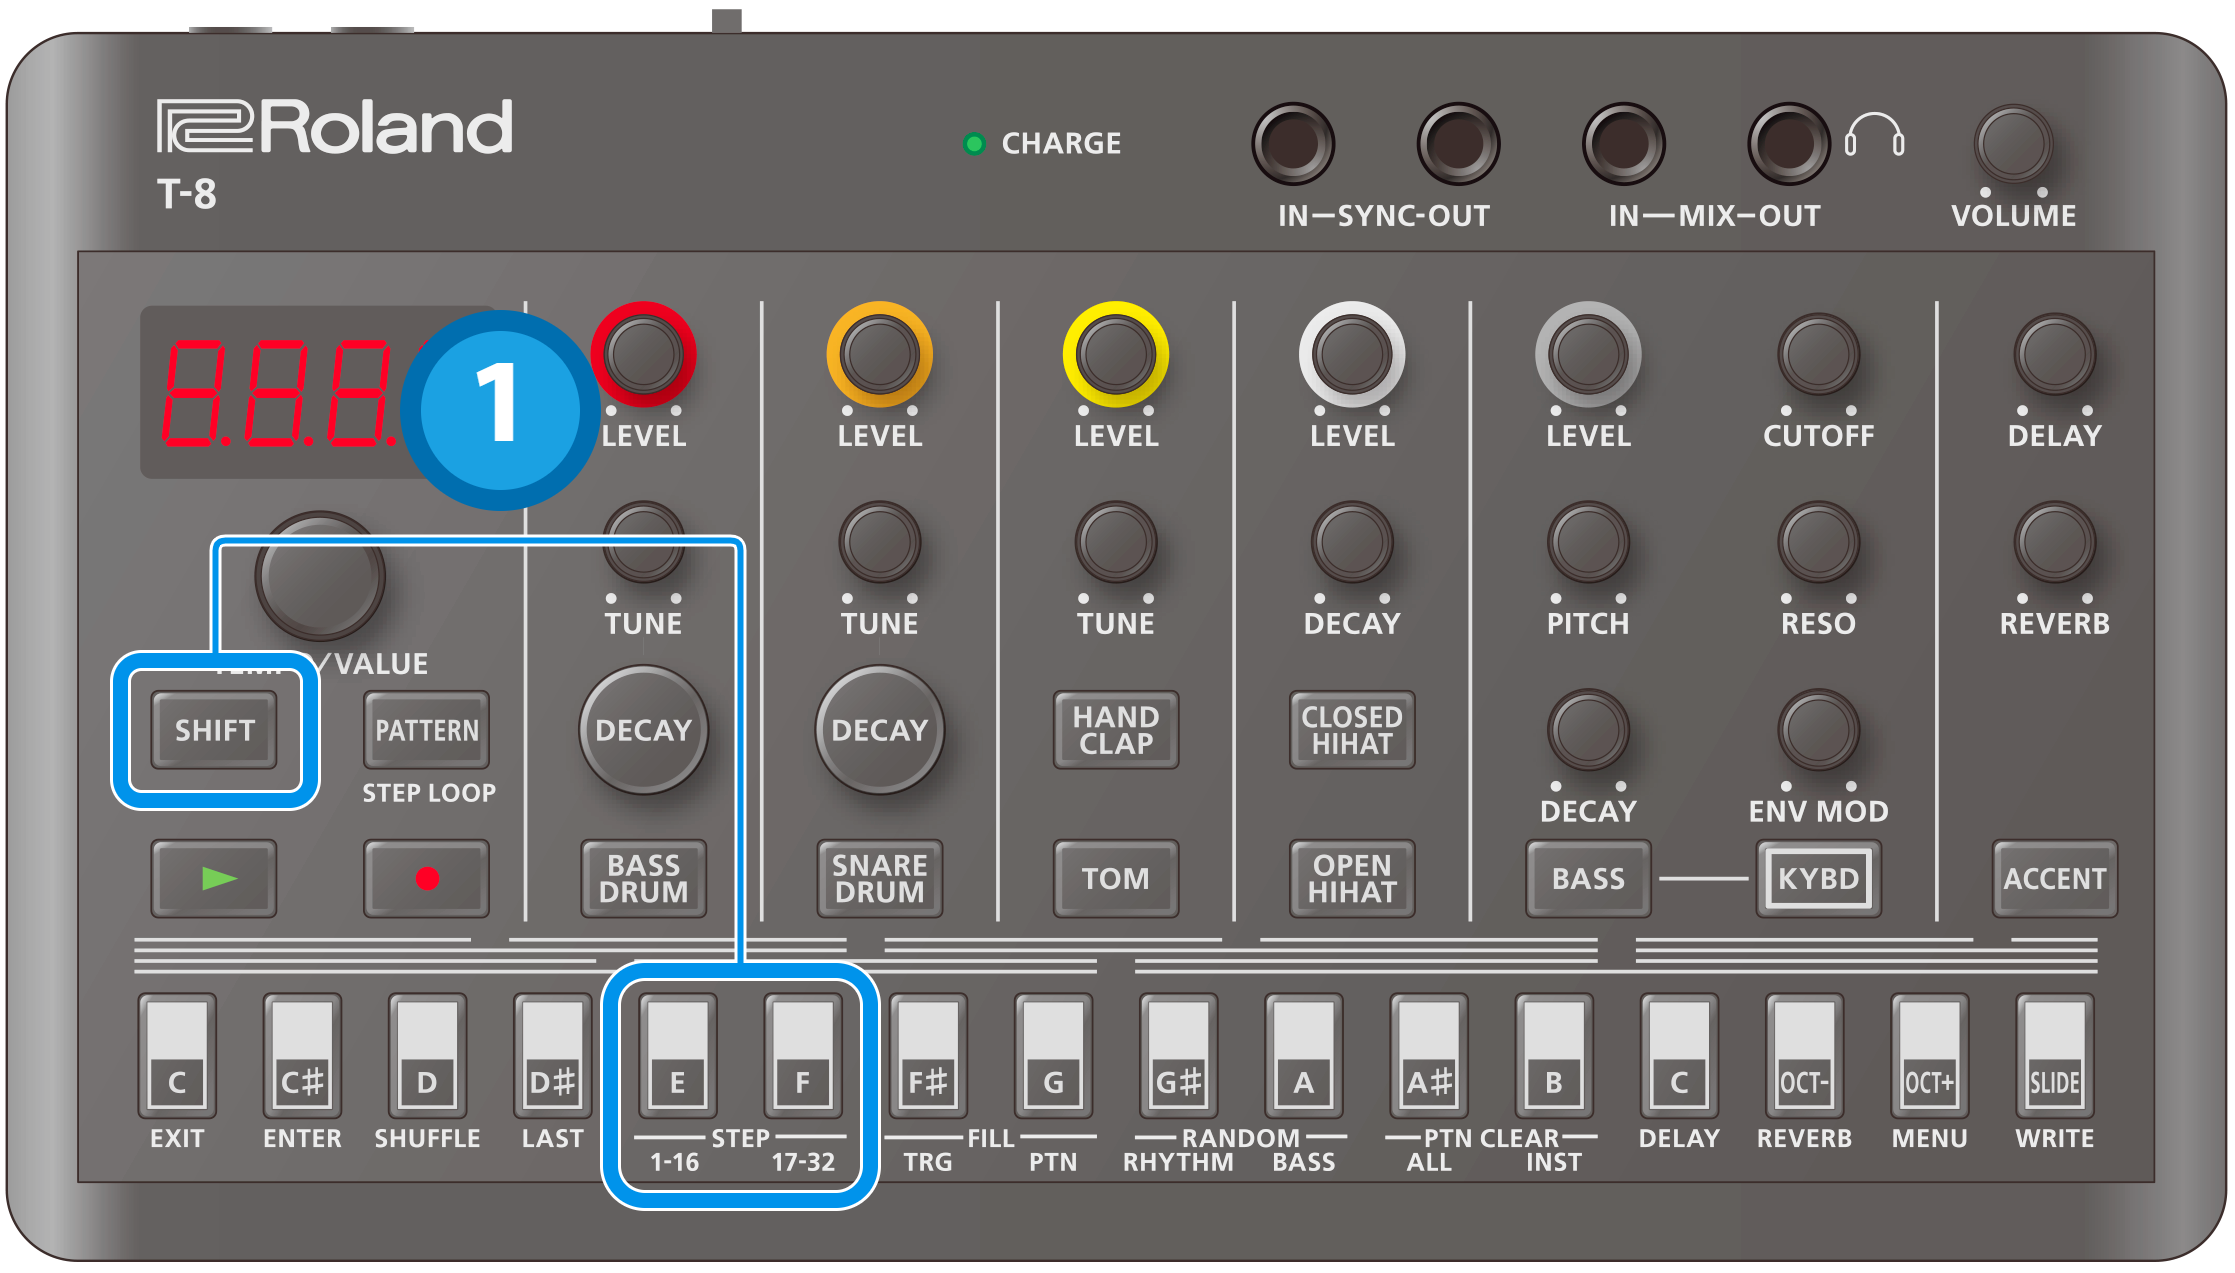
Press the [SHIFT] button (and keep the button held down until the operation is finished).
While you’re holding the [SHIFT] button, STEP [1–16] lights up and STEP [17–32] blinks (when steps 1–16 are selected); and STEP [1–16] blinks and STEP [17–32] lights up (when steps 17–32 are selected).
Press the STEP [1–16] or STEP [17–32] button.
Doing so switches to the respective page.
If the last step is 16 or less and you press the STEP [17–32] button when steps 17–32 are empty, the last step is automatically set to 32, and the contents of steps 1–16 are copied to steps 17–32.
Inputting an accent
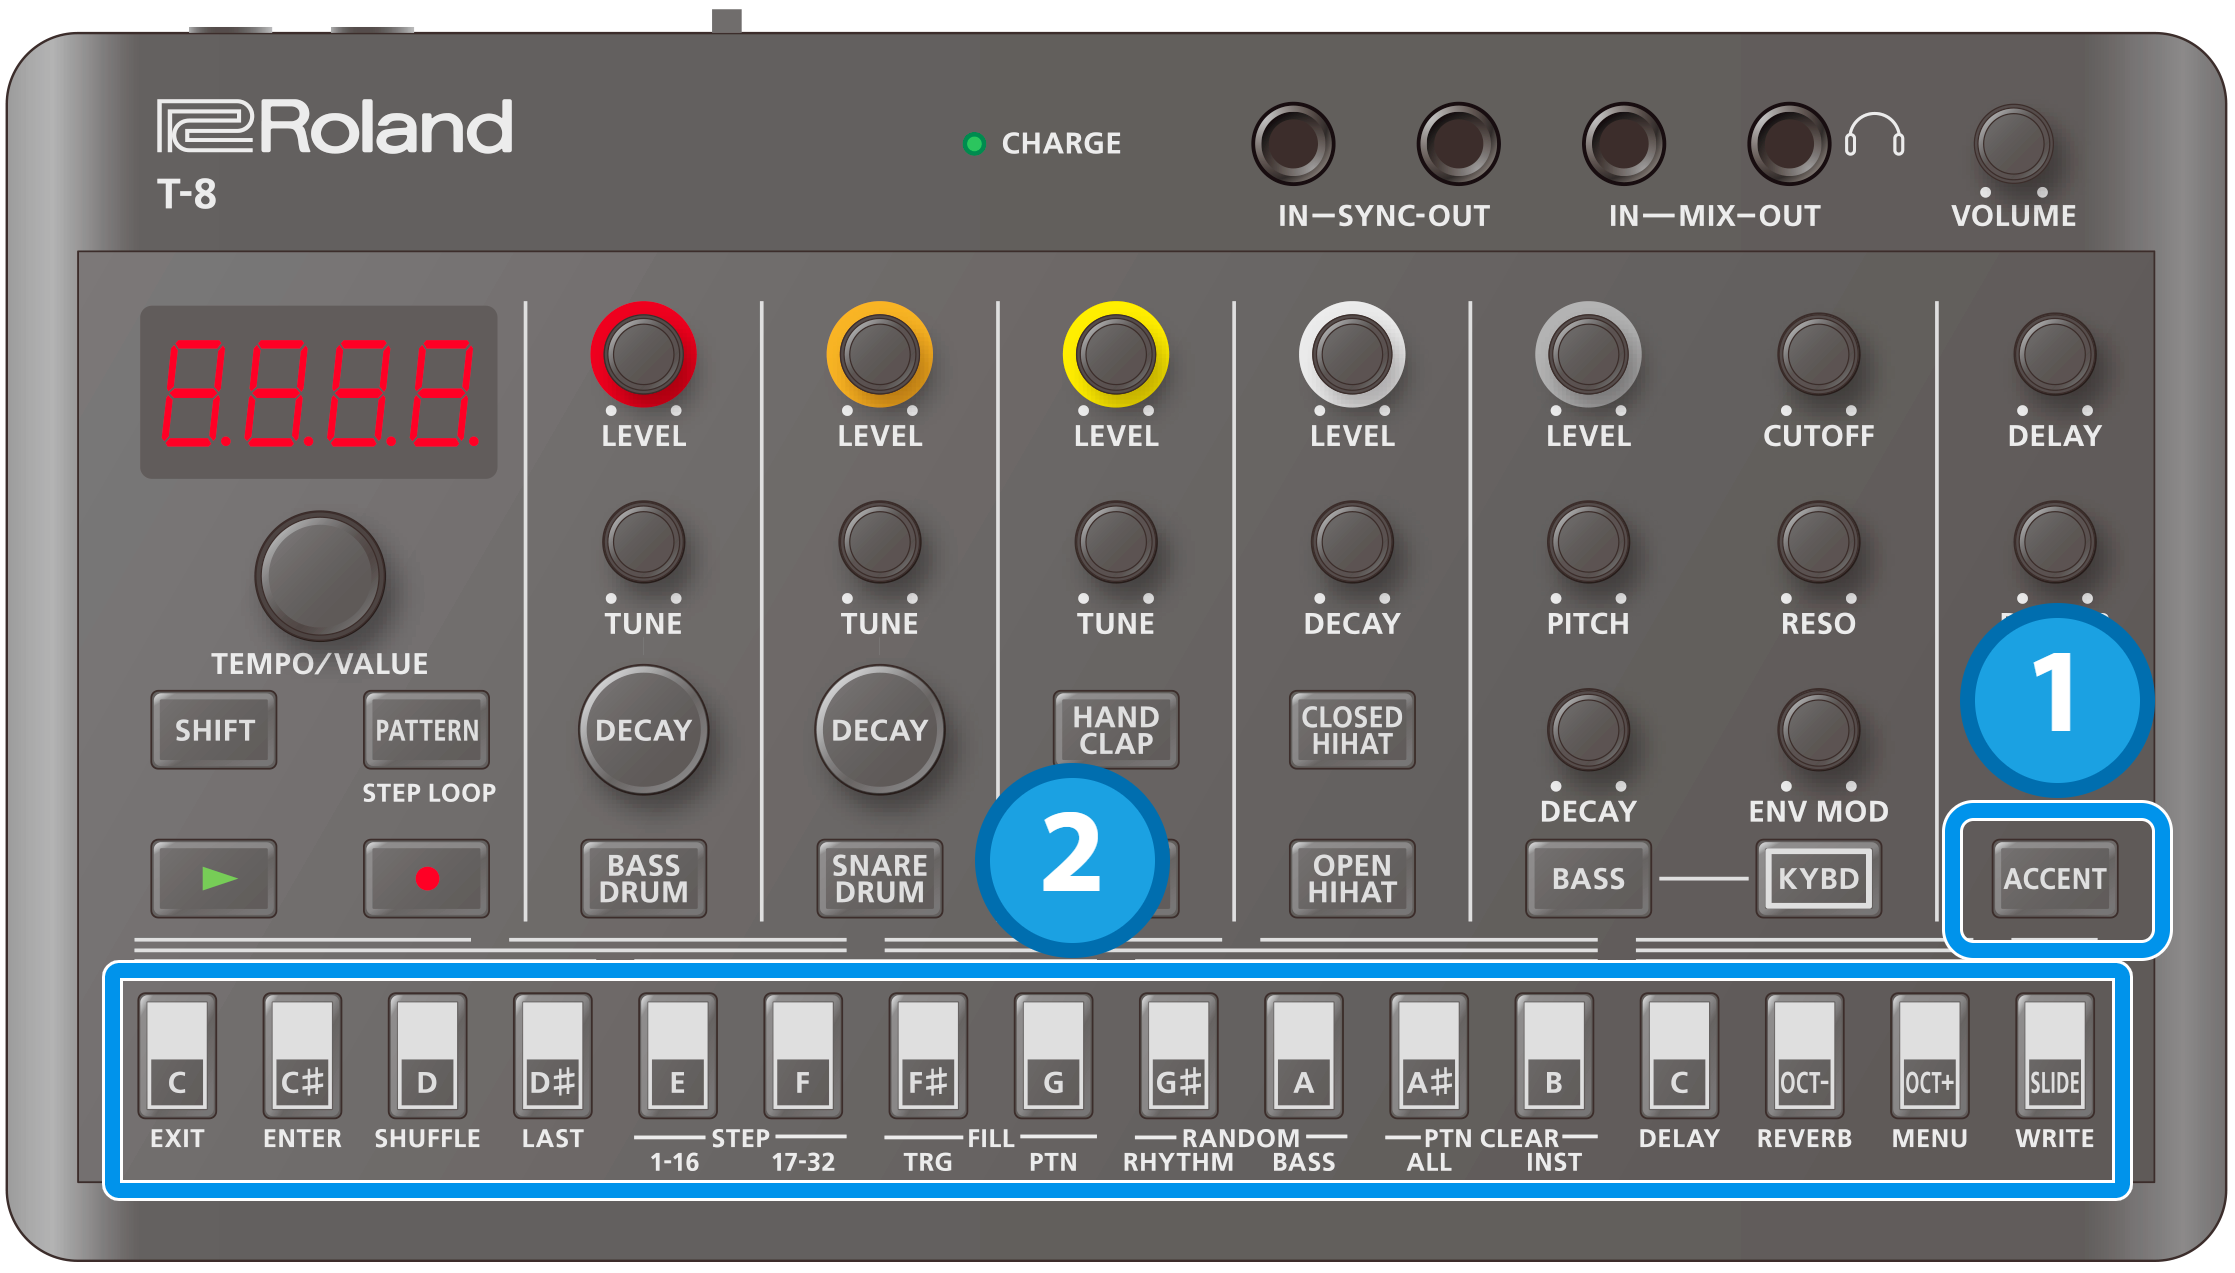
With the rhythm instrument selected, press the [ACCENT] button.
The [ACCENT] button lights up.
Press the step buttons of the steps you want to accent.
The steps you select light up, and the accents are inputted.
Accents are applied to all rhythm instruments.
Adjusting the accent strength
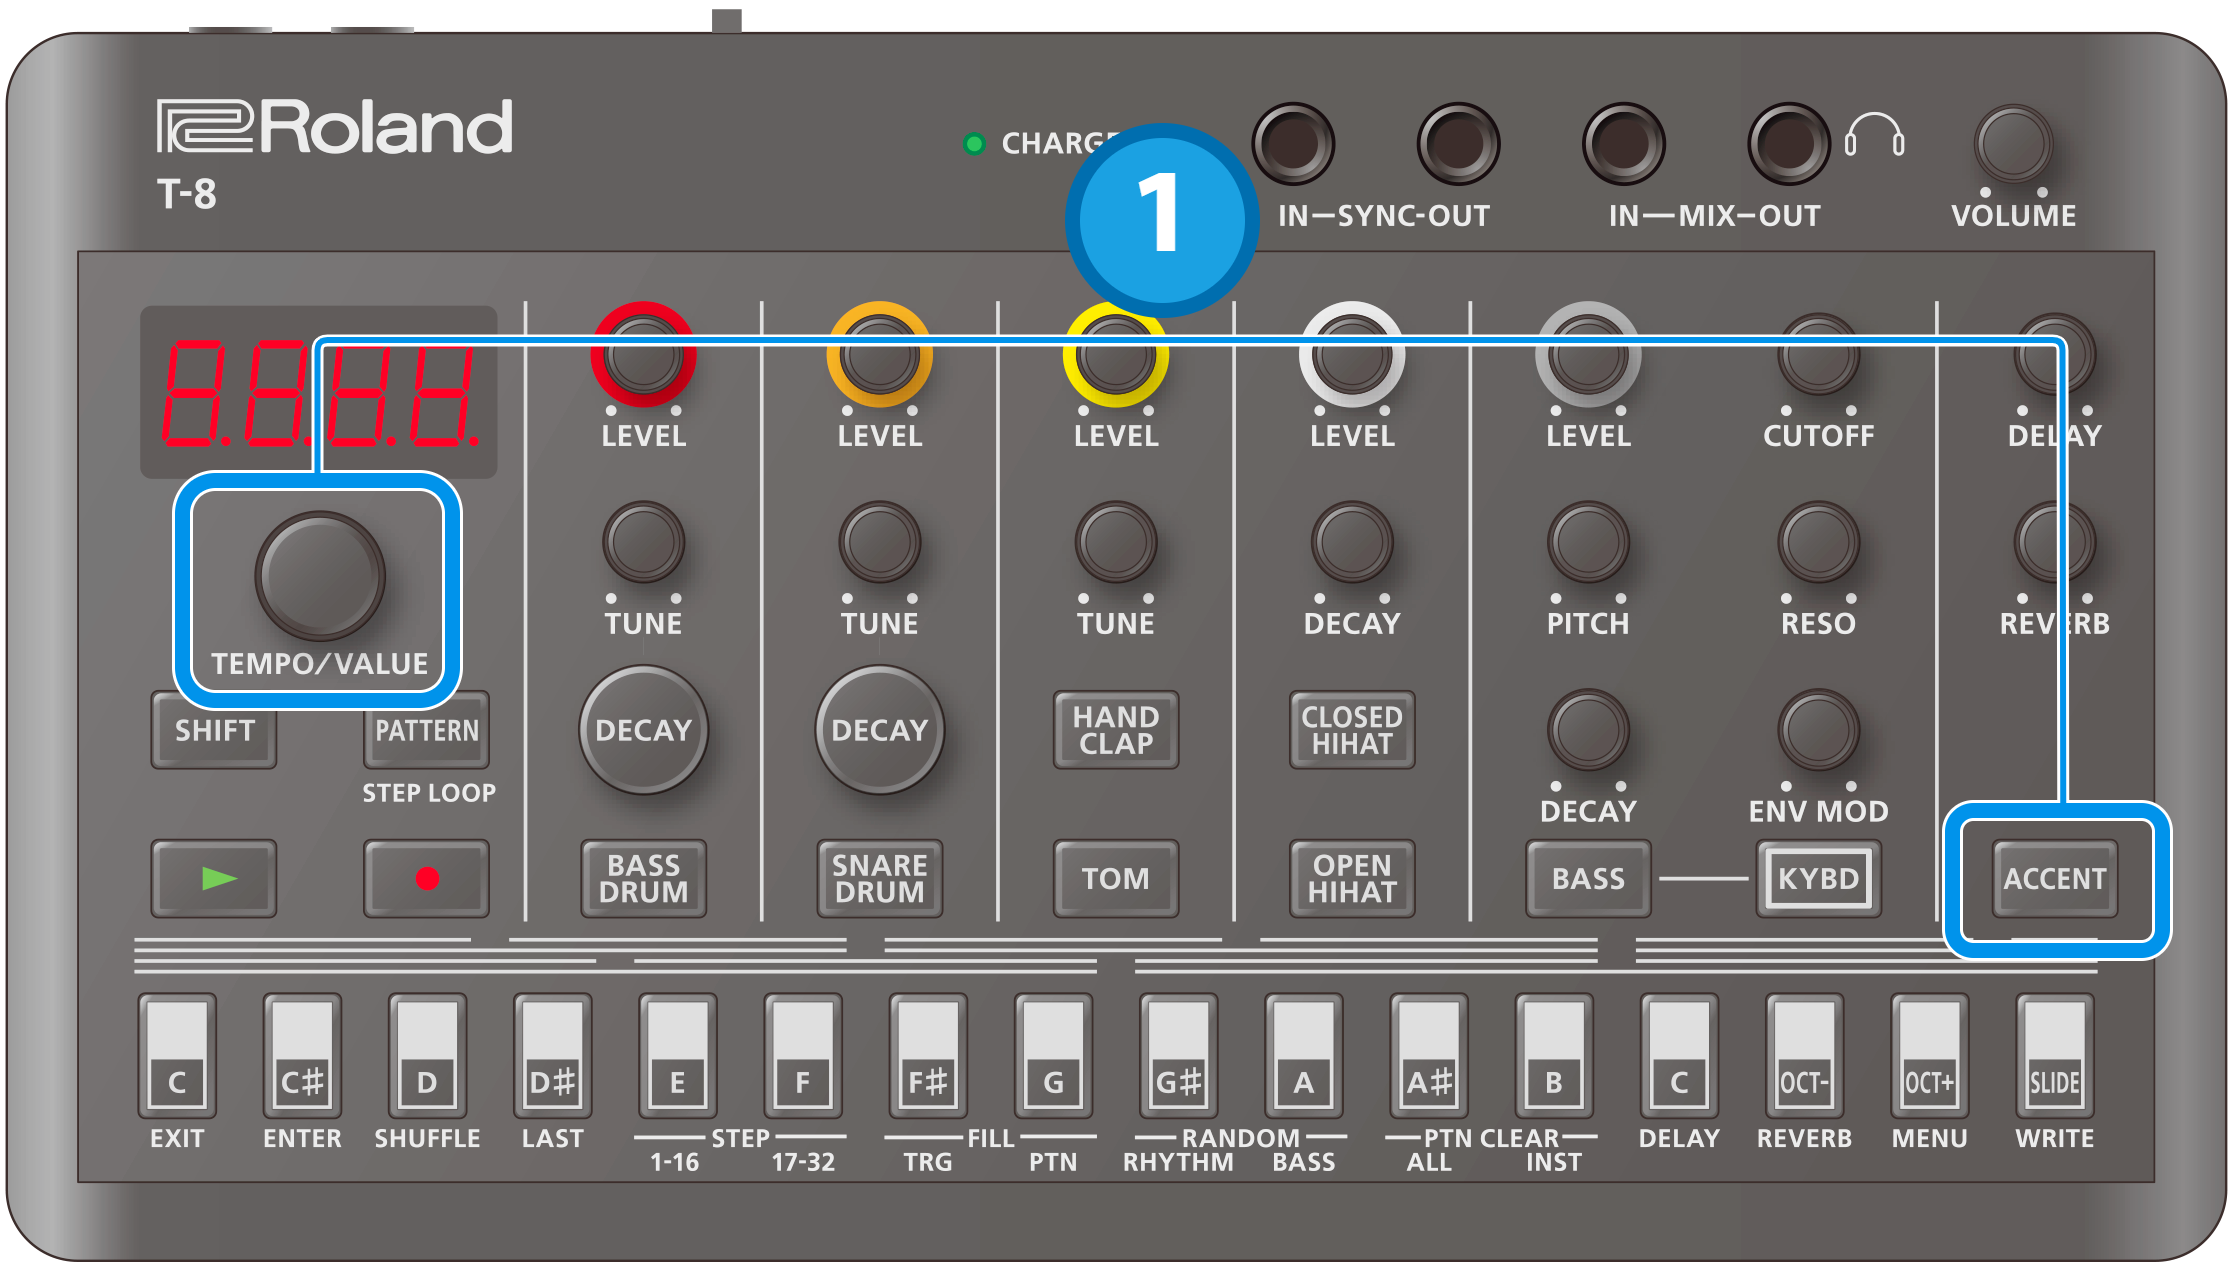
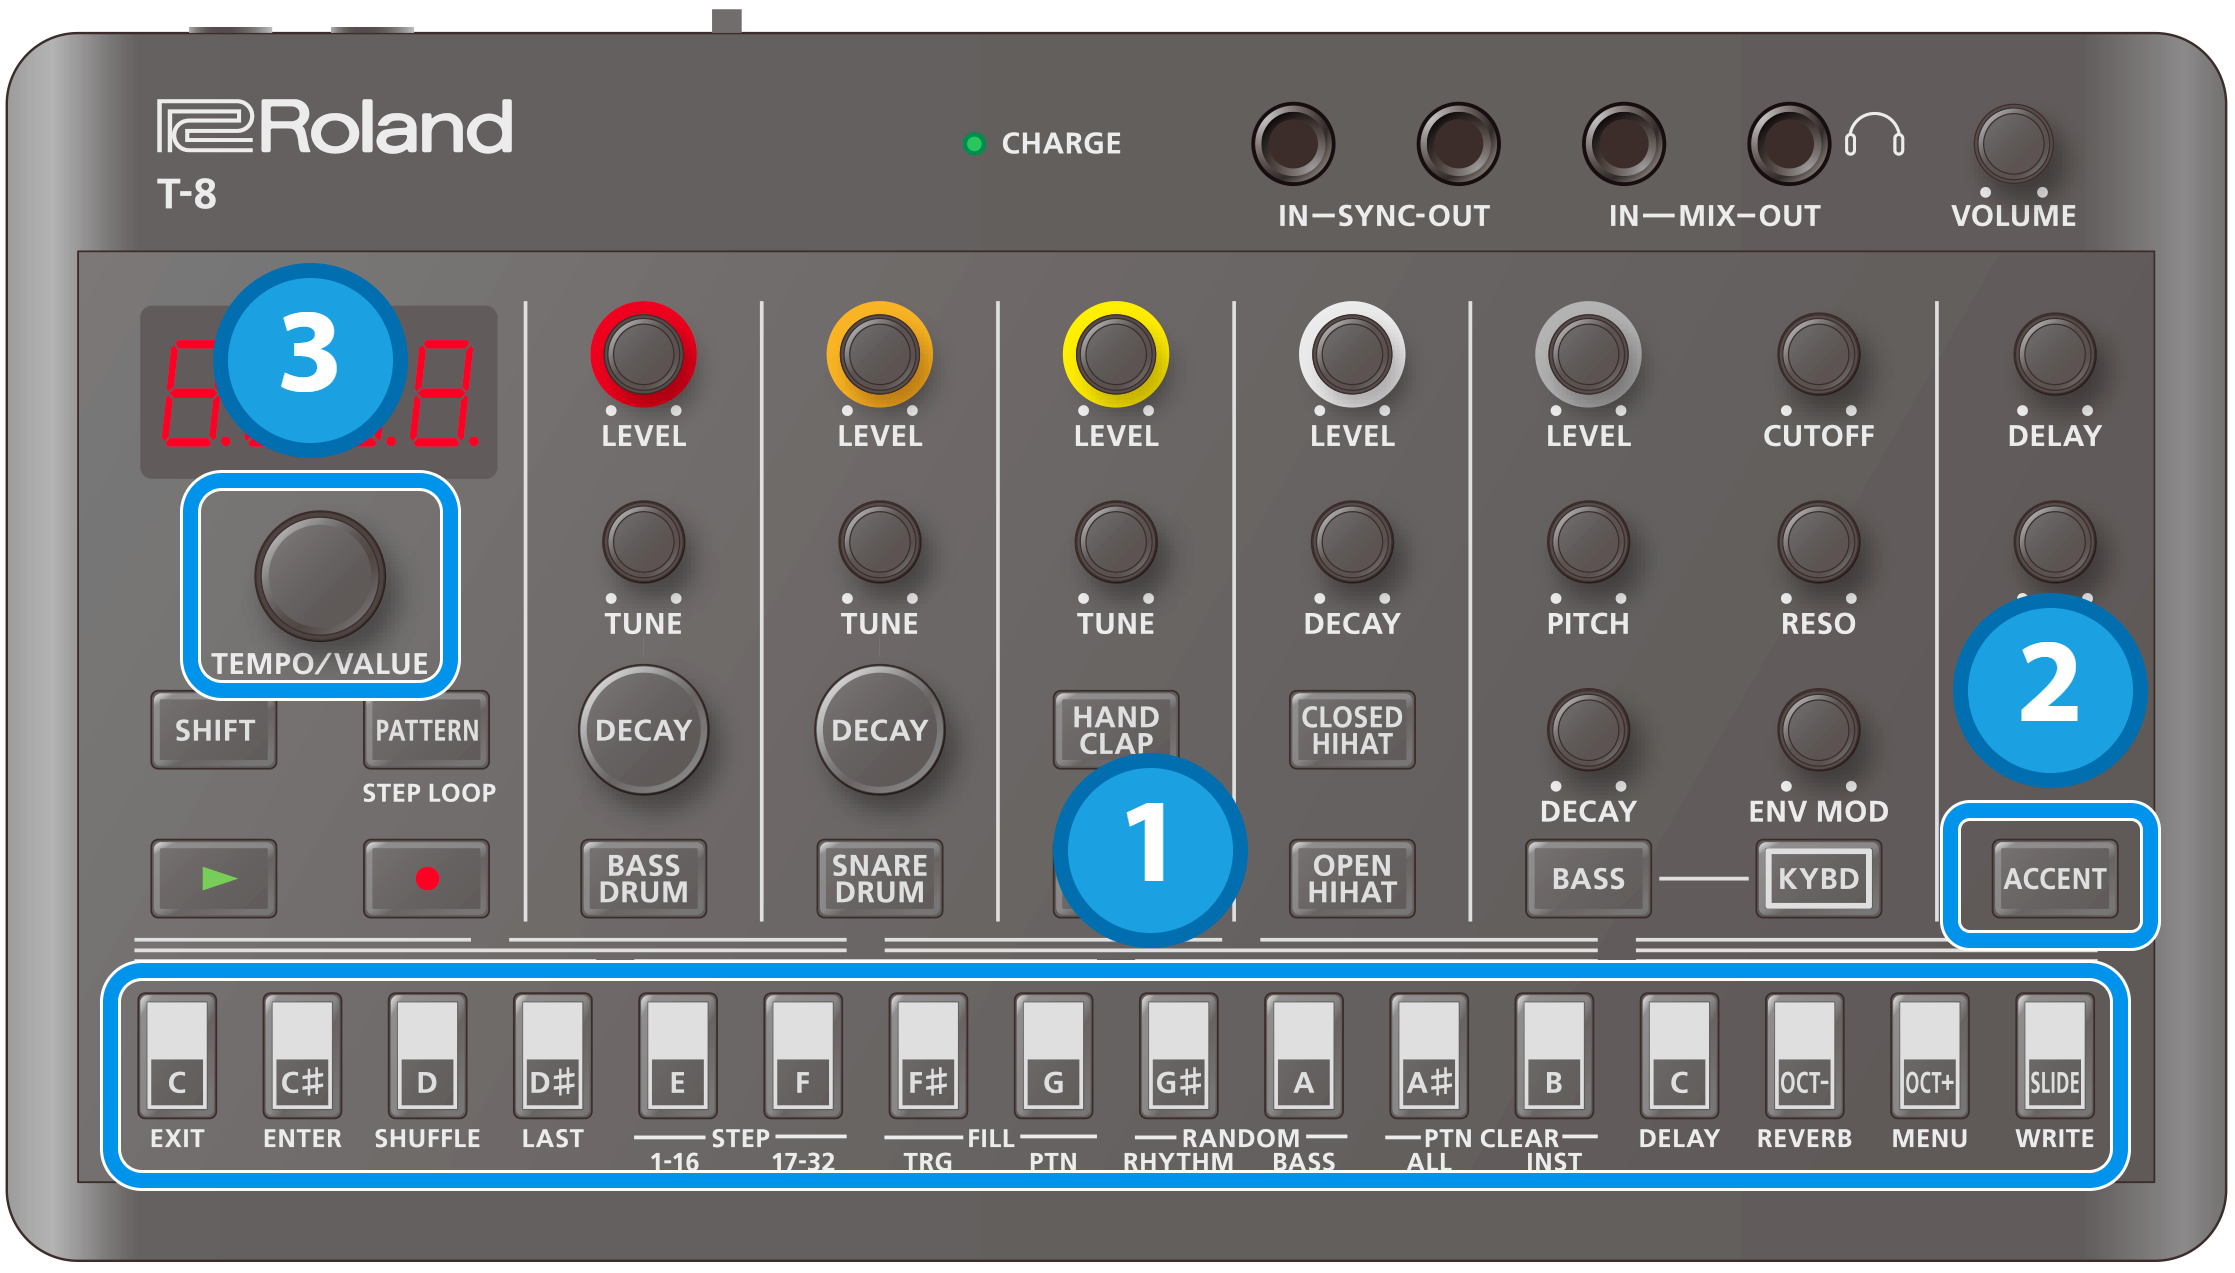
With the rhythm instrument selected, turn the [TEMPO/VALUE] knob while holding down the [ACCENT] button.
This sets the rhythm accent.
Setting the probability
This shows how to set the probability for notes to play back. You can use the probability feature to make a pattern play in different variations, while that same pattern keeps playing back.
Press one of the step 1–16 buttons (and keep holding the step buttons until the operation is finished).
The probability value (P.0–P.100) is displayed.
Turn the [TEMPO/VALUE] knob to set the value.
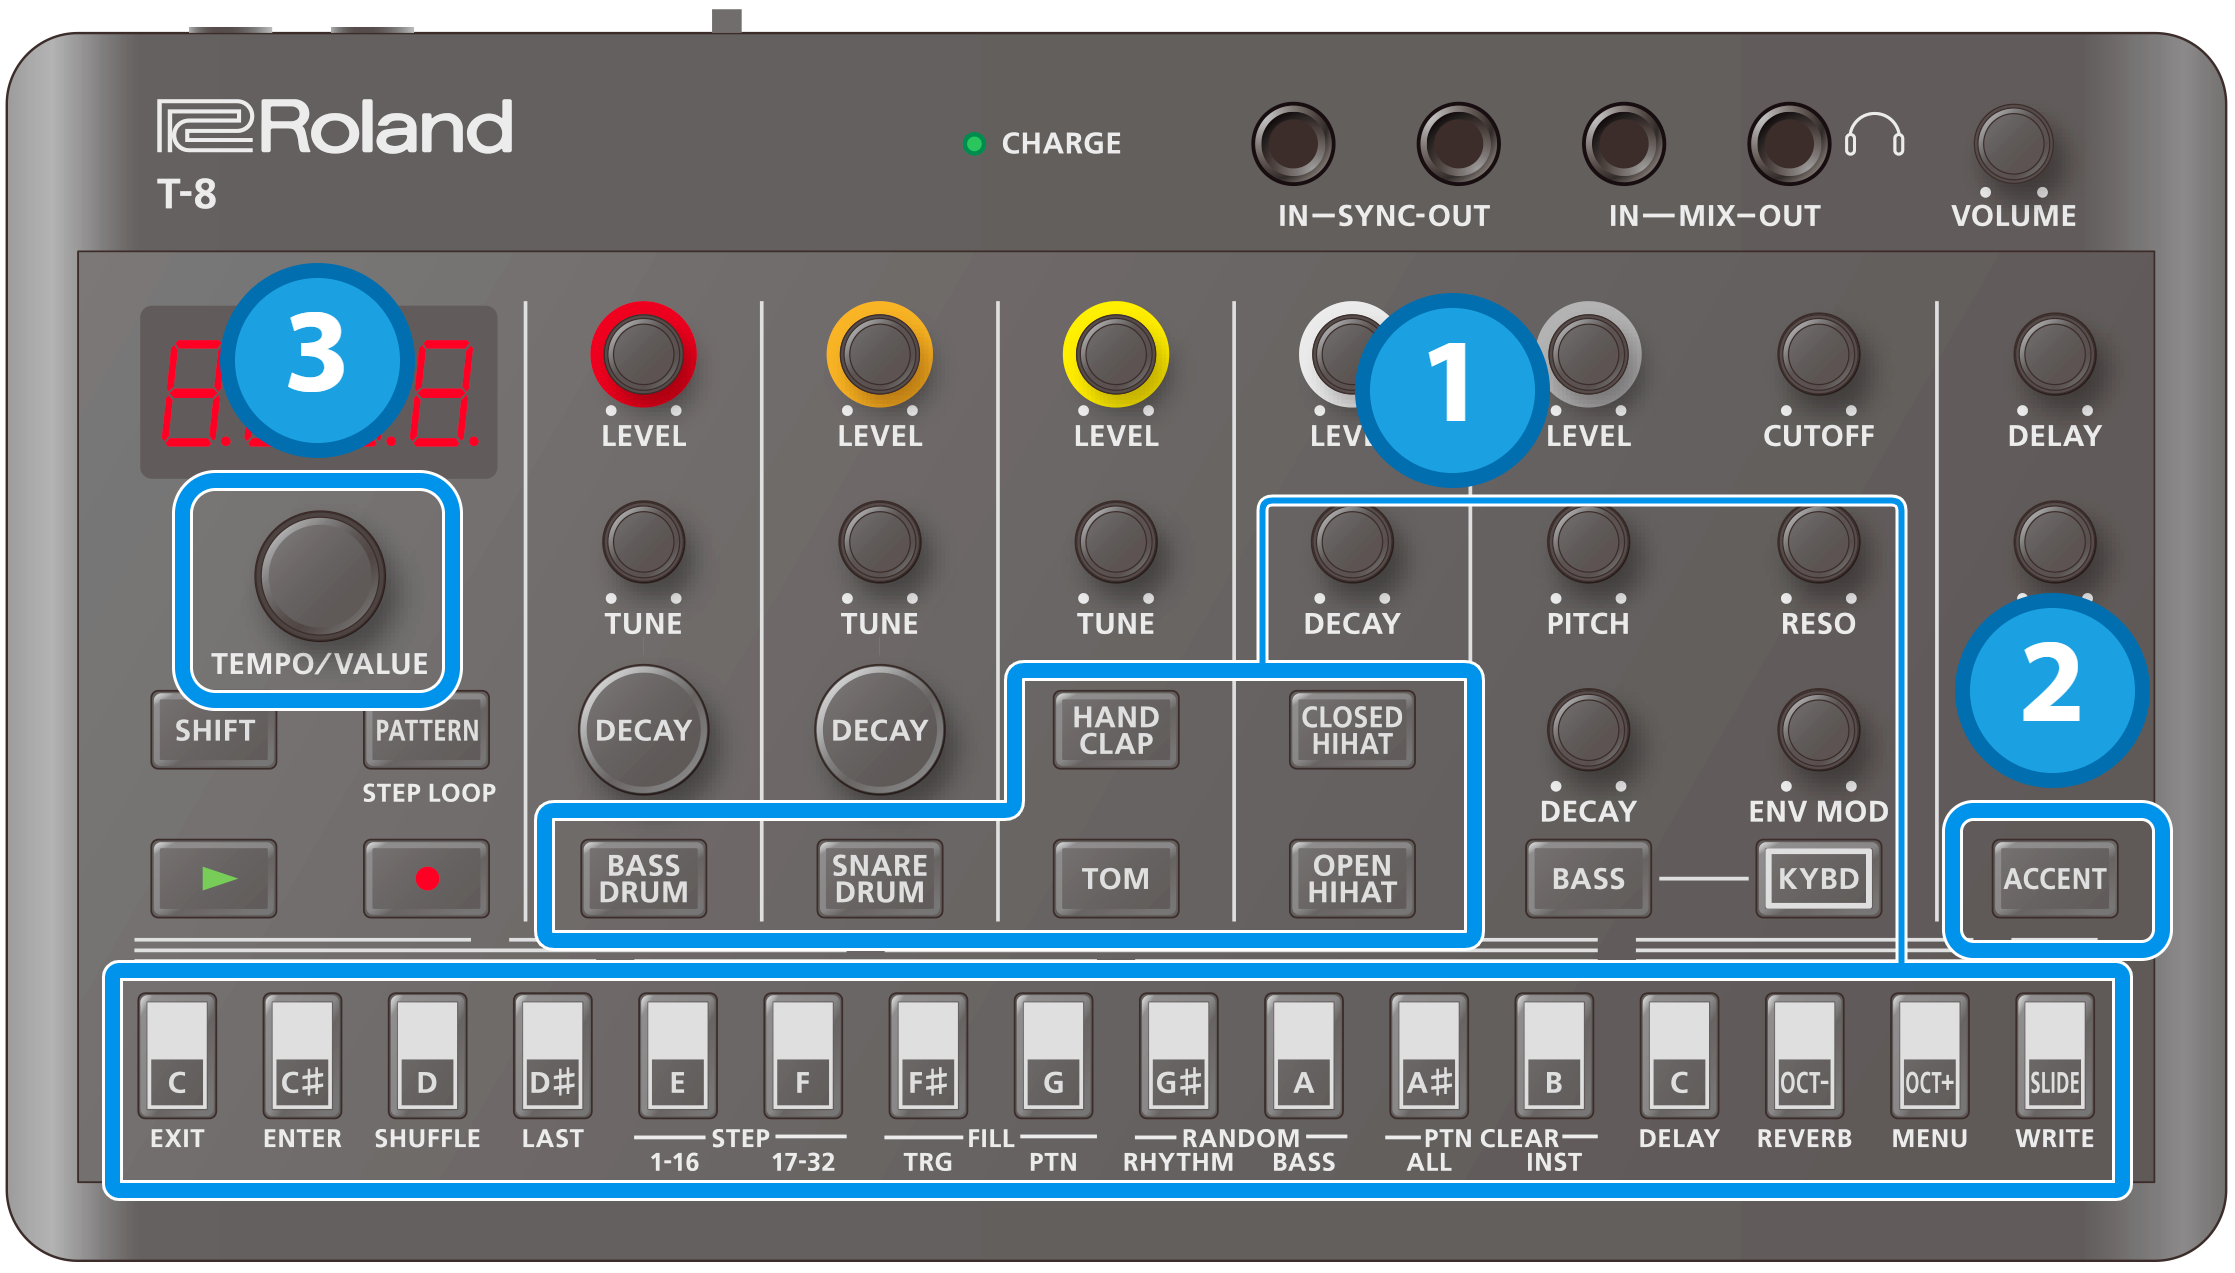
Inputting sub steps
You can divide the steps you input to create rolls or repeated strokes using the sub step function.
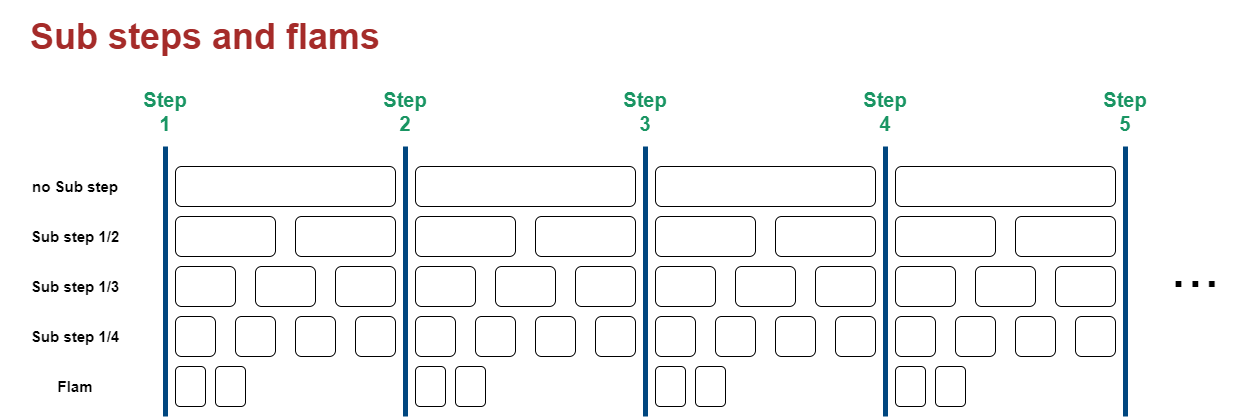
Hold down an instrument button and press one of the step 1–16 buttons.
The status of the current sub step is shown.
Hold down the instrument button and press one of the step 1–16 buttons again.
This changes the sub step setting. The settings cycle through in this order: OFF Ó 1_2 Ó 1_3 Ó 1_4 Ó FLAN.
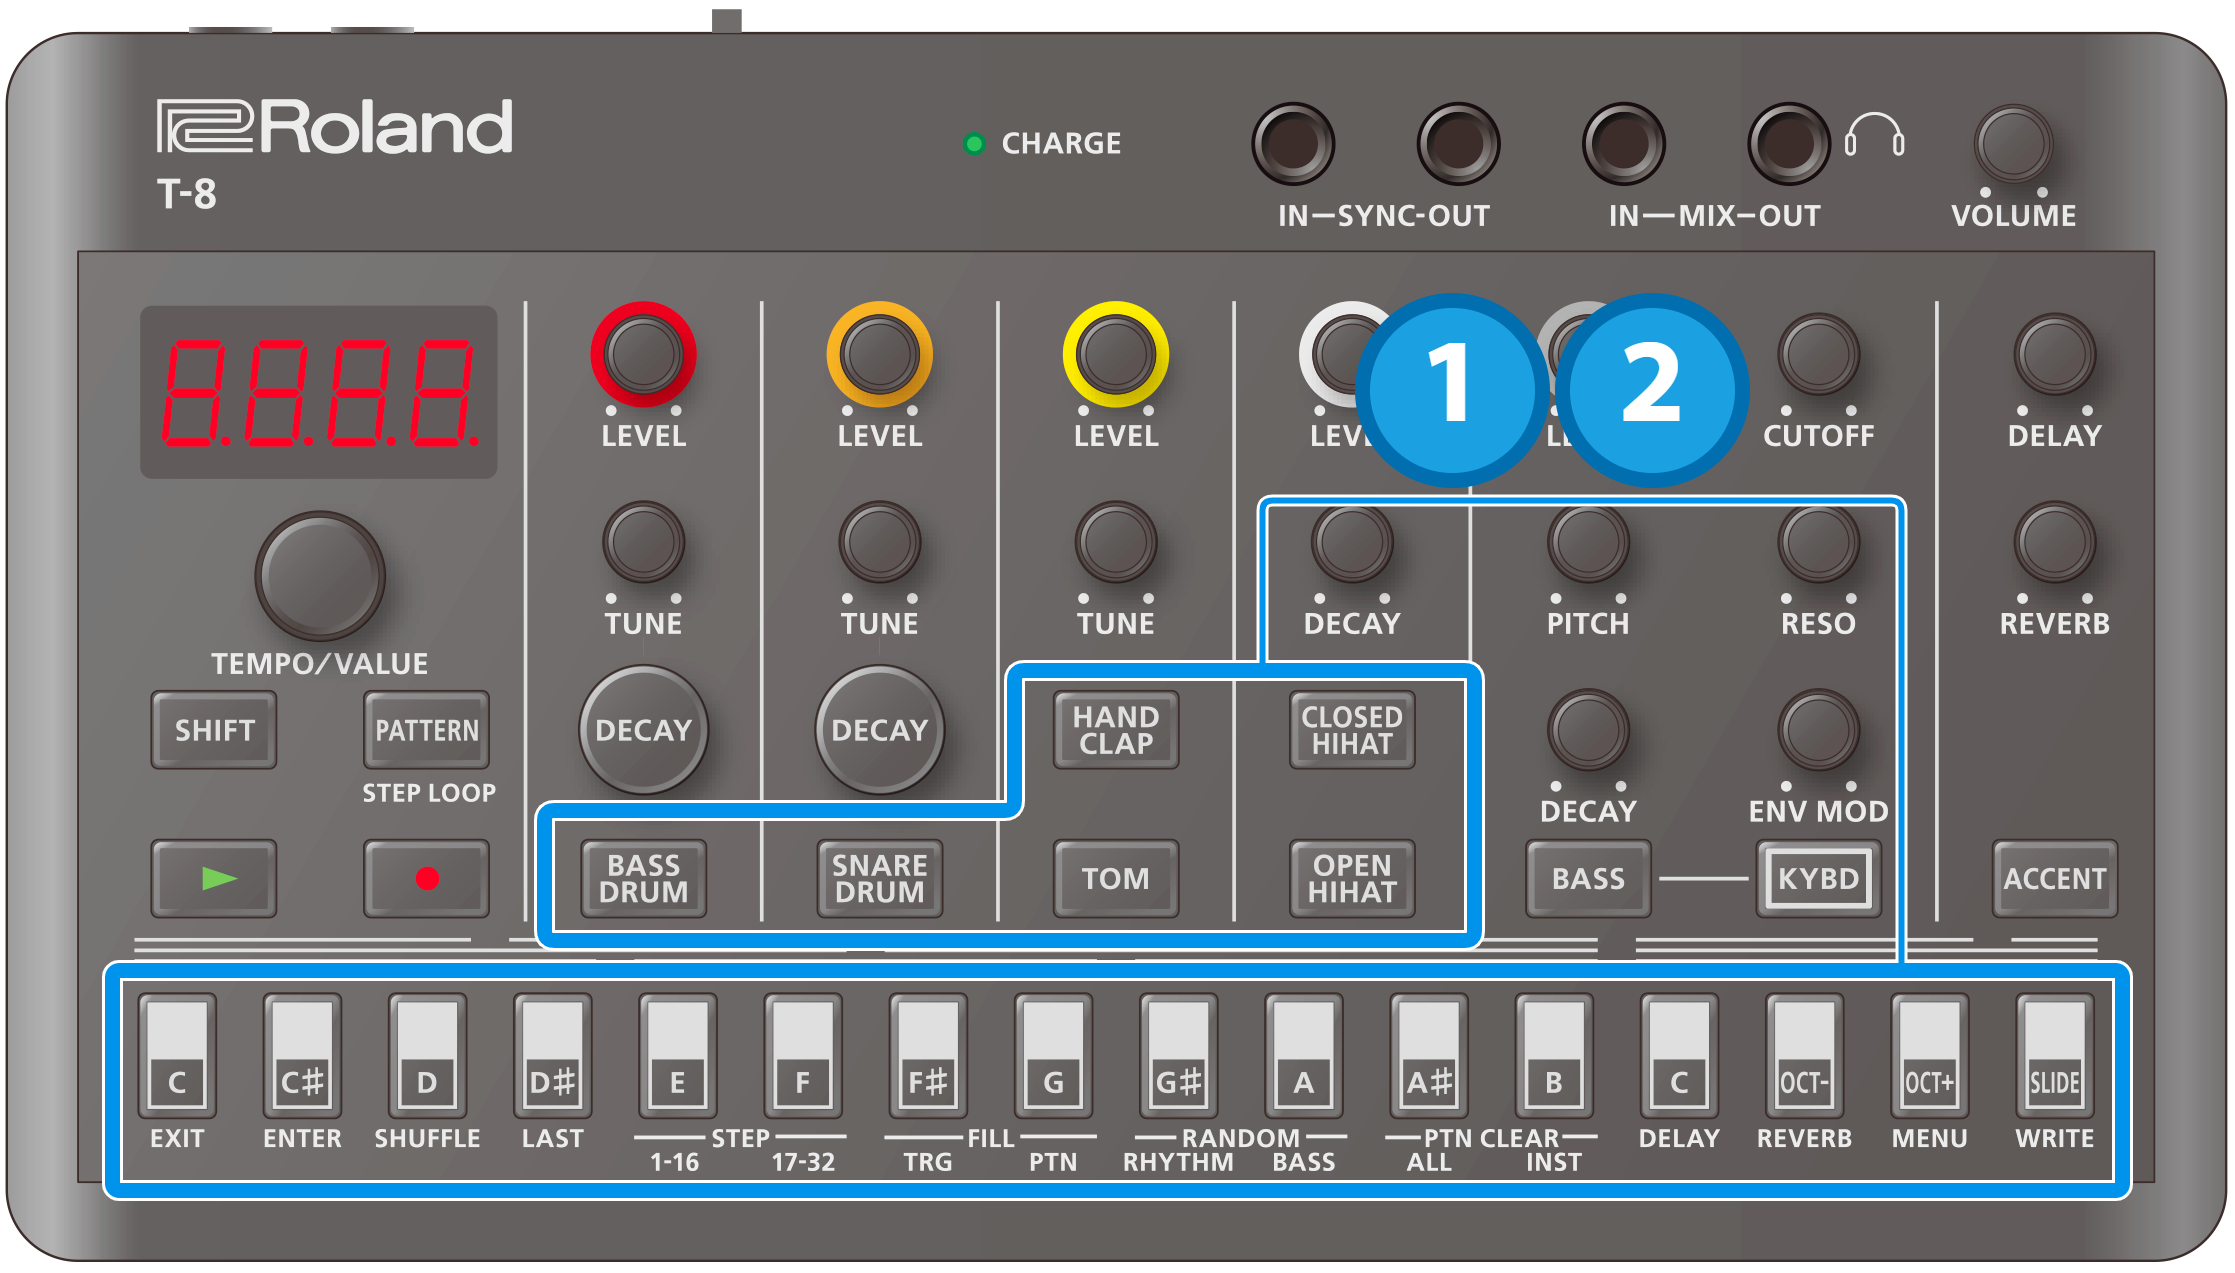
Setting the sub step probability
Here’s how to set the probability for sub steps to play back.
Hold down an instrument button and press the step 1–16 buttons. (Keep holding down the instrument button until the operation is finished.)
The setting for the current sub step (OFF–FLAN) is shown.
Press the [ACCENT] button.
The probability value (P.0–P.100) for the sub step is displayed.
Use the [TEMPO/VALUE] knob to set the sub step probability.
Setting the velocity
This shows how to input the velocity (how soft or loud the note plays) for the steps of each instrument.
Press one of the step 1–16 buttons (and keep holding the step buttons until the operation is finished).
The probability value (P.0–P.100) is displayed.
Press the [ACCENT] button.
The velocity value (v.0–v.10) is displayed.
Turn the [TEMPO/VALUE] knob to set the value.
Master probability
You can add a value that affects the probability of the entire sequence.
Ø For more details on probability, refer to “Setting the probability”.
- This has no effect if the individual probabilities are not set.
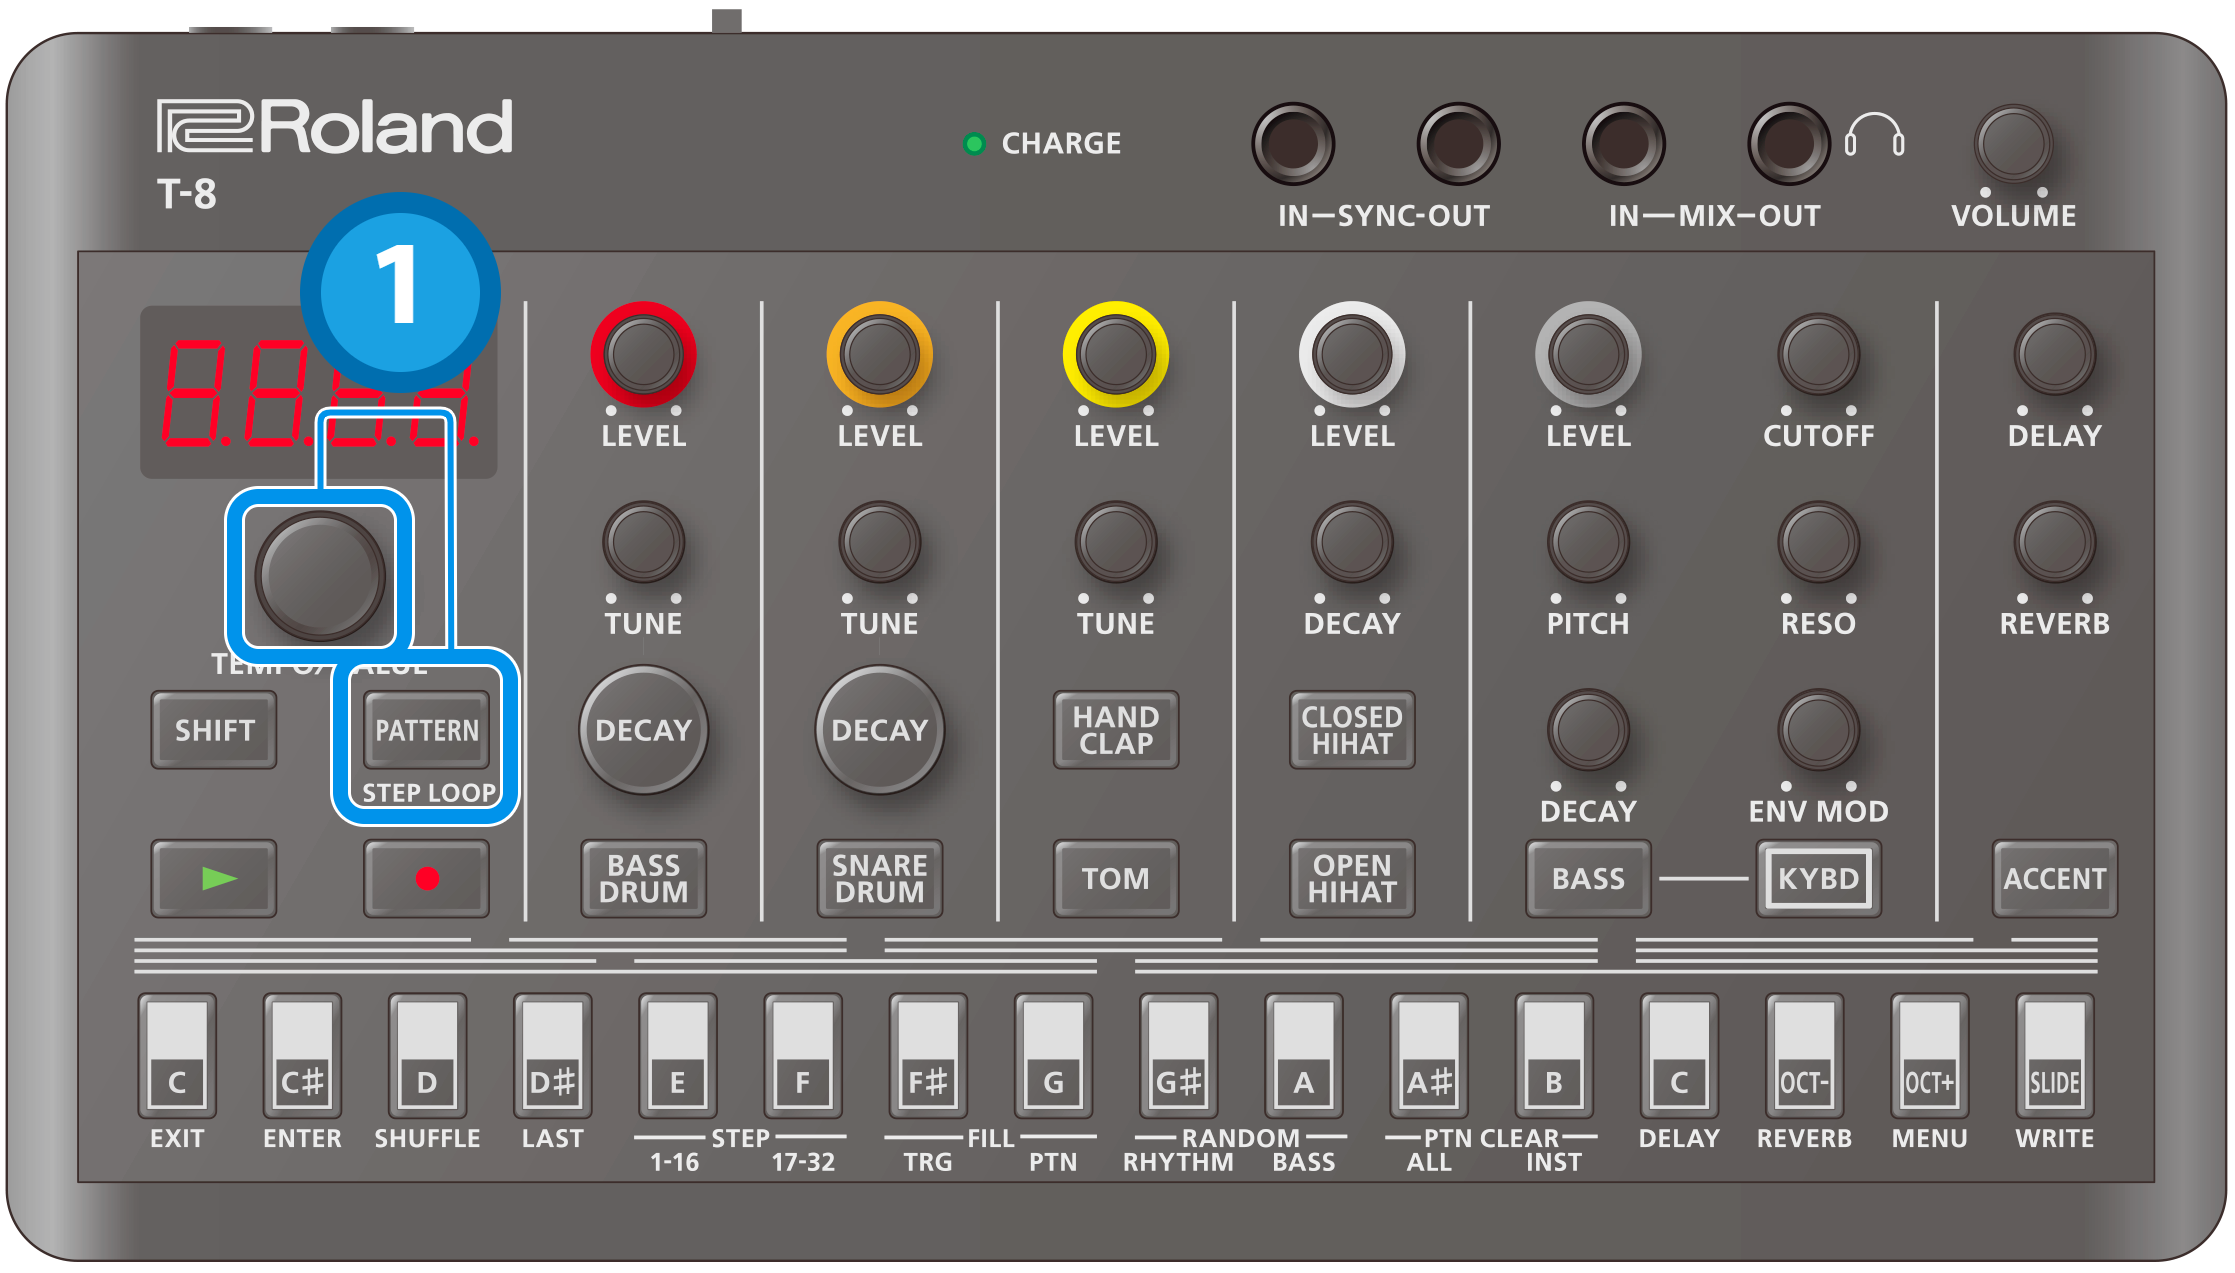
Hold down the [PATTERN] button and turn the [TEMPO/VALUE] knob.
This sets the master probability.
Looping specific steps (step loop)
You can make a selected step or steps play back in a loop during pattern playback.
The rhythm instruments that are played back by the selected step all play back in a loop.
Only the rhythms play back in a loop.
You can make more than one step play back in a loop at the same time.
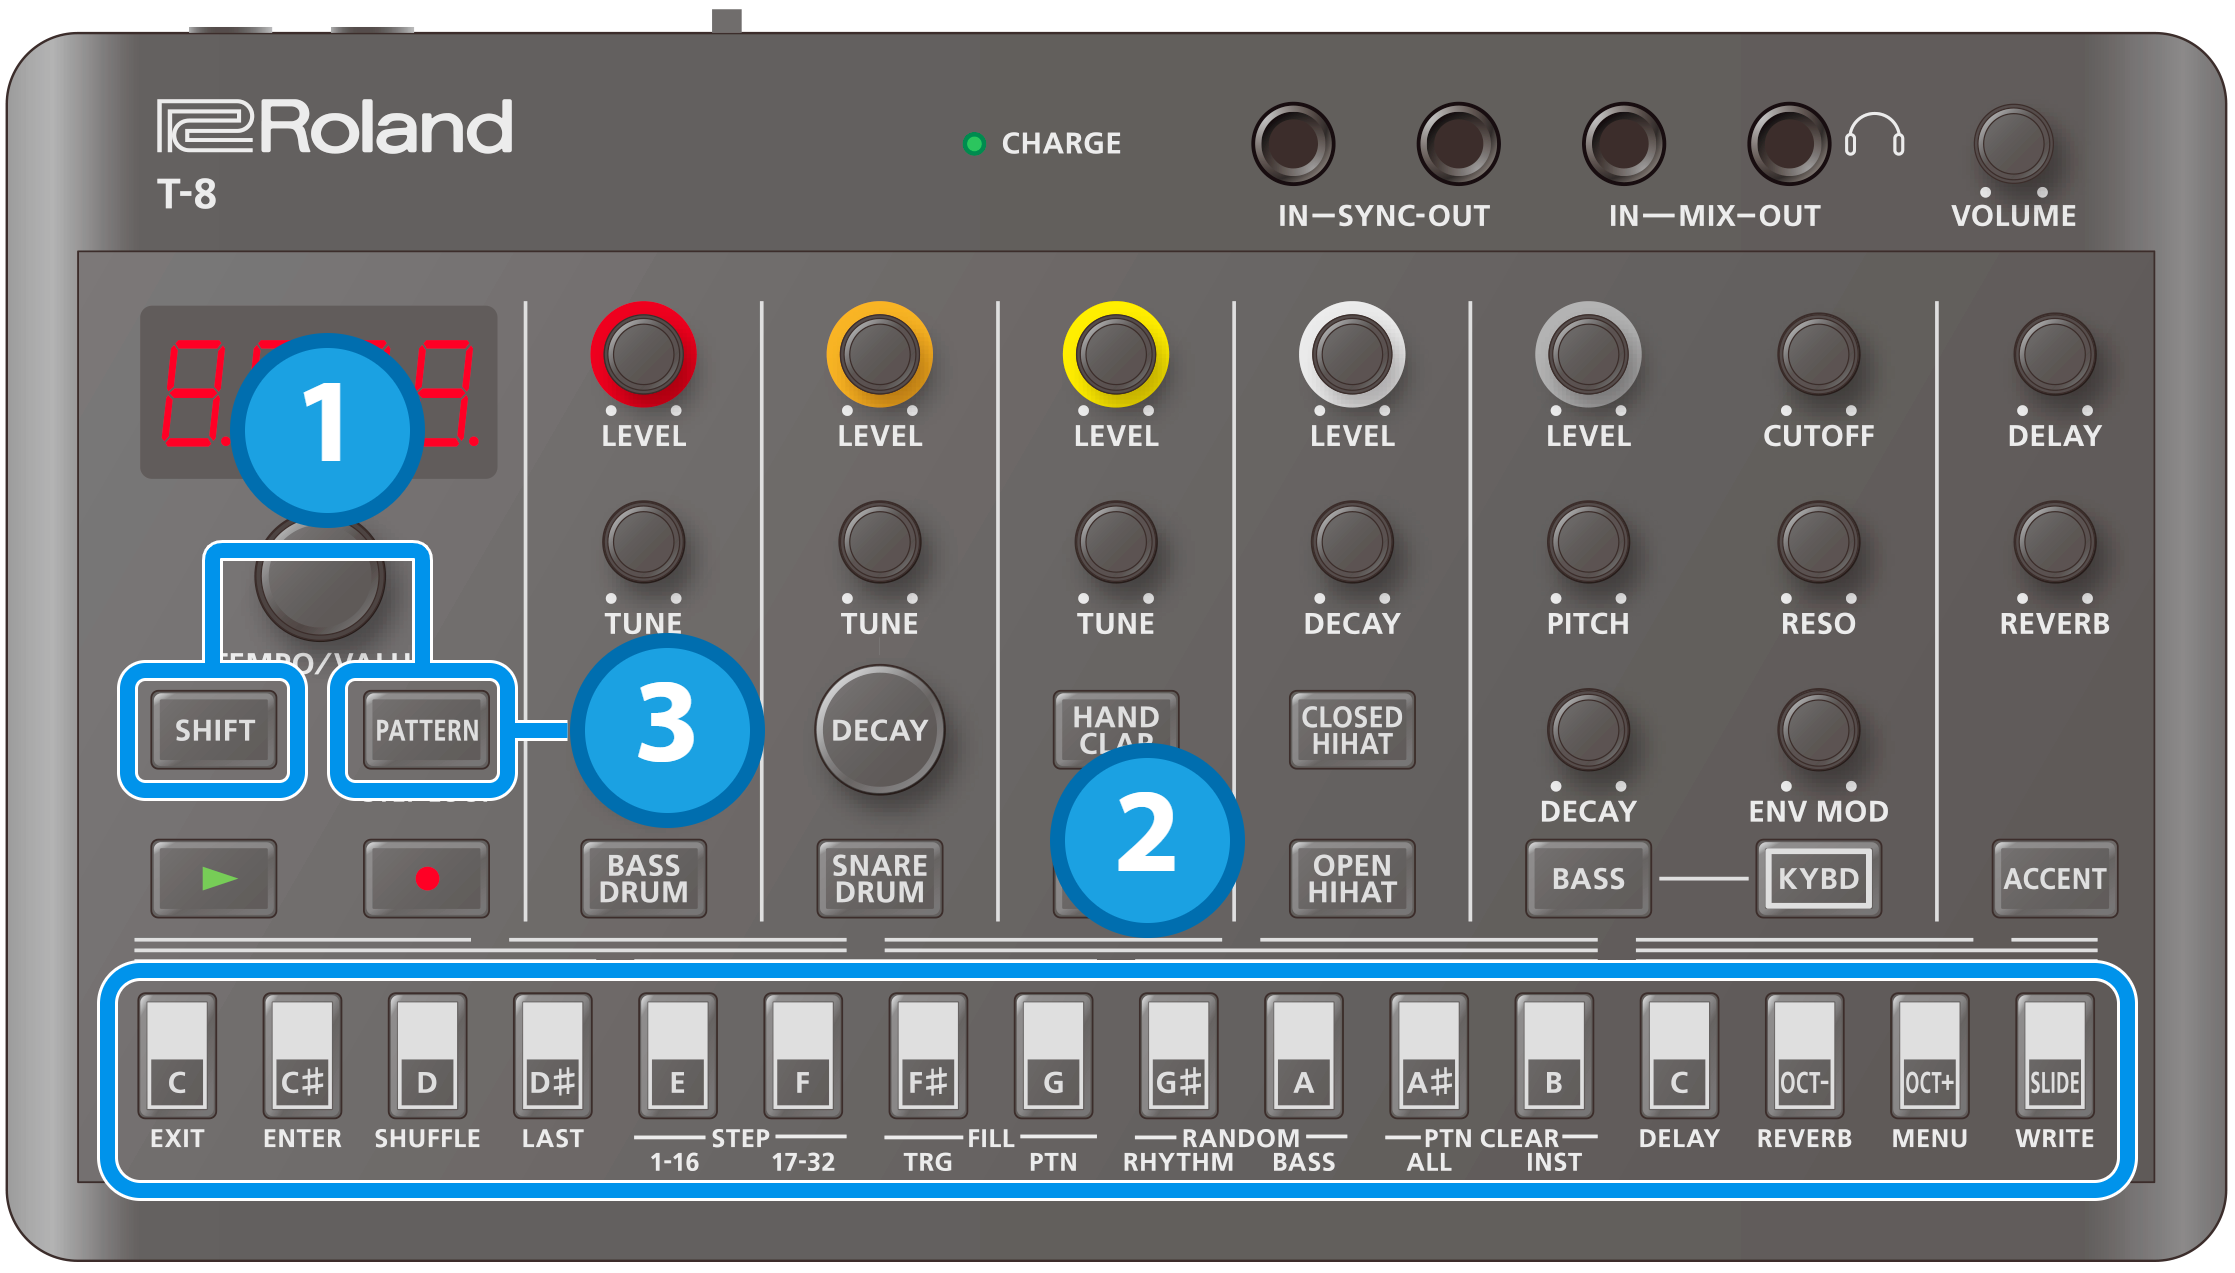
Hold down the [SHIFT] button and press the [PATTERN] button.
The [PATTERN] button blinks, and the unit enters step loop mode.
Press a step button.
When you are finished, press the [PATTERN] button.
Real-time input (tap input)
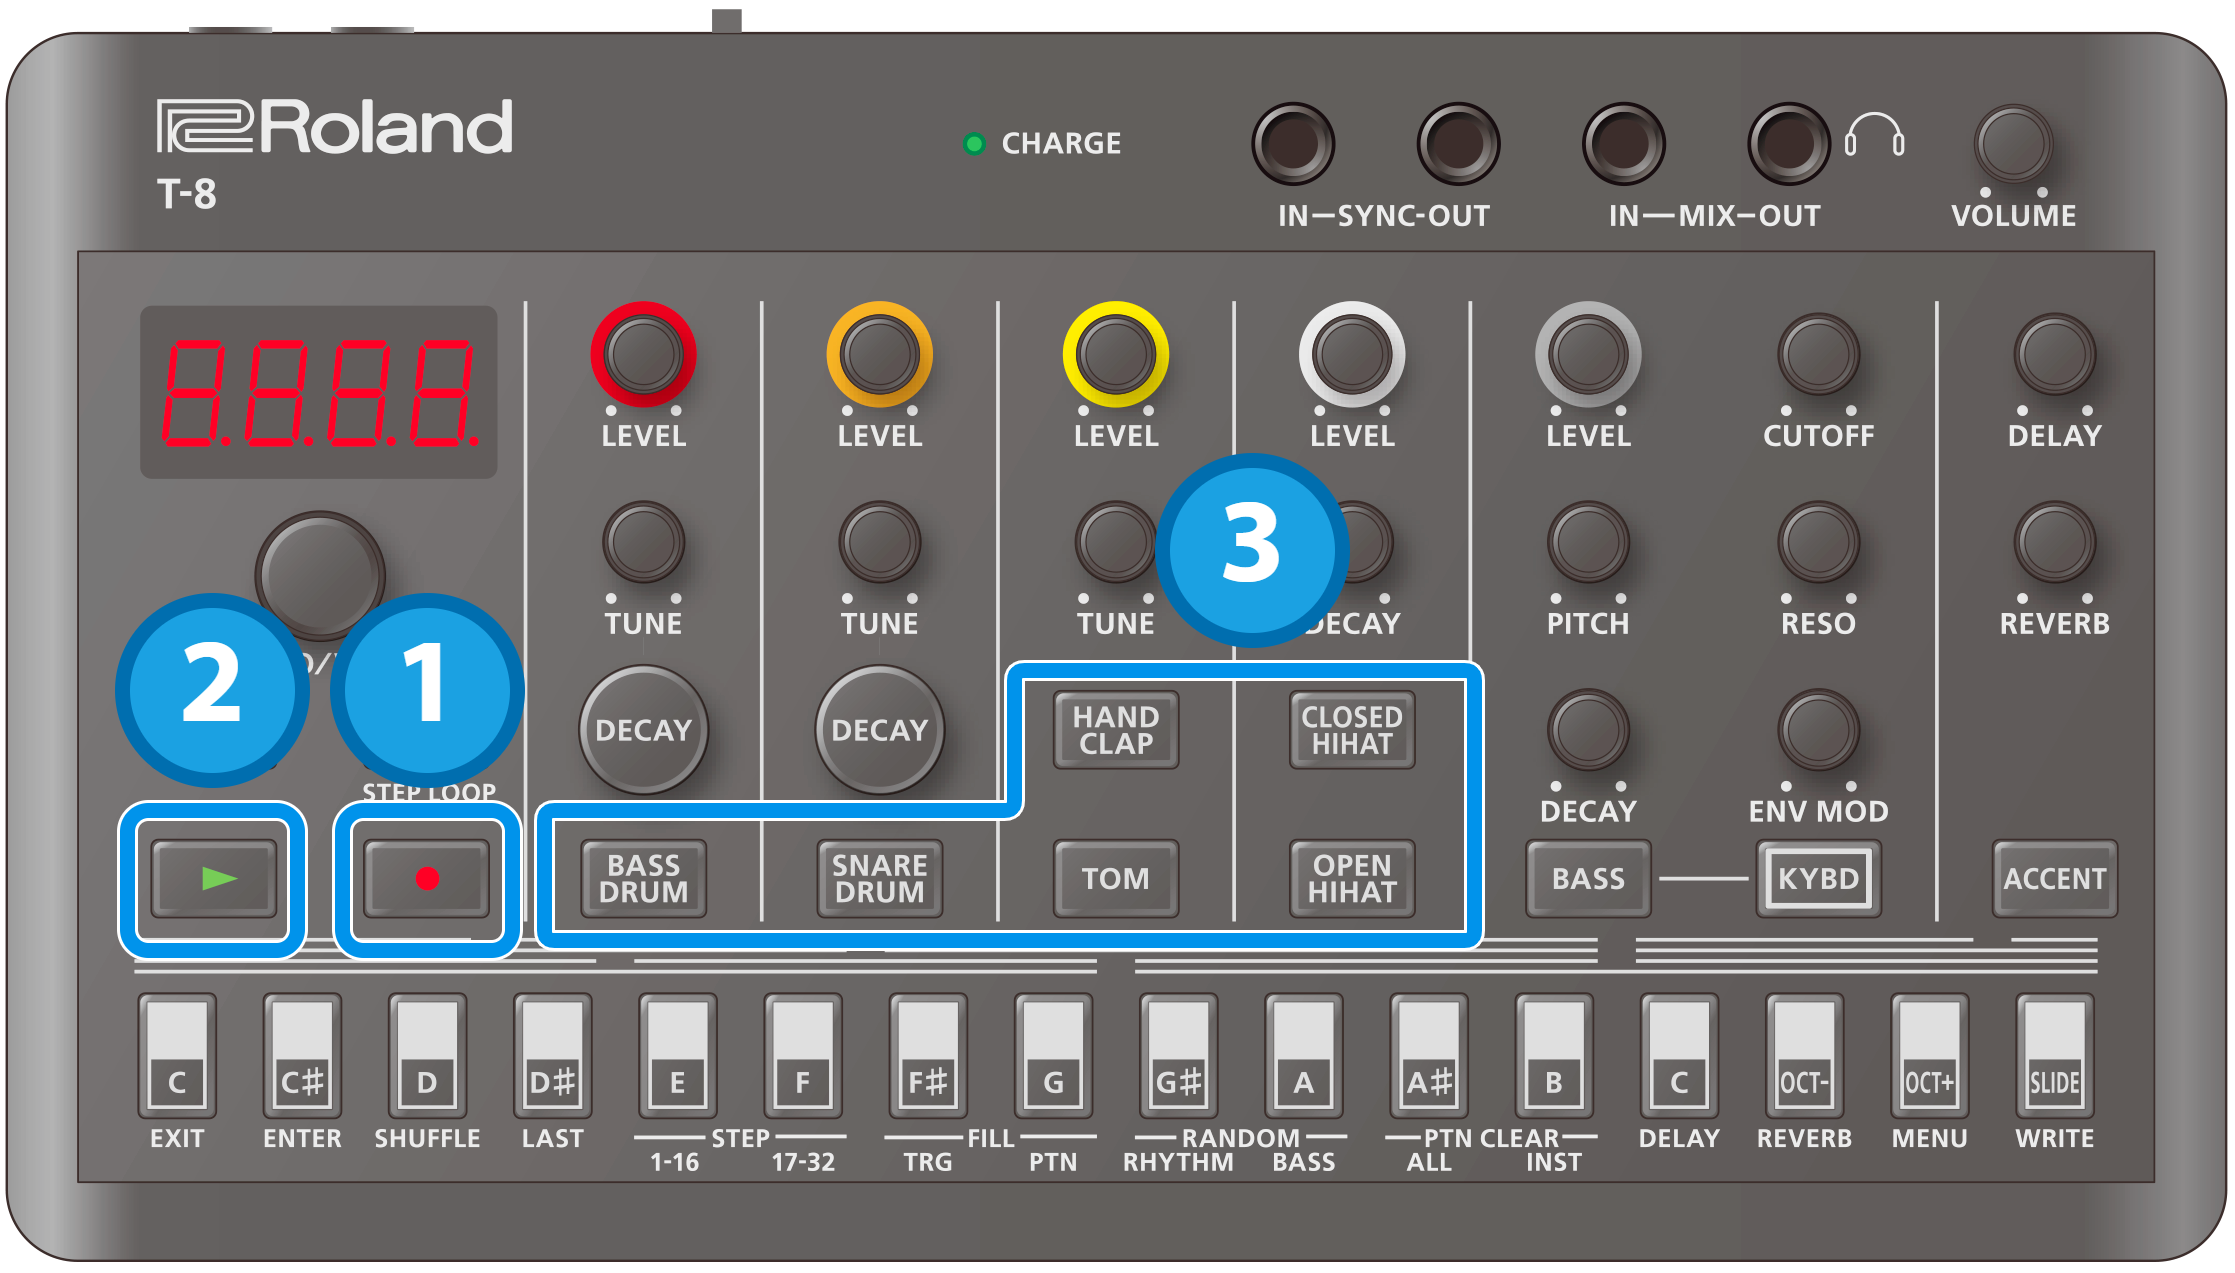
Press the [ó] (REC) button.
The [ó] (REC) button lights up.
Press the [ø] (PLAY) button.
The [ø] (PLAY) button lights, and recording begins.
Press an instrument button.
This inputs a note into the step during playback.