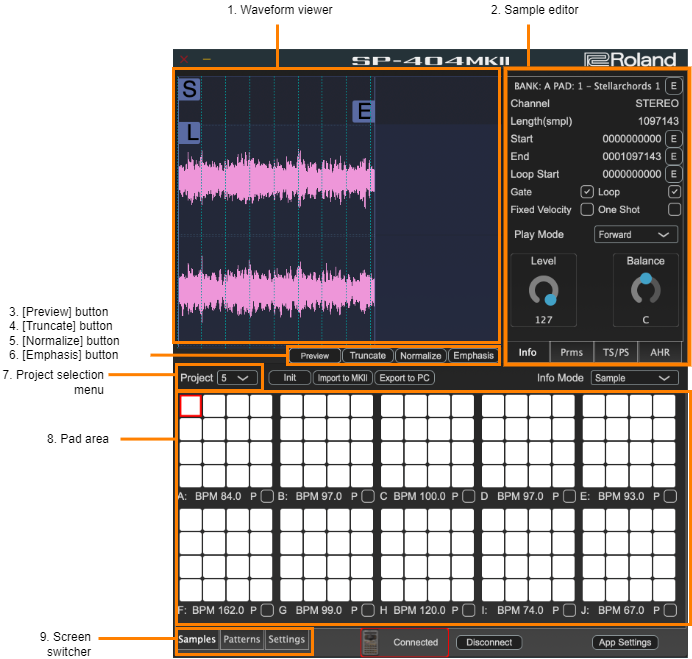
Waveform viewer
Displays the waveform of the selected sample.
The “S” icon (
 ) indicates the playback start position, and the “E” icon (
 ) indicates the playback end position.
The “L” icon (
 ) is shown when the loop is on. The loop range is from the “L” icon to the “E” icon.
Sample editor
Use this to edit the parameters of the selected sample.
You can edit different parameters for each tab.
[Preview] button
Press this to play back the selected sample on the SP-404MK2.
You can also use the space bar key on your computer to trigger playback instead of the [Preview] button.
[Truncate] button
Trims (deletes) the sample’s audio regions before the start point and after the end point.
[Normalize] button
Increases the overall volume.
[Emphasis] button
Emphasizes the high-frequency sound.
Project selection menu
Switches between projects you wish to edit.
Pad area
This shows the pads for all banks.
The white pads (
 ) already contain an assigned sample, and the black pads (
 ) are empty.
Screen switcher
Switches between screens to edit.