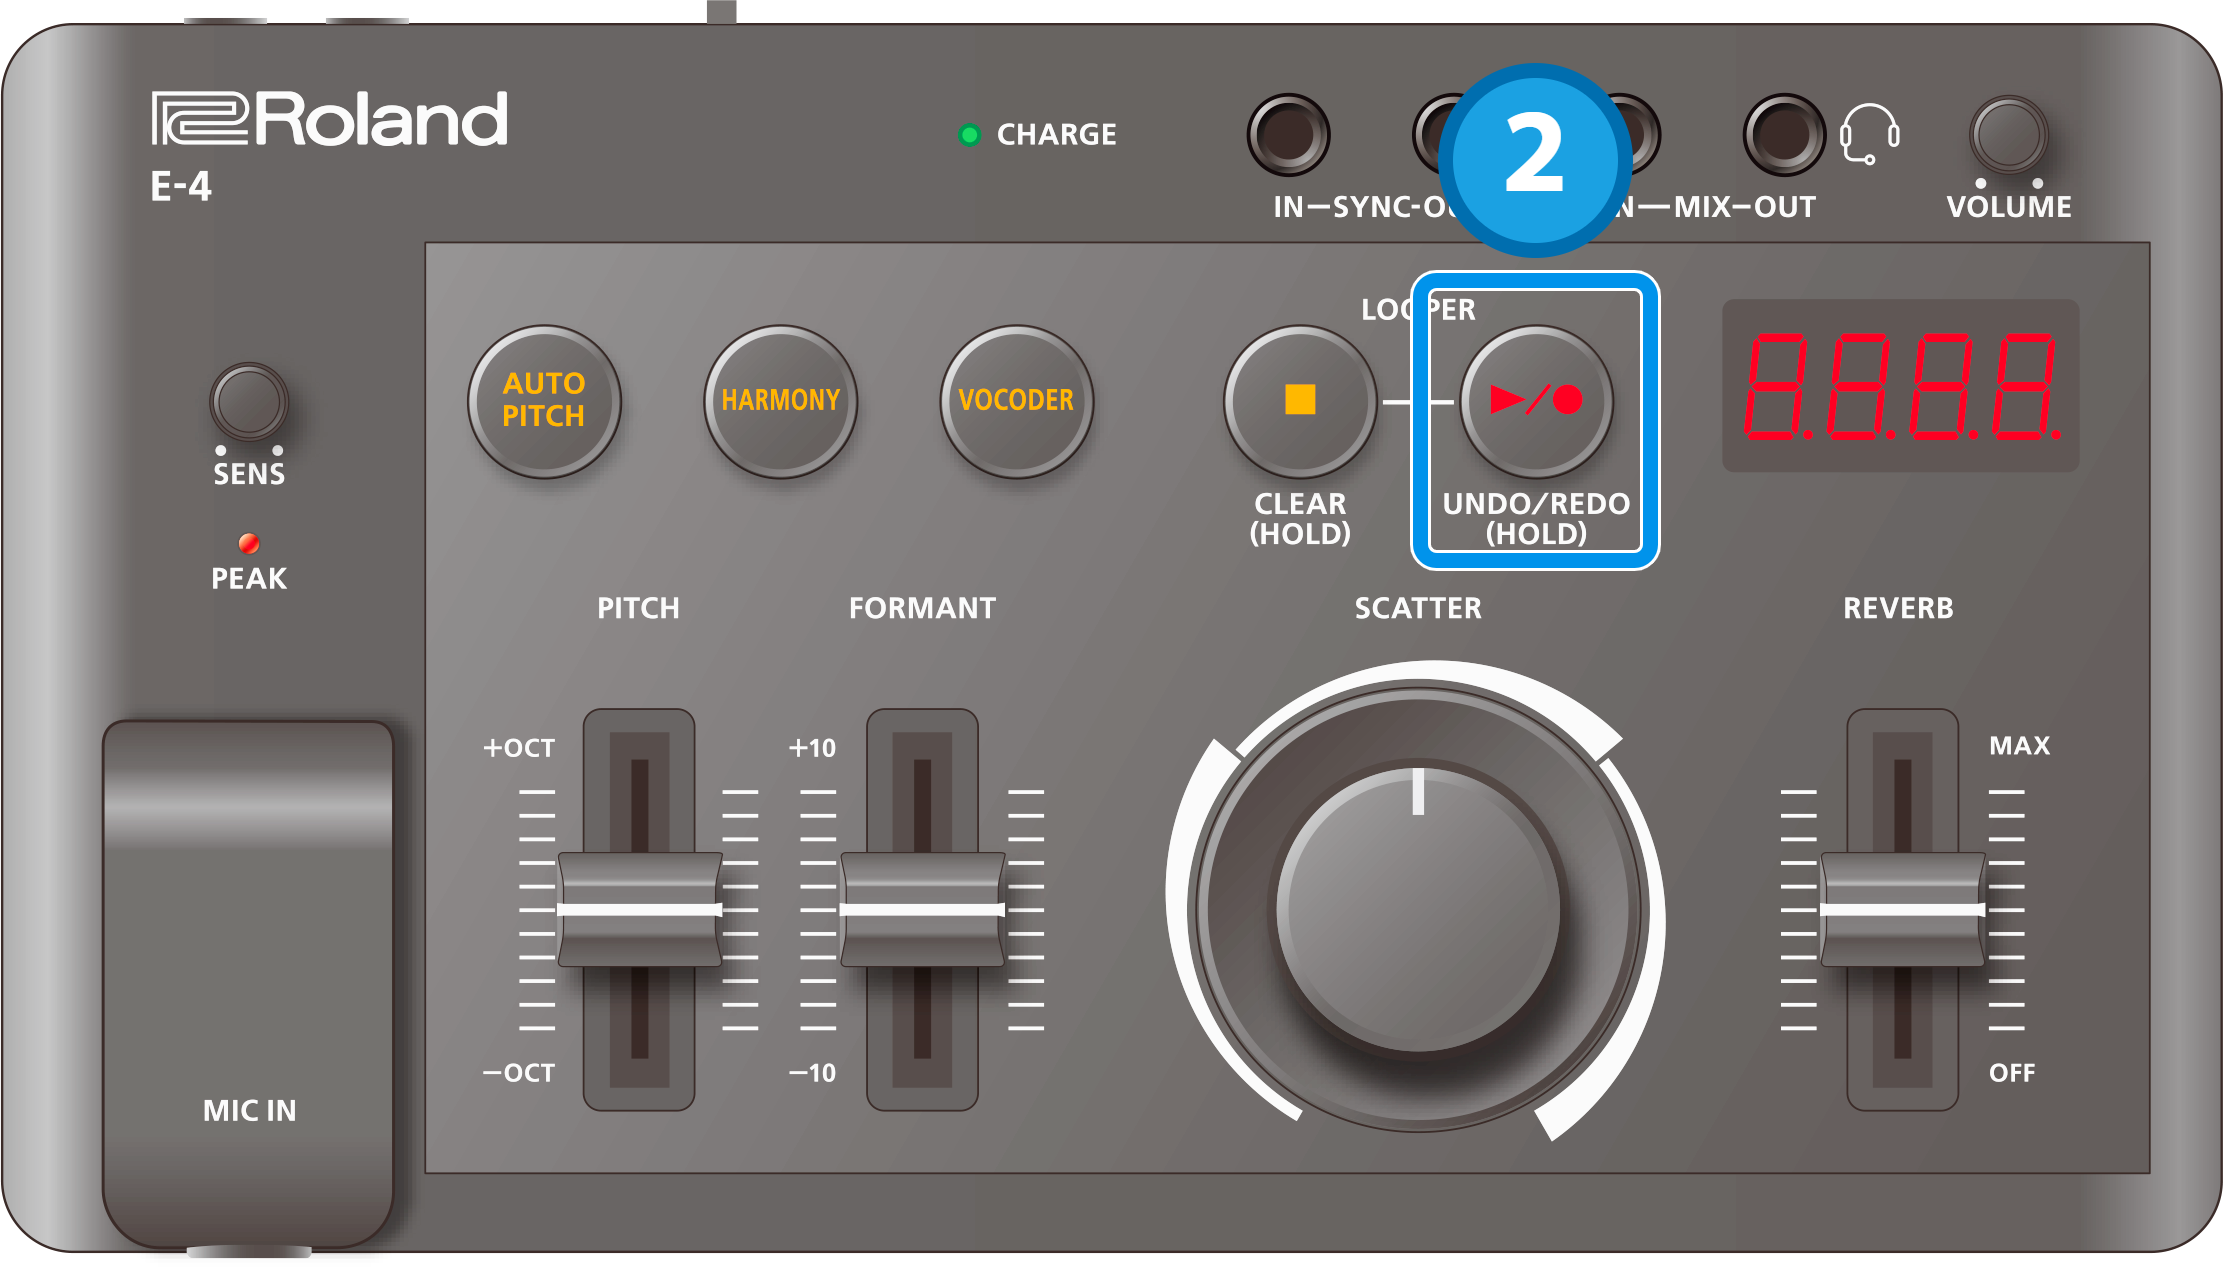
Recording audio input

Press the [â/ó] (play/record) button.
Recording starts when you press the button. If recording is already in progress, playback starts.
“rEC” is displayed, and the [â/ó] (play/record) button lights up red (recording/overdubbing).To finish the recording, press the [â/ó] (play/record) button again.
Playback begins as-is.
The internal BPM is determined at the point when recording ends (the SYNC OUT F8 pulse changes).
The SYNC OUT clock returns to the beginning.
“PLAY” is displayed, and the [â/ó] (play/record) button lights up green (playback).
Stopping audio that’s playing back (or switching to standby)
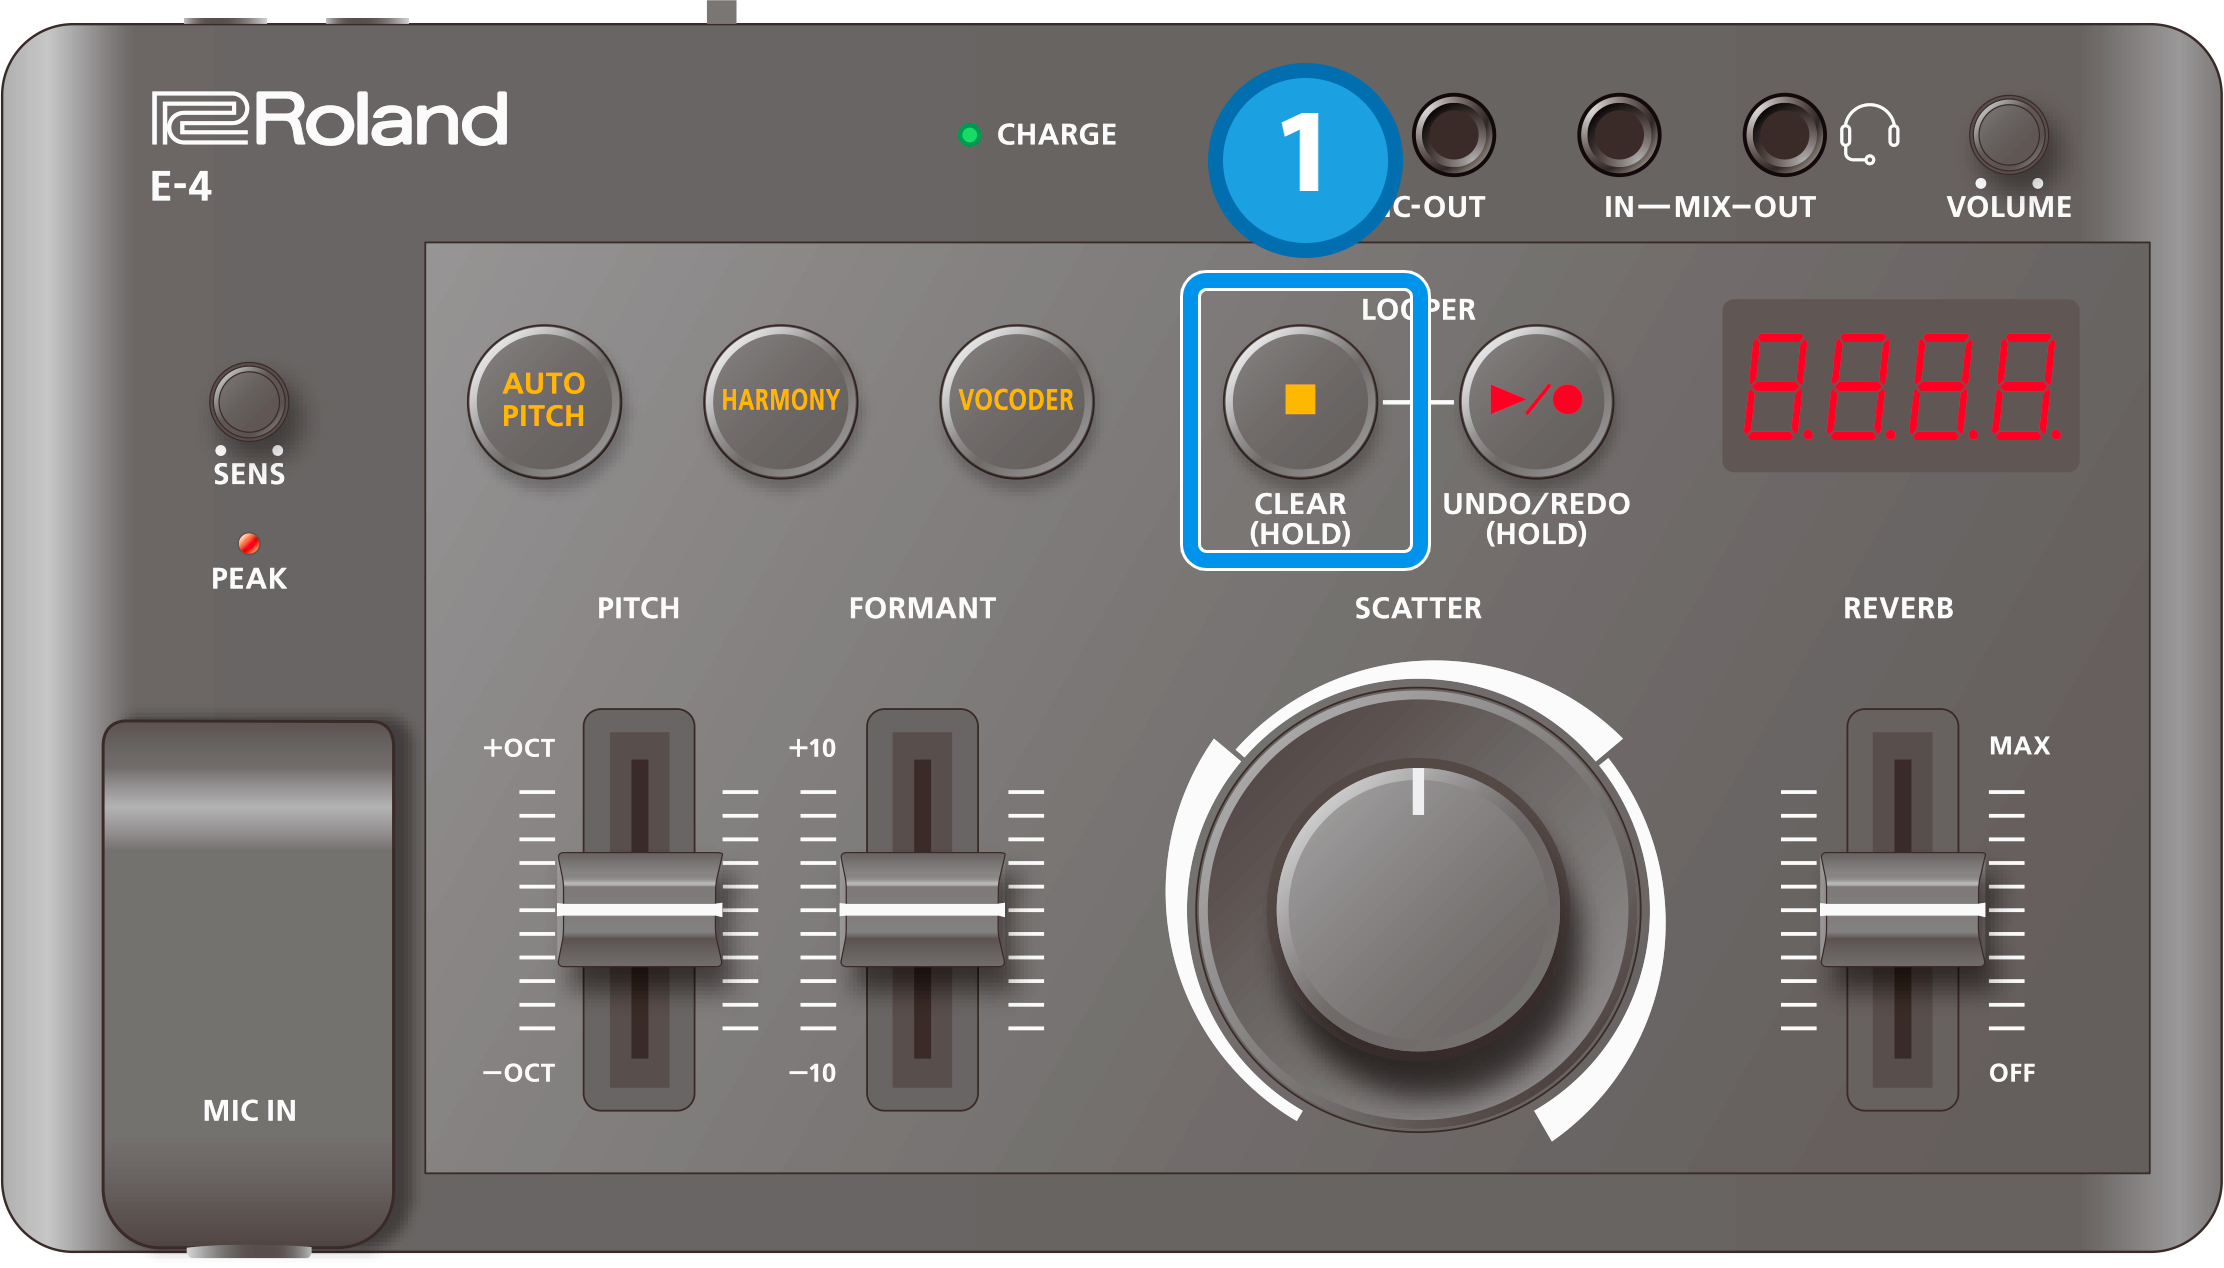
Press the [ð] (stop) button during playback.
Playback stops when you press the button.
The display indicates “STOP”.
Playing back recorded audio
Record once, and then stop recording.
Press the [â/ó] (play/record) button when recording has stopped.
Playback begins when you press the button. SYNC OUT clock returns to the beginning (when set to do so).
During playback, the [â/ó] (play/record) button lights up and “PLAY” is displayed.
Layering audio recordings (overdub)

Press the [â/ó] (play/record) button when playback or recording is stopped.
Playback begins.
The [â/ó] (play/record) button lights up green.Press the [â/ó] (play/record) button again.
Recording starts when you press the button.
During recording, the [â/ó] (play/record) button lights up red and “rEC” is displayed.