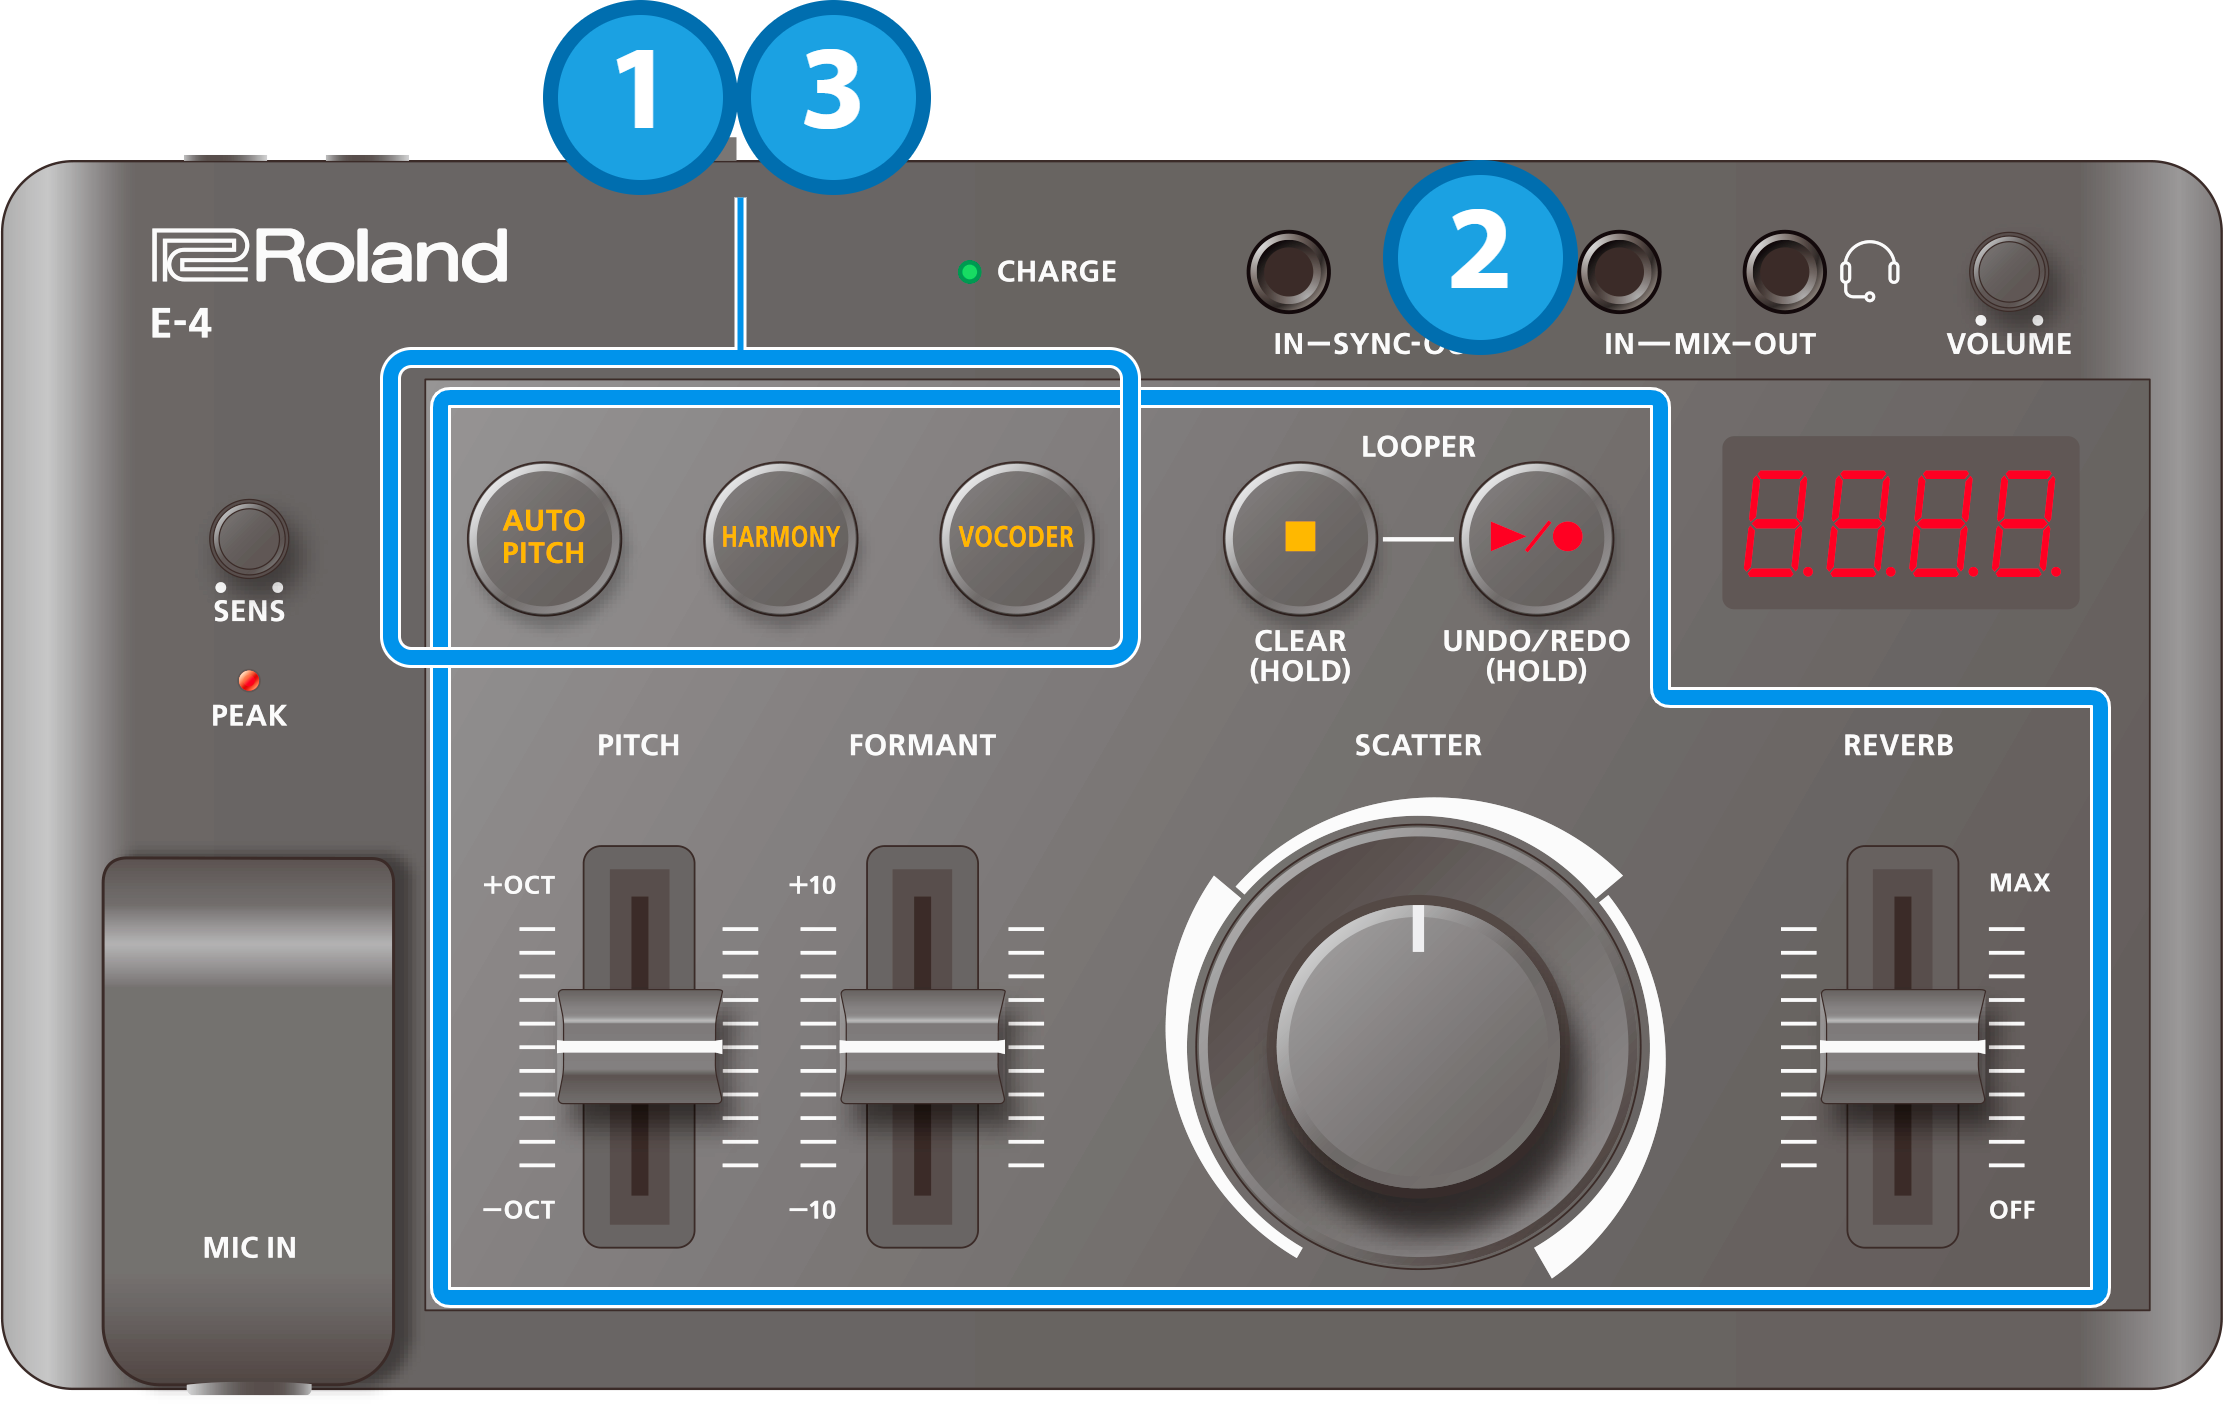
Press the [AUTO PITCH], [HARMONY] and [VOCODER] buttons at the same time.
The unit enters menu mode.
Use the buttons and sliders to make the settings.
For details, refer to the parameters below.
When you are finished, press the [AUTO PITCH], [HARMONY] and [VOCODER] buttons at the same time.
System settings
Item |
Controller |
Value |
Explanation |
|---|---|---|---|
USB OUT ROUTING |
[AUTO PITCH] button |
NIX.O, NIC.I |
Sets whether to use the output audio from your computer or tablet for the MIC IN input (NIC.I) or for the MIX OUT input (NIX.O). |
| FORCE HEADSET | [HARMONY] button | Avto, Forc |
When this is set to “Forc”, only the headset mic is used, regardless of whether a front mic is plugged in. |
| MIDI KEY IN | [VOCODER] button | Off, KeY.I |
When this is set to “KeY.I”, the pitch remains fixed when note messages are input. |
| MIDI THROUGH | [ð] (stop) button | Off, ñhrv |
When this is set to “ñhrv”, the messages that are input from the MIDI IN connector are output to the MIDI OUT connector. |
| AIRA LINK (*1) | [â/ó] (play/record) button | Off, A.Lnk |
Set this to “A.Lnk” when connecting a device via USB that is compatible with AIRA LINK, such as the MX-1. |
| MIDI CHANNEL | [SCATTER] dial | Ch.1–Ch.16 | Specifies the MIDI transmit/receive channel. |
| SYNC CLOCKS | [PITCH] slider | 1, 2, 3, 4, 6, 8, 12, 24 | Sets the number of sync clocks per beat. |
| SYNC RATE | [FORMANT] slider | 1_8, 1_4, 1_2, 1 |
Sets the synchronization cycle for the looper. |
| MIDI CLOCK SYNC | [REVERB] slider | Avto, Int, NIDI, USB |
Sets which synchronization signal is used by this unit.
|
*1: When using with another port besides the USB HOST 3 port on the MX-1, the unit starts up in battery-only mode. To use battery-only mode, turn on the power while holding down the [C] button.
MIDI settings
Function |
MIDI messages |
Explanation |
|---|---|---|
| ROBOT NOTE | Note On/Off | Controls the vocoder pitch using note numbers. The [AUTO PITCH] button blinks when notes are being input. |
| PITCH | Pitch Bend | Controls the [PITCH] slider value. |
| SYNC | Timing Clock | Controls the looper that synchronizes with the tempo data. |