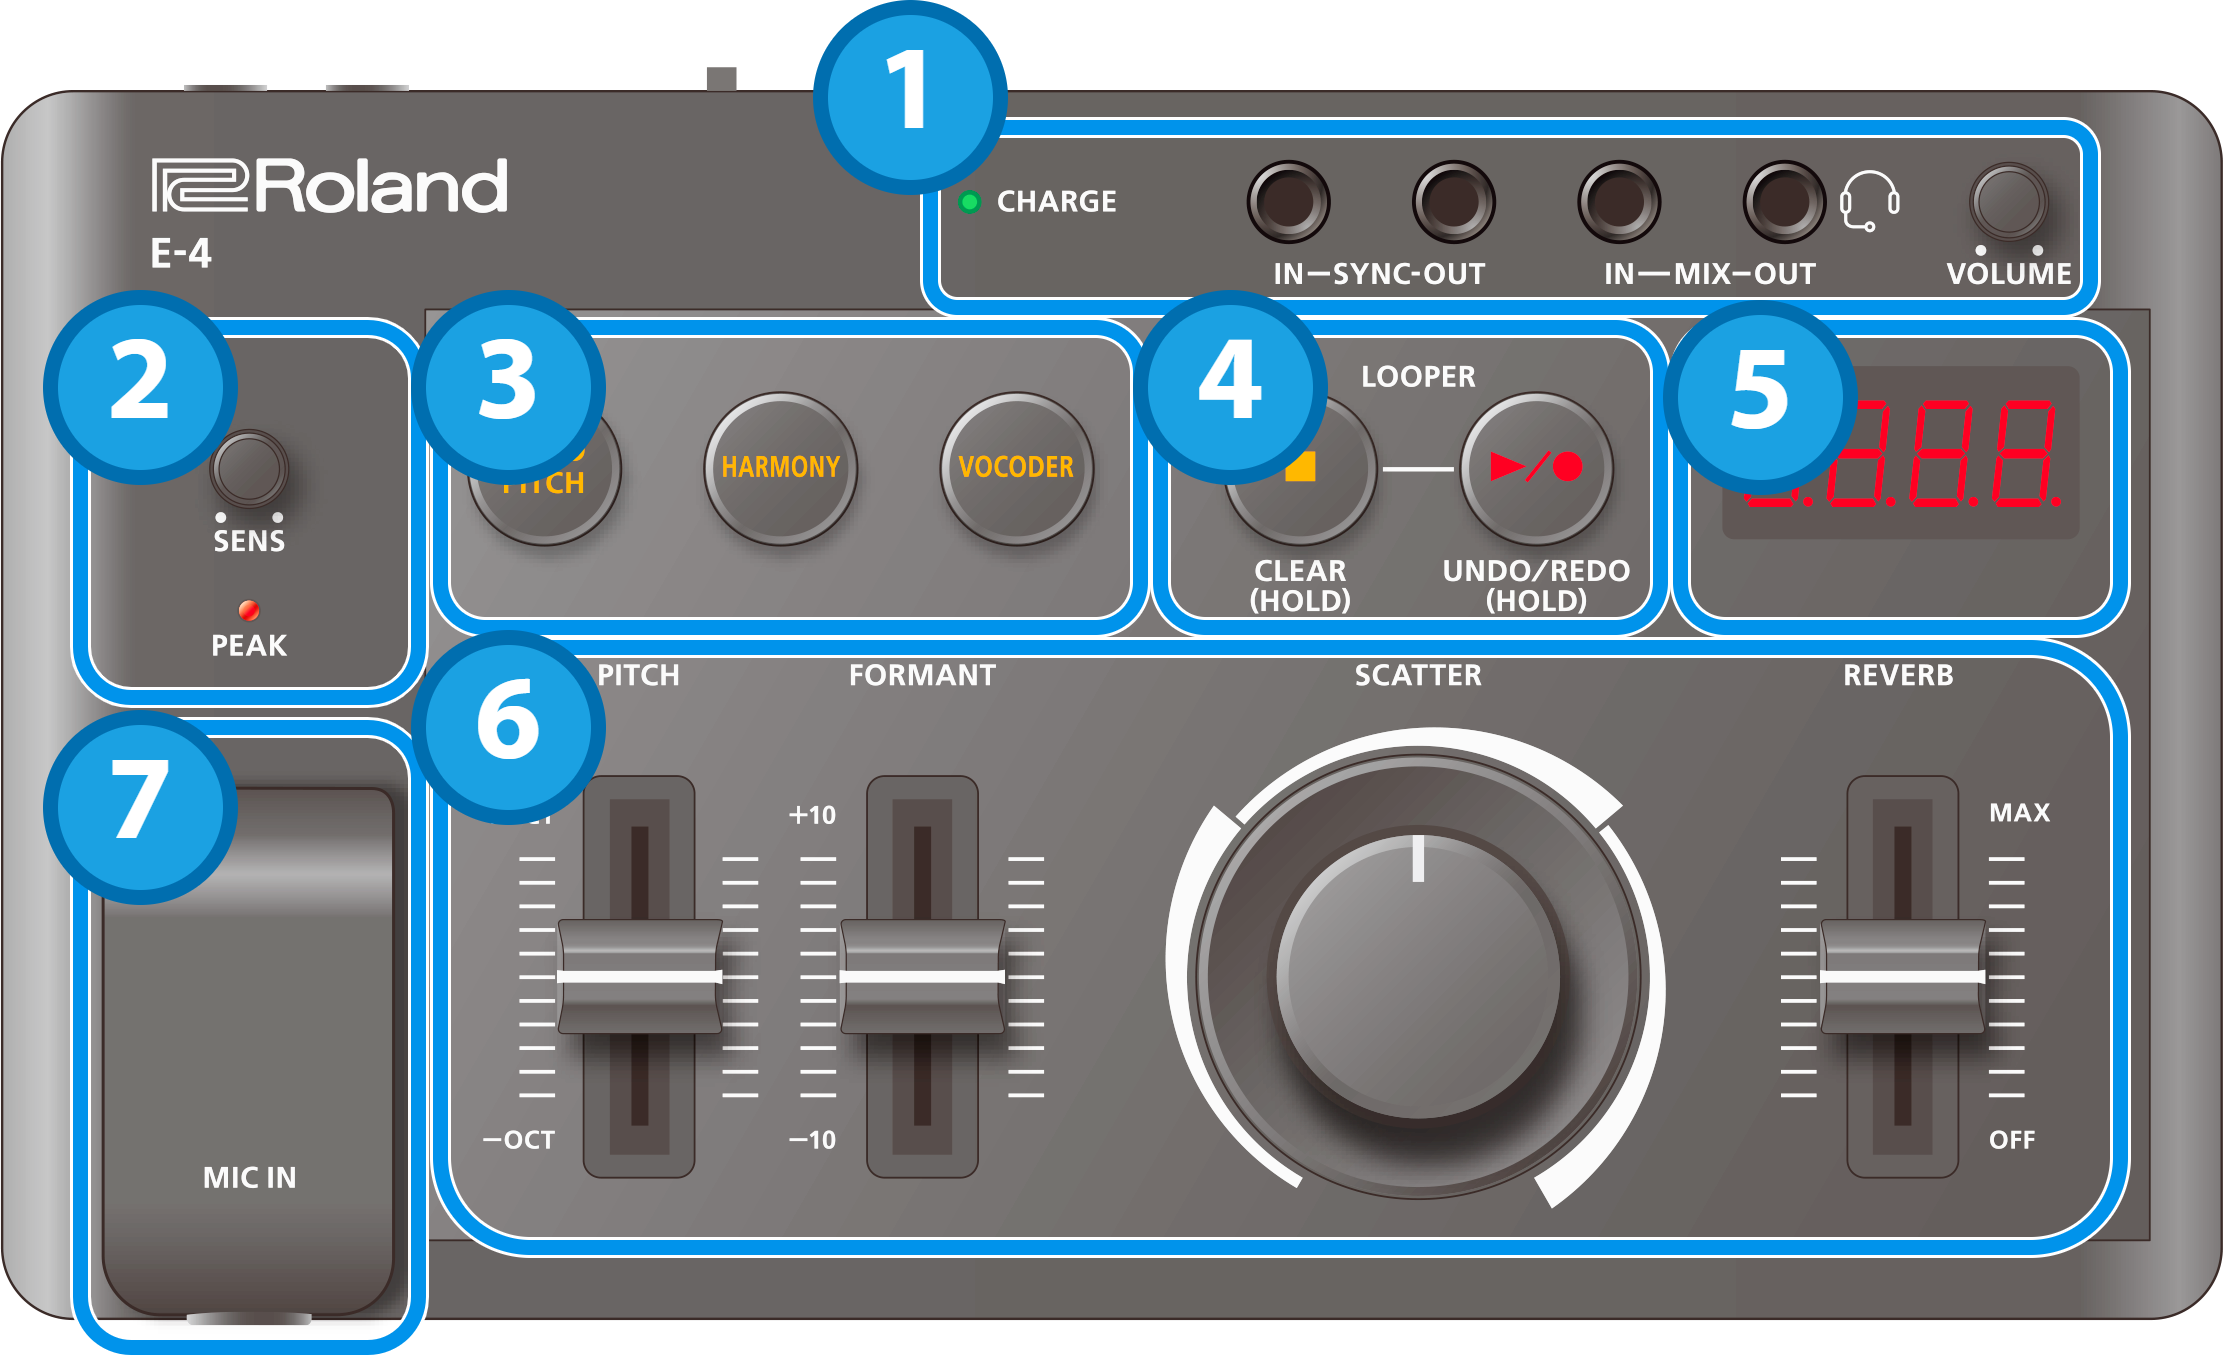
1. Jacks
Controller |
Explanation |
|---|---|
| CHARGE indicator |
When charging via USB port: |
When not charging via USB port:
|
|
| SYNC IN jack | Use this jack to input synchronization signals from an external device. |
| SYNC OUT jack | Use this jack to output synchronization signals to an external device. |
| MIX IN jack | This is the audio input jack. |
| MIX OUT/HEADSET jack | This is the audio output jack. |
| [VOLUME] knob | Adjusts the volume of audio coming from the MIX OUT jack. |
- Use cables with monaural mini phone type plugs to connect to/from the SYNC IN/OUT jacks. Do not use cables with stereo mini phone type plugs, as these cables do not work.
- Do not connect an audio device to the SYNC OUT jack. Doing so may cause a malfunction.
- If an external device is connected to the SYNC IN jack, the unit synchronizes with the clocks inputted to the SYNC IN jack, regardless of the MIDI Clock Sync setting.
- Use cables with stereo miniature phone type plugs to connect to/from the MIX IN/OUT jacks. Do not use cables with monaural mini phone type plugs, as these cables do not work.
You can use a headset with a 3.5 mm CTIA-type mini plug (4-pole).
2. Mic operations
Controller |
Explanation |
|---|---|
| [SENS] knob | Adjusts the sensitivity of the mic input. |
| PEAK indicator | Lights up when the mic’s input level is too high. |
3. Effect switches
Controller |
Explanation |
|---|---|
[AUTO PITCH] button |
Adjusts (corrects) the pitch of your voice. |
| [HARMONY] button | Adds a harmony to your voice. |
| [VOCODER] button | Changes your voice to a vocoder voice. |
4. LOOPER section
Controller |
Explanation |
|---|---|
| [ð] (stop) button | Stops playback of the recorded audio. Long-press to delete the recorded audio. |
| [â/ó] (play/record) button | Press to start recording and play back recorded audio. Long-press to undo or to redo overdubbing. |
- Hold down the [ð] (stop) button and press the [â/ó] (play/record) button to play back the audio you recorded from the beginning.
5. Display
Item |
Explanation |
|---|---|
| Display | Shows the tempo. |
6. Sound control
Controller |
Explanation |
|---|---|
| [PITCH] slider | Sets the pitch of the voice. You can change the pitch up and down one octave. |
| [FORMANT] slider | Adjusts the formant of the voice. Settings in the negative (–) direction produce a more masculine vocal character, and settings in the positive (+) direction produce a more feminine vocal character. |
| [SCATTER] dial | Adjusts the scatter depth and type. The first two digits indicate the type, and the last two digits indicate the depth. |
| [REVERB] slider | Adjusts the reverb volume. |
7. Jacks and ports
Name of jack or port |
Explanation |
|---|---|
| MIC IN jack | Connect an unbalanced dynamic mic here. |