This shows how to set the changes in volume when playing back a sample.
You can use fade-in settings (making the volume gradually get louder) and fade-out settings (making the volume gradually get softer).
- Hold down the [SHIFT] button and press the [PITCH/SPEED] button.
The envelope setting screen appears.
Press pads [1]–[16] to select the sample you want to edit.

Press pads [1]–[16] while holding down the [MARK] button to select a sample without playing it back.
- Use the [CTRL 1]–[CTRL 3] knobs to set the fade-in and fade-out.
Controller |
Parameter |
Value |
Explanation |
|---|---|---|---|
[CTRL 1] knob |
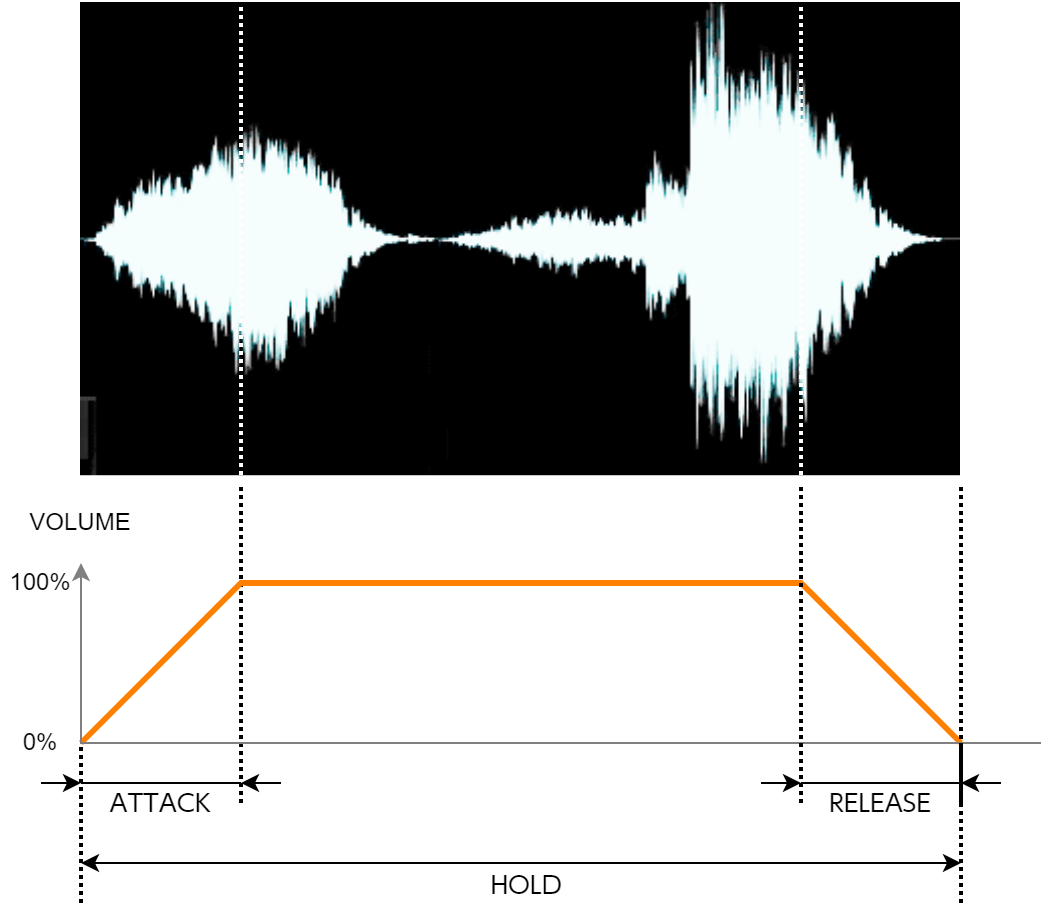
ATTACK |
0–127 |
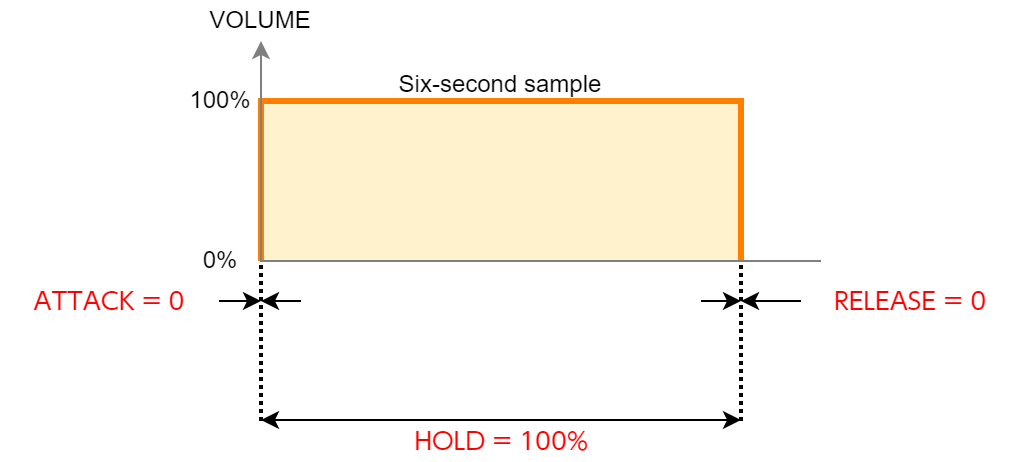
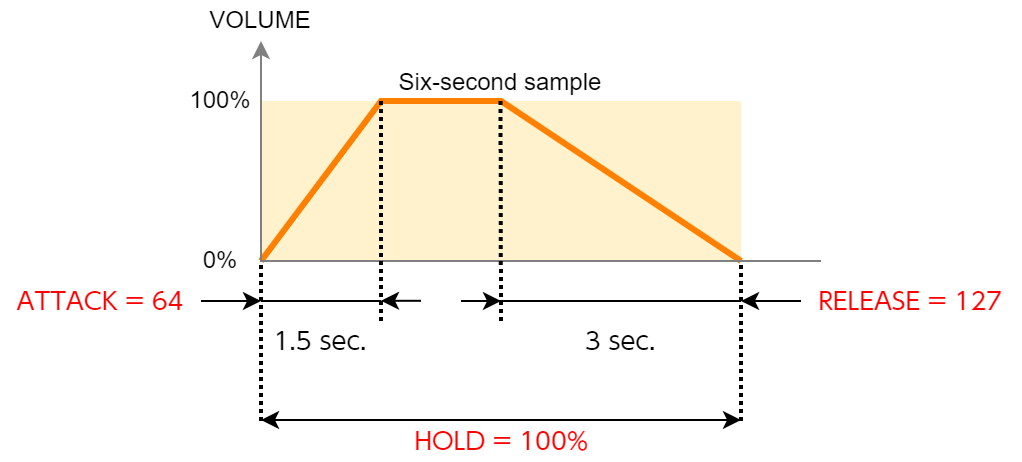
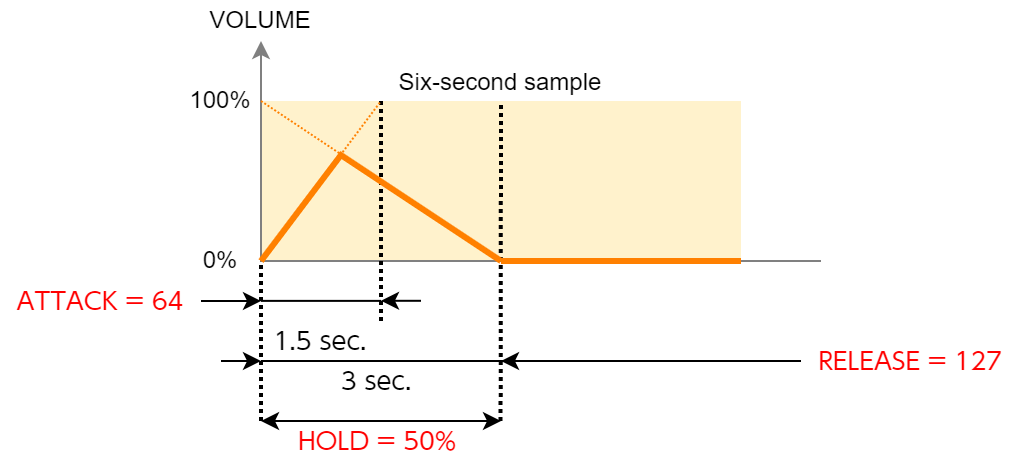
Sets the fade-in time. When you set this to 127, the fade-in time is three seconds. |
[CTRL 2] knob |
HOLD |
1–100 (%) |
The time from fade-in to fade-out is determined by its ratio to the overall sample time. For instance, when this is set to 100, fade-in and fade-out are applied to the entire sample. When this is set to 50, fade-in and fade-out are applied from the beginning of the sample to the middle. |
[CTRL 3] knob |
RELEASE |
0–127 |
Sets the fade-out time. When you set this to 127, the fade-out time is three seconds. |
|
When you change the following parameters while holding down the [COPY] button, you can change the parameters of other samples registered to the same mute group simultaneously.
For details on the mute group setting, refer to “Preventing Samples from Playing Back at the Same Time (MUTE GROUP)”. |
Example settings for ATTACK, HOLD and RELEASE
Here are some examples of how the volume of a six-second sample changes when you set different ATTACK, HOLD and RELEASE values.