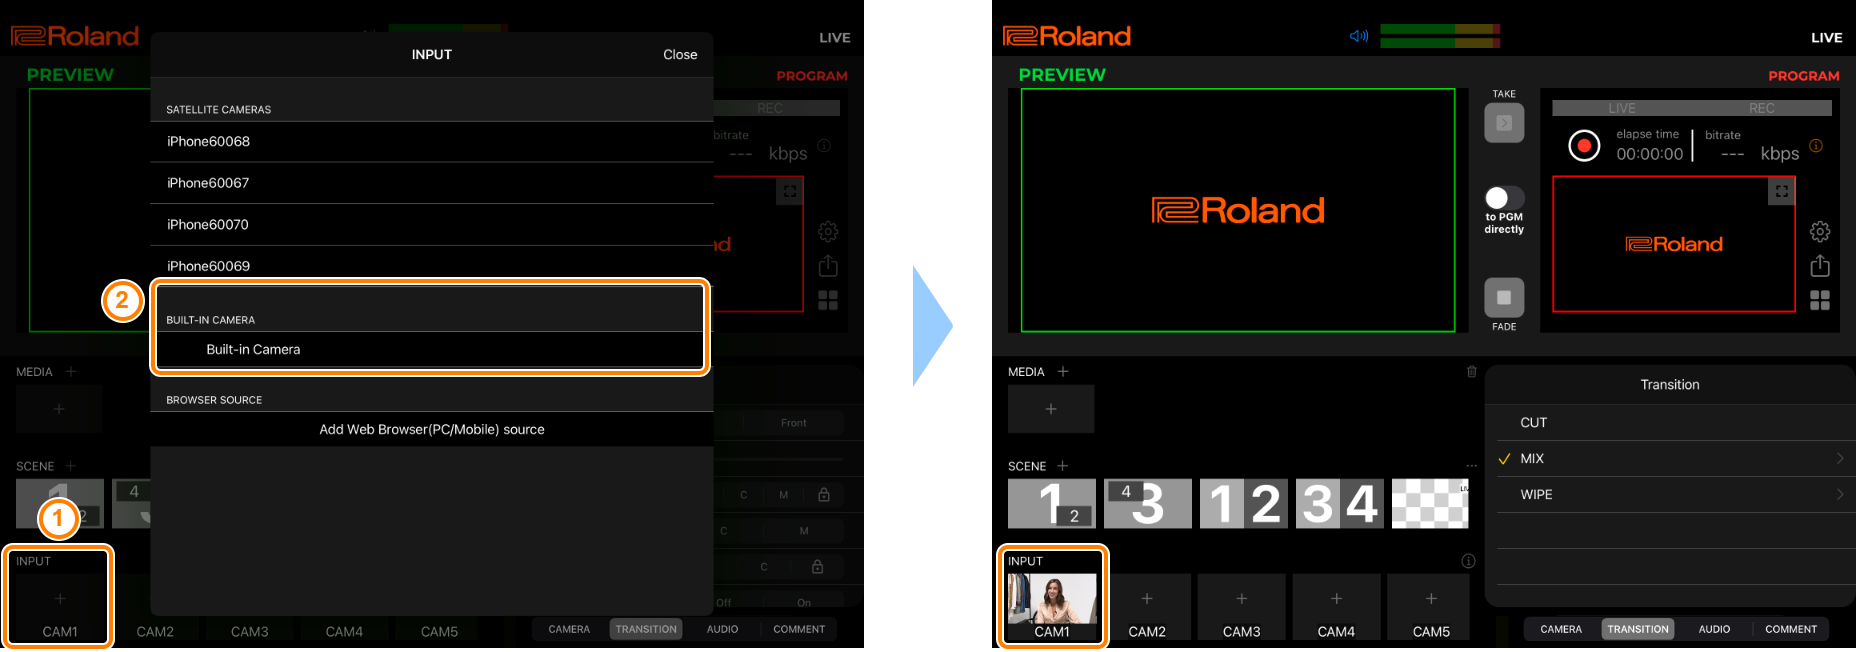
Here’s how to assign the video input from the built-in camera on your iPad to INPUT CAM1–5.
Inputting video from the built-in camera
Tap INPUT “+” (CAM1–5), and select “Built-in Camera” from the list.
The input source is assigned.

Configuring the built-in camera
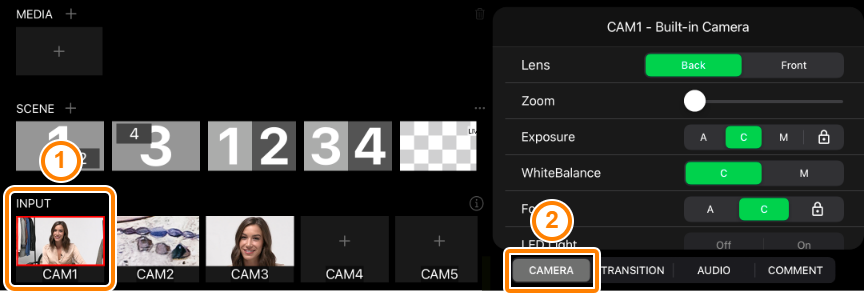
Tap the input source whose camera you wish to configure, and tap the “CAMERA” tab.

Tap the parameters in the CAMERA menu to configure the camera.
Item Explanation Lens Selects which of the built-in lenses to use (including wide-angle, telephoto, front-facing and so on). Zoom Adjusts the zoom factor. Exposure Sets the exposure mode. In manual mode, you can adjust the ISO sensitivity and shutter speed.
A: Auto mode
C: Continuous mode
M: Manual mode
WhiteBalance Adjusts the white balance. In manual mode, this adjusts the color temperature and hue. Focus Sets the focal point. LED Light Turns the camera light on/off.
- Only for models with a built-in LED flash.
Stabilization Turns the image stabilization on/off. Sync delay with audio-in When this is on, the video of the built-in camera is delayed by the specified audio delay time. You can use this feature to match the timings of the video taken by the satellite camera and the built-in camera.
- The audio delay settings are applied to the delay time of the video taken by the built-in camera. The delay time set on the VRC-01 (with the [LIP SYNC DELAY] knob) is not included.
The output video may stutter or frames may be dropped, depending on the type of iPad you’re using and the scene combination.
- The menu parameters and values displayed may differ, depending on which camera model you use.
- Only for models with a built-in LED flash.
Related links:
Changing the Order of the Input Sources (INPUT)
Changing/Unlocking the Input Source (INPUT) Assignments
Changing the Label Name of an Input Source (INPUT)
Assigning Functions to the Pads