This shows you how to configure the settings that apply to the entire unit, such as part settings, system settings and so on.
|
When both the [COMMON] and [EFFECT] buttons are lit, press both buttons at the same time to make their LEDs go dark (this turns STEP SEQ off). |

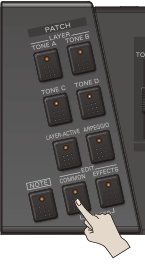
Press the [COMMON] button.
The [COMMON] button lights up.
Use the [VALUE] knob to select the parameter to set, and press the [VALUE] knob.
The parameter setting screen appears.- Turn the [VALUE] knob to set the value, and press the [VALUE] knob.
- When you are finished making the settings, press the [EXIT] button.
| Step buttons | Indication | Explanation |
|---|---|---|
| [1] | PArt | Configures the settings for the selected part. |
| [2] | LAYr | Configures the settings for the selected layer. |
| [3] | LFO | Configures the LFO-related settings for the selected layer. |
| [4] | ľG | Configures the WG-related settings for the selected layer. |
| [5] | Enu | Configures the envelope-related settings for the selected layer. |
| [6] | RAnG | Configures the range-related settings for the selected part. |
| [7] | EQ | Configures the EQ settings for the selected part. |
| [8] | KEY | Configures the keyboard settings. |
| [9] | NiDi | Configures the MIDI-related settings. |
| [10] | SYS | Configures the system settings. |
| [11] | UTiL | Select this to use the utilities. |
|
You can also press a corresponding step button to select the parameter items. |