Here’s an example of how to output the game or other video signal that’s input from the HDMI IN (1, 2) connectors via USB to your computer.
- To prevent malfunction and equipment failure, always turn down the volume, and turn off all the units before making any connections.
- Before turning the unit on/off, always be sure to turn the volume down. Even with the volume turned down, you might hear some sound when switching the unit on/off. However, this is normal and does not indicate a malfunction.
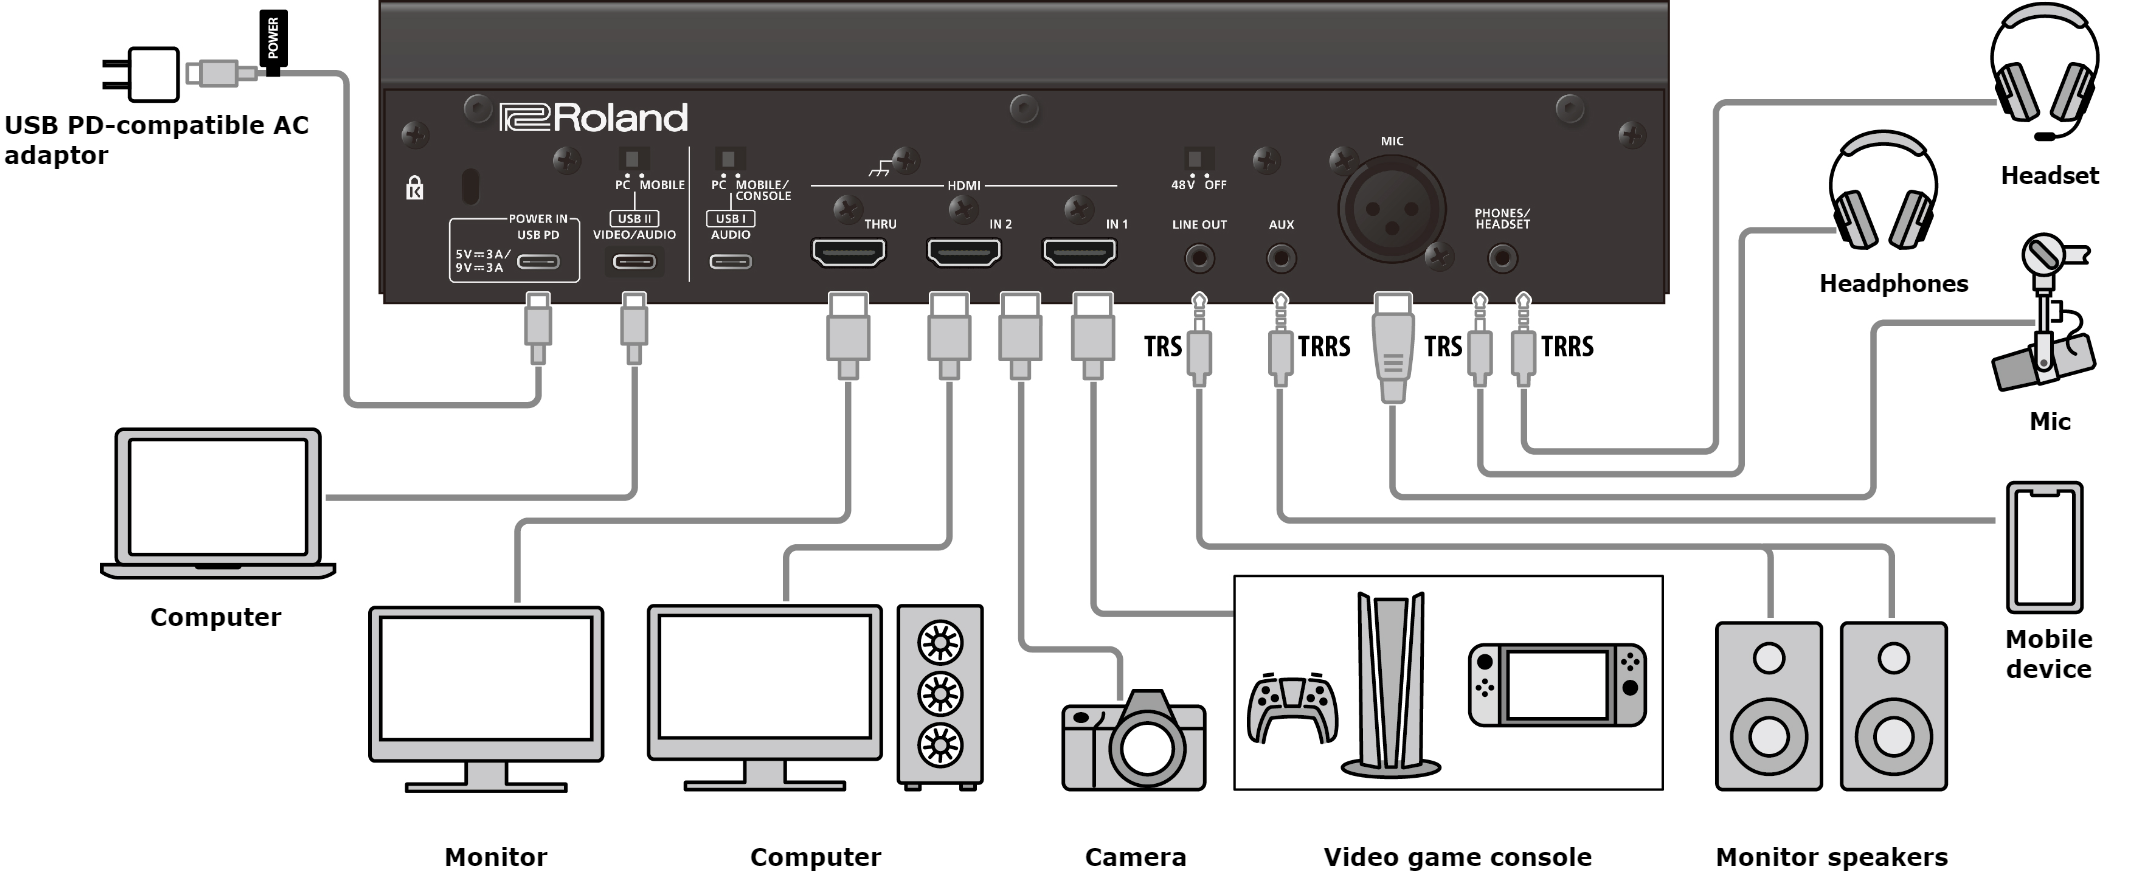
- Use an HDMI cable to connect your computer or gaming device to the HDMI IN 1 or 2 connector.
If you want to use an external display to check the video that’s input from the HDMI IN 1 or 2 connectors, connect the display (monitor) to the HDMI THRU connector.

If you want to use the HDMI THRU connector to output a video that’s input to the HDMI IN connector with a frame rate of 60 Hz or greater, set HDMI IN CAPABILITY MODE (EDID) to “DISPLAY THRU” or “MERGED”.
When outputting a video via USB that’s input to the HDMI IN 1 or 2 connectors, connect your computer to the USB II port.
Be sure to use only the included USB cable.
Press the VIDEO [HDMI IN] button to select the input video.
Press the button to toggle between 1 (HDMI IN 1) and 2 (HDMI IN 2).
Press the VIDEO [USB OUT] button to output the video to your computer.
The VIDEO [USB OUT] button lights up, and the video signal is output to the computer that’s connected to the USB II port.
- When you press the VIDEO [USB OUT] while it is lit, a black screen is output to the computer, and the VIDEO [USB OUT] button blinks.
- Long-press the VIDEO [USB OUT] button to stop the video output to your computer. The VIDEO [USB OUT] button goes dark.