You can edit markers while playing samples in DJ mode.
Press pad [13] or [15].
The corresponding samples play back.
Hold down the [SHIFT] button and press the [START/END] button.
The marker edit screen appears.
Controller
Action
[MARK] button
Adds a marker.
[CTRL 1] knob
Moves the cursor.
[CTRL 2] knob
Moves the marker.
[CTRL 3] knob
Selects a marker.
[SHIFT] button + [CTRL] knob (turn)
Zooms the area around each point in/out.
[VALUE] knob (turn)
Zooms the area in/out around each point you just manipulated.
[VALUE] knob (press)
You can use a numerical value to set the position of each point.
Use the [VALUE] knob to select the point to set, and press pads [1]–[10] to input the position (press pad [10] to input a “0”).
To confirm the inputted position, press the [VALUE] knob.
[SHIFT] button + [VALUE] knob (turn)
Adjusts the volume of the channel.
[DEL] button + pads [1]–[8]
Deletes the marker.
[RESAMPLE] button
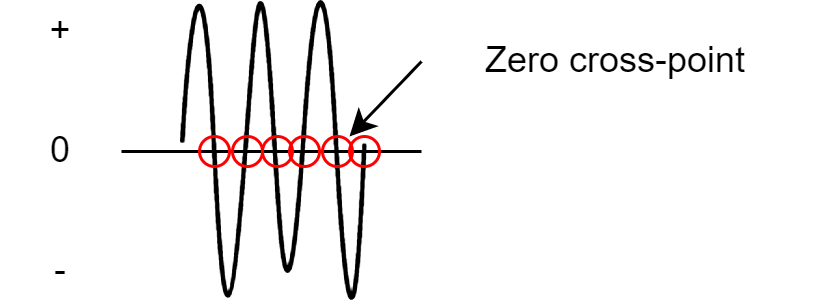
Moves the start point to the zero cross-point (*) that’s closest to the start point time (SNAP to Zero-Cross function).
Similarly, the loop point and end point are also moved.
This function is enabled when the [RESAMPLE] button is lit.
The “zero cross-point” is the time at which the value of the sample waveform crosses from zero into a positive or negative number.

[ROLL] button
While this button is pressed, you can preview the sound several seconds before the end point.
Pad [13]
Switches between play/pause.
Pad [9]
Returns to the playback start position.