- Before turning the unit on/off, always be sure to turn the volume down. Even with the volume turned down, you might hear some sound when switching the unit on/off. However, this is normal and does not indicate a malfunction.
When supplying power via the USB port
Connect the included USB Type-C cable to a 5V USB AC adaptor or to the USB port on your computer.
To turn on the power, slide the [POWER] switch of this unit to “ON”.
When supplying power via batteries
- Insert the batteries by following the steps in “Installing the batteries”.
To turn on the power, slide the [POWER] switch of this unit to “ON”.

- In places where small children are present, make sure that an adult provides supervision and guidance.
Installing the batteries
As an alternative to USB bus power, you can use commercially available AA nickel-metal hydride batteries or alkaline batteries to power the unit.
- If USB bus power is being supplied, the unit uses USB bus power even if batteries are installed.
Remove the battery cover.
When turning the unit over, be careful so as to protect the buttons and knobs from damage. Also, handle the unit carefully; do not drop it.
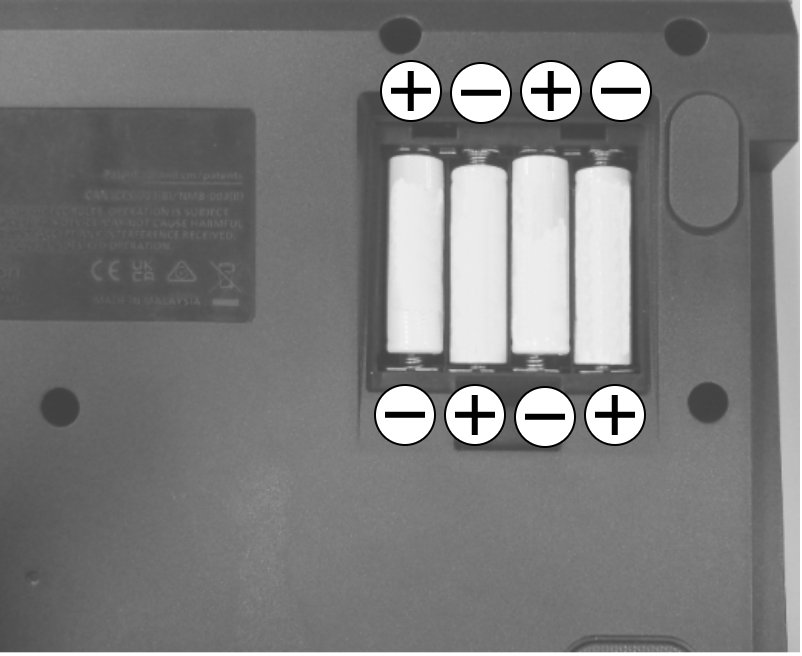
Taking care to observe the correct orientation of the batteries, insert the batteries into the battery case.

Close the battery cover.
If you handle the battery improperly, you risk explosion and fluid leakage. Make sure that you carefully observe all of the items related to batteries that are listed in the “USING THE UNIT SAFELY” and “IMPORTANT NOTES” (“USING THE UNIT SAFELY”) leaflets for proper use.
Battery replacement indicator
When the batteries have run down, the message “Battery Low!” appears on the screen.
When this occurs, install new batteries.