On the WAVE LIST screen, press the [F2] (WAVE EDIT) button.
The WAVE EDIT screen appears.
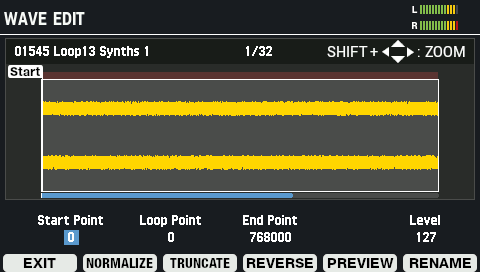
Parameter
Value
Explanation
Wave 00001 (Wave name)–20000 (Wave name) Sets the wave whose waveform you wish to edit. Start Point
-
Sets the start point (the location at which the wave starts playing).
Loop Point
-
Sets the loop point (the location at which the wave’s loop starts playing).
End Point
-
Sets the end point (the location at which the wave stops playing).
Level
0–127
Sets the wave volume.
Button
Explanation
[F1] (EXIT) Exits WAVE EDIT mode. [F2] (NORMALIZE) Adjusts the wave volume. [F3] (TRUNCATE) Deletes unnecessary parts of the wave. [F4] (REVERSE) Creates a reversed version of the wave. [F5] (PREVIEW) Previews the wave that you’re editing.
The wave plays back in a loop when you hold down [SHIFT] and press [F5] (PREVIEW). If you press [F5] (PREVIEW) once again, the loop stops playing back.[F6] (RENAME) Renames the wave. Cursor [à] [á] [ã] [â] button Selects a parameter. [-] [+] buttons, [VALUE] knob Edits the setting. [SHIFT] button + cursor [à] [á] [ã] [â] button Zooms the displayed waveform in/out.
Adjusting the volume of a wave (NORMALIZE)
Here’s how to adjust the volume of waves, such as when they sound quiet, so that the wave’s volume is maximized without getting distorted.
On the WAVE EDIT screen, press the [F2] (NORMALIZE) button.
The NORMALIZE window appears.

- Use the [-] [+] buttons or the [VALUE] knob to select whether to overwrite the wave or to save it as a new wave.
- Rename the wave as appropriate ([F5] (NAME) button).
To execute, press the [F6] (EXECUTE) button.
A confirmation message appears.
Select “OK” and then press the [ENTER] button.
To cancel the operation, press the [F4] (EXIT) button.
Deleting unnecessary parts of a wave (TRUNCATE)
Sets the range over which the wave sounds (using the start and end points) and erases the unnecessary portions, which helps to free up memory.
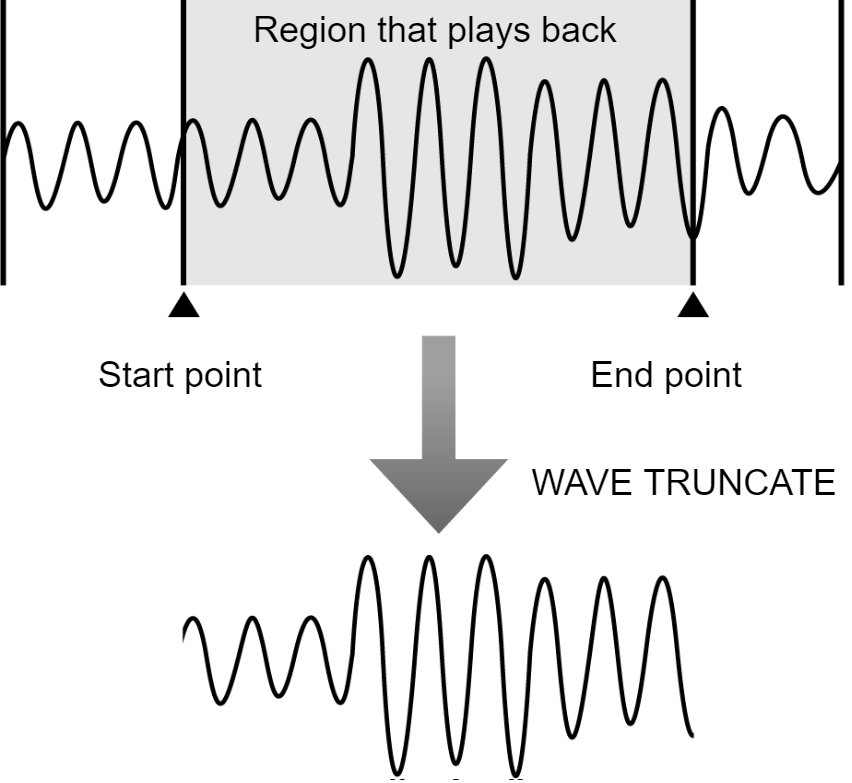
On the WAVE EDIT screen, press the [F3] (TRUNCATE) button.
The TRUNCATE window appears.
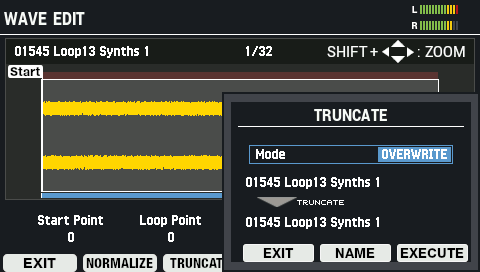
- Use the [-] [+] buttons or the [VALUE] knob to select whether to overwrite the wave or to save it as a new wave.
- Rename the wave as appropriate ([F5] (NAME) button).
To execute, press the [F6] (EXECUTE) button.
A confirmation message appears.
Select “OK” and then press the [ENTER] button.
To cancel the operation, press the [F4] (EXIT) button.
Creating a wave that plays back in reverse (REVERSE)
Here’s how to create a wave that plays back in reverse, based on an existing wave.
On the WAVE EDIT screen, press the [F4] (REVERSE) button.
The REVERSE window appears.
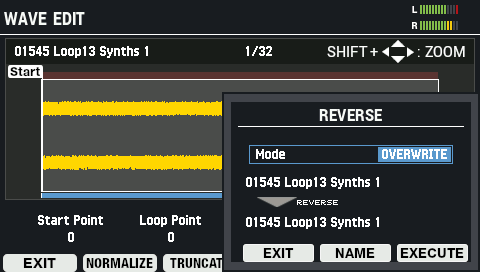
- Use the [-] [+] buttons or the [VALUE] knob to select whether to overwrite the wave or to save it as a new wave.
- Rename the wave as appropriate ([F5] (NAME) button).
To execute, press the [F6] (EXECUTE) button.
To cancel the operation, press the [F4] (EXIT) button.
Select “OK” and then press the [ENTER] button.
To cancel the operation, press the [F4] (EXIT) button.
Renaming a wave (RENAME)
Here’s how to rename a wave (up to 16 characters can be used).
On the WAVE EDIT screen, press the [F6] (RENAME) button.
The WAVE RENAME window appears.
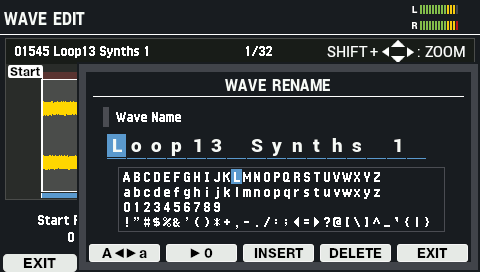
Use the cursor [ã] [â] buttons to move the cursor.
Use the [-] [+] buttons to select the character.
You can also use the [VALUE] knob to select a character.
Button
Explanation
[F2] (Aãâa)
Toggles between uppercase/lowercase.
[F3] (â0)
Switches to numeric input.
[F4] (INSERT)
Inserts a character at the cursor position.
[F5] (DELETE)
Deletes the character at the cursor position.
[F6] (EXIT)
Exits and returns to the WAVE EDIT screen.